
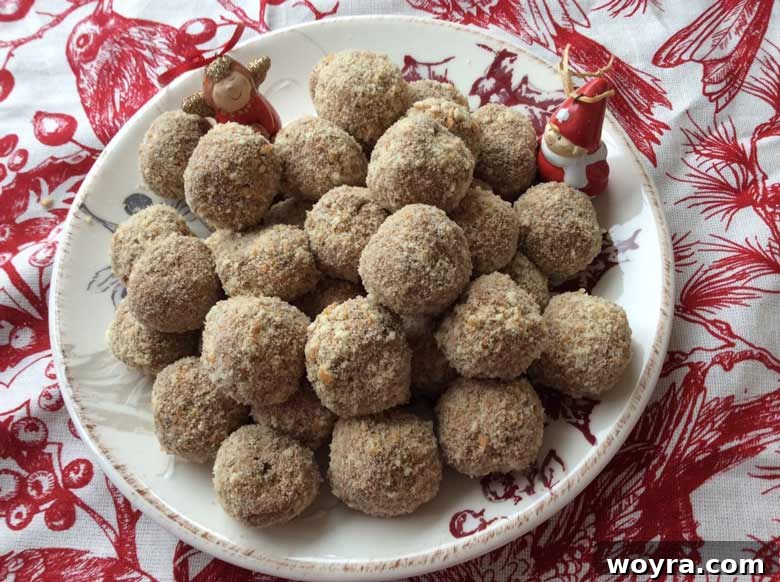
These incredibly easy chocolate mousse balls require just three ingredients: Cool Whip, Hershey’s chocolate, and Nilla Wafers. They create a truly irresistible dessert, perfect for any occasion, especially holiday gatherings!
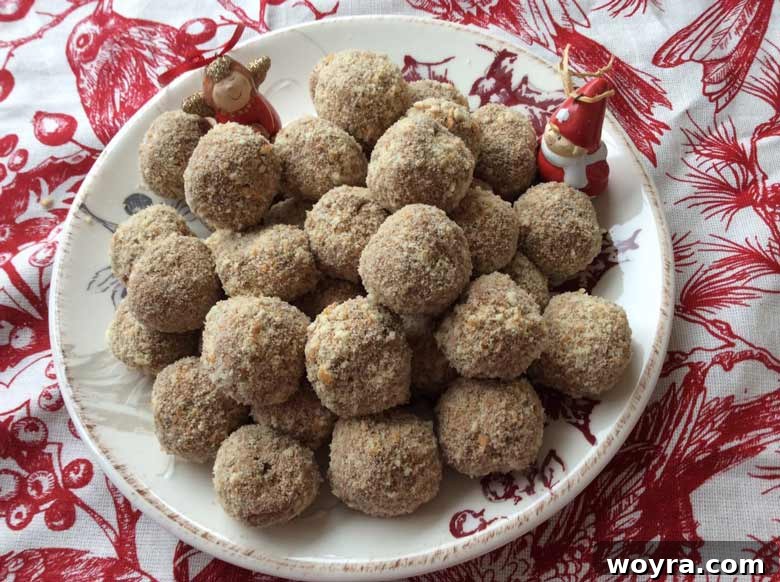
Easy 3-Ingredient Chocolate Mousse Balls: Your Go-To No-Bake Dessert
There’s something universally appealing about a simple, yet utterly decadent chocolate dessert. These easy chocolate mousse balls are precisely that! Imagine light, airy chocolate mousse, encased in a delightful crunch of Nilla Wafer crumbs – they’re an absolute dream. While perfect for brightening up any holiday spread, these no-bake treats are so simple and delicious, you’ll want to make them all year round.
These aren’t just good; they’re legendary! This recipe has been requested countless times, and for good reason. It’s a cherished family secret passed down from my wonderful old babysitter, Mrs. Marge. Her recipe for these chocolate-covered Nilla Wafer delights has brought joy to so many, and now it’s your turn to experience their magic.
Why You’ll Fall in Love with This Recipe:
- Minimal Ingredients: You only need three common ingredients to create this show-stopping dessert.
- Effortlessly Easy: No baking, no complex techniques – just simple steps for amazing results.
- Irresistible Flavor & Texture: They taste like luxurious chocolate truffles with a delightful, crumbly cookie coating.
- Perfect for Any Occasion: While a holiday favorite, these versatile treats are ideal for parties, potlucks, or a special everyday indulgence.
- A Unique Twist on Mousse: Enjoy the classic flavor of chocolate mousse in a fun, bite-sized ball format.
Essential Ingredients for Your Chocolate Mousse Balls:
Crafting these delectable chocolate mousse balls is surprisingly straightforward, thanks to our humble trio of ingredients. Each plays a crucial role in achieving that perfect balance of flavor and texture:
- Hershey’s Chocolate: Specifically, regular Hershey’s chocolate bars (like the milk chocolate bars often used for s’mores) are key. While I typically opt for higher-quality baking chocolate for most recipes, the unique properties of Hershey’s are essential here. It melts smoothly and combines with the Cool Whip to create a surprisingly stable and delightful mousse texture that other chocolates might not replicate as perfectly.
- Cool Whip: This whipped topping is the backbone of our mousse. It provides the light, airy consistency and helps stabilize the mixture, making it easy to roll into balls. It also adds a subtle sweetness and creaminess without the need for additional sugar.
- Nilla Wafers: These classic vanilla wafers are crushed into fine crumbs, providing the perfect slightly sweet and crunchy coating for our chocolate mousse balls. They add an essential textural contrast and a hint of vanilla flavor that complements the chocolate beautifully.
Choosing these specific ingredients is truly what makes Mrs. Marge’s recipe shine. Don’t be tempted to swap the Hershey’s or Cool Whip for alternatives in this instance; their unique compositions contribute directly to the recipe’s legendary success!
Step-by-Step Guide to Crafting Your Mousse Balls:
Follow these detailed instructions to create perfect, melt-in-your-mouth chocolate mousse balls every time. Precision in preparation, especially regarding chocolate temperature, is key to success!
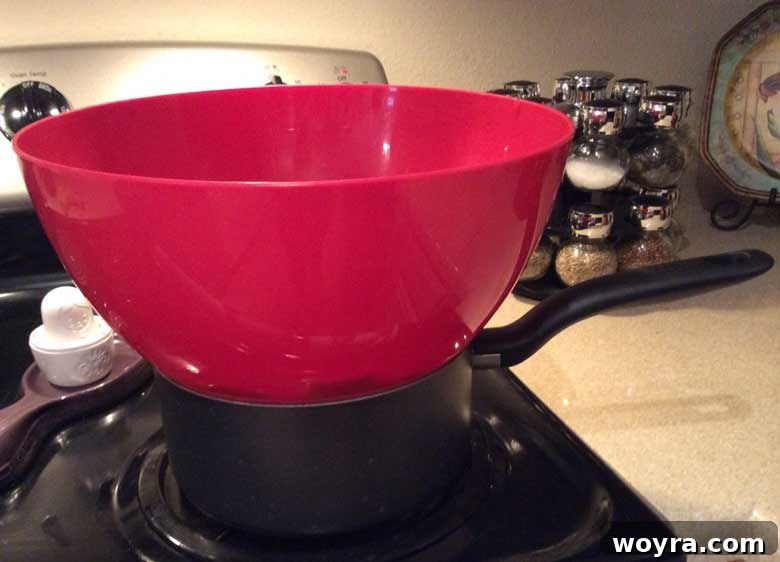
Step 1: Prepare and Melt the Chocolate. Begin by thawing your 8-ounce tub of Cool Whip in the refrigerator according to package directions. Next, carefully melt 16 ounces of Hershey’s chocolate. While microwaving is an option, it requires constant vigilance to prevent burning. Chocolate can seize or scorch easily in a microwave, so heat in short 15-20 second bursts, stirring well after each, until smooth. My preferred method is using a double boiler: place a heatproof bowl over a pot of simmering water, ensuring the bottom of the bowl does not touch the water. Stir the chocolate frequently until it’s completely smooth and melted. This method provides gentle, even heat, reducing the risk of burning and often resulting in a quicker cooling time.
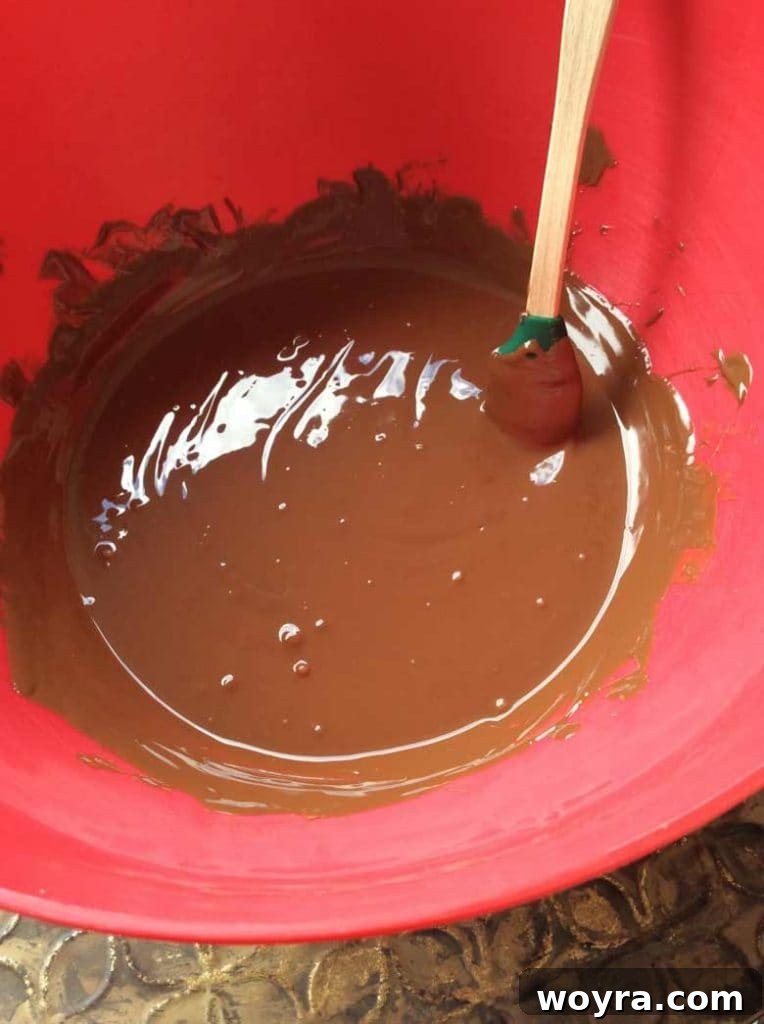
Step 2: Cool the Melted Chocolate to Room Temperature. This step is absolutely critical for achieving the perfect mousse texture. Once your chocolate is fully melted, remove it from the heat and let it cool completely to room temperature. This means not just warm, but truly cool to the touch – the outside of the bowl should feel cool as well. If the chocolate is still warm or hot when combined with the Cool Whip, it will cause the Cool Whip to melt and the chocolate to seize or harden unevenly, resulting in a grainy, clumpy texture rather than a smooth, airy mousse.
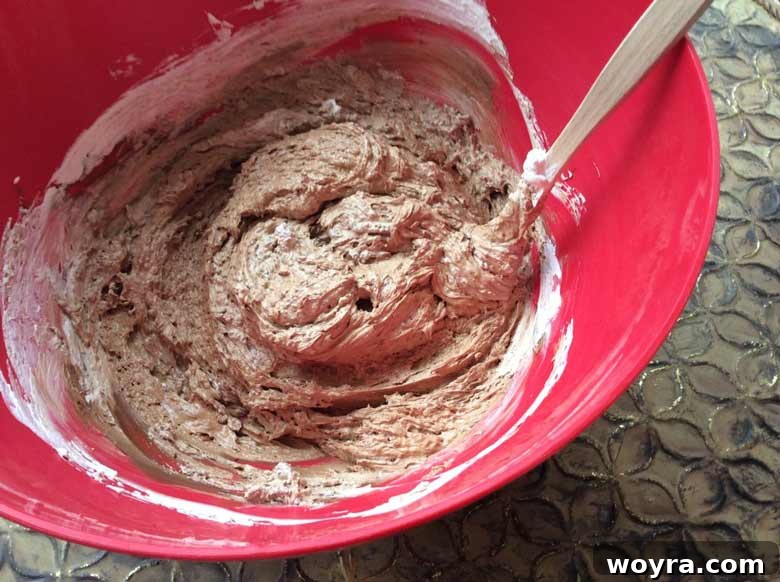
Step 3: Combine Chocolate and Cool Whip, Then Chill. Once your melted chocolate is at room temperature, gently fold in the entire 8-ounce tub of thawed Cool Whip. Mix until the chocolate and Cool Whip are thoroughly combined, resulting in a thick, smooth, and uniform mousse-like mixture. Be careful not to overmix, as this can deflate the Cool Whip. Once mixed, cover the bowl and refrigerate the mixture for at least 30 minutes. This chilling period is crucial as it allows the mousse to firm up significantly, making it much easier to handle and roll into perfectly round balls.
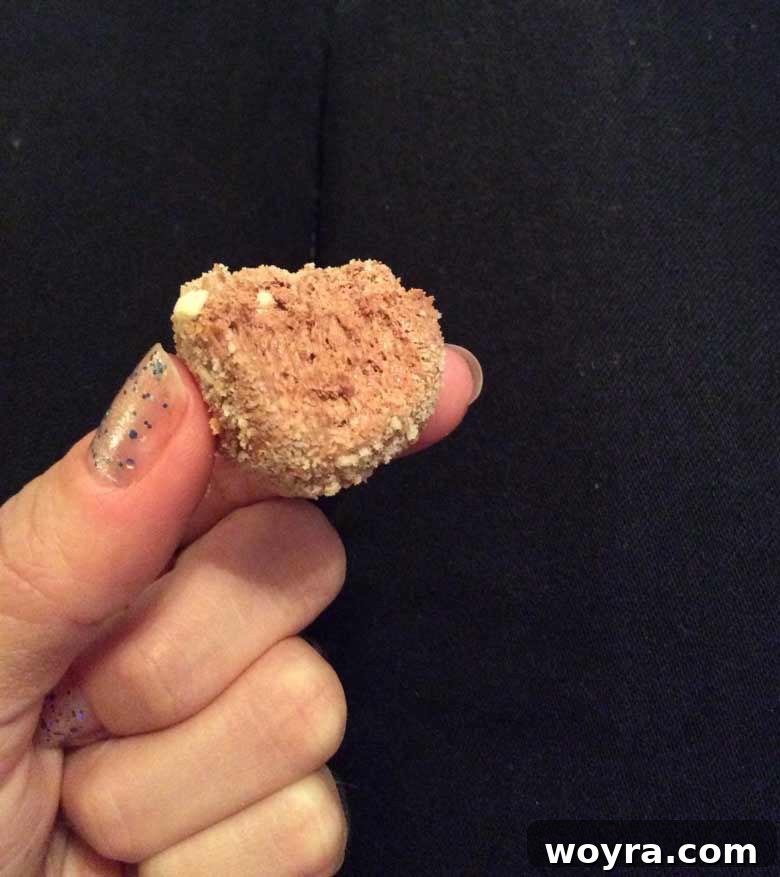
Step 4: Prepare Wafers, Roll, and Coat. While the mousse chills, prepare your Nilla Wafer coating. Crush approximately half of an 11-ounce box of Nilla Wafers (which should yield about 1 cup of crumbs). The easiest way to do this is in a food processor until you have fine, even crumbs. Alternatively, place the wafers in a sturdy plastic bag and crush them with a rolling pin or even a hammer for a more rustic texture. Once the mousse has hardened from chilling, take about one tablespoon of the mixture. Quickly roll it between your palms to form a smooth ball. Immediately, dunk the chocolate ball into the Nilla Wafer crumbs, rotating until it’s completely covered. Place the coated ball onto a clean plate or baking sheet. Repeat this process until all of the chocolate mousse mixture has been used up.
Step 5: Final Chill and Serve. After rolling and coating all your chocolate mousse balls, place the plate back into the refrigerator for at least another 30 minutes. This final chill allows the coating to adhere firmly and ensures the mousse balls are perfectly set and firm when served. Once thoroughly chilled, your delicious and easy chocolate mousse balls are ready to be enjoyed! They make an excellent dessert or party treat.
Expert Tips & Tricks for Perfect Chocolate Mousse Balls:
Achieving the ideal texture and presentation for these chocolate mousse balls is simple with a few insider tips:
(1) Temperature is Everything: As emphasized in the steps, ensuring both your Cool Whip is fully thawed and your melted chocolate is completely cooled to room temperature before mixing is paramount. This careful temperature control is the absolute only way to prevent the chocolate from seizing and guarantee that signature light, airy “mousse” texture.
(2) Handling the Mousse: Rolling the mousse balls can indeed be a bit messy, as the chocolate mousse can soften and melt from the warmth of your hands due to body heat. To minimize this and make rolling easier, try these techniques: work quickly in small batches, keep your hands as cool as possible (a quick rinse under cold water between batches can help), or even lightly coat your hands with cocoa powder if preferred. A small cookie scoop can also help portion out the mousse quickly before rolling.
(3) Scaling for a Crowd: These chocolate mousse balls are notorious for disappearing quickly, especially at parties! If you’re planning to serve them to a larger group, I highly recommend doubling or even tripling the recipe. They are always a huge hit and you’ll be glad to have extras!
(4) Storage and Shelf Life: Store your finished chocolate mousse balls in an airtight container in the refrigerator. They will remain fresh and delicious for up to 3-5 days. For longer storage, they can also be frozen for up to 2-3 months. Thaw them in the refrigerator before serving for the best texture.
(5) Creative Variations: While the Nilla Wafer coating is classic, feel free to experiment! You can roll the mousse balls in finely chopped nuts (like pecans or almonds), cocoa powder for a richer flavor, shredded coconut, or even festive sprinkles for a more celebratory look.
(6) Presentation Matters: Arrange your chocolate mousse balls on a pretty platter, perhaps with a dusting of powdered sugar or a few fresh berries for an elegant touch. They make wonderful edible gifts when placed in small decorative boxes.
Other Chocolate Mousse & Truffle Recipes You May Enjoy:
If you love the concept of these easy chocolate treats and are looking to explore other versions, I have a few suggestions:
If you’re seeking a healthier, dairy-free alternative to these classic mousse balls, then you absolutely must try my Dairy-Free Chocolate Mousse Balls (Gluten-free). They offer a similarly delightful texture and rich chocolate flavor without the dairy.
For those following a Paleo lifestyle, I also have a fantastic Paleo Mousse Balls recipe. This version is crafted with ingredients that fit within Paleo guidelines, ensuring everyone can enjoy a delicious chocolate treat.
Did you try this recipe? Please leave me a ⭐ review below! Your feedback helps other home cooks discover and enjoy these wonderful recipes.
Easy 3-Ingredient Chocolate Mousse Balls
Dominique
60
mousse balls
1 hr
1 hr 30 mins (includes chilling)
Email Recipe
Print Recipe

These incredibly easy chocolate mousse balls are made from Cool Whip, Hershey’s chocolate, and Nilla Wafers. They make for a wonderful, no-bake dessert or party treat that’s always a crowd-pleaser!
Ingredients
-
1
8 ounce
tub of Cool Whip, thawed -
16
ounces
Hershey’s Chocolate, milk chocolate bars recommended -
1
cup
crushed Nilla Wafers, (approximately 1/2 of an 11 ounce box)
Instructions
-
Ensure your Cool Whip is fully thawed according to package instructions.
-
Melt 16 ounces of Hershey’s chocolate. The best method is using a double boiler: place a heatproof bowl over a pot of simmering water (make sure the bowl doesn’t touch the water). Stir until the chocolate is completely smooth and melted. Alternatively, microwave in short 15-20 second bursts, stirring well after each, until smooth.
-
Allow the melted chocolate to cool completely to room temperature. This is crucial for the mousse texture – the bowl should feel cool to the touch.
-
Once the chocolate is cooled, gently fold the thawed 8-ounce tub of Cool Whip into the melted chocolate. Mix until thoroughly combined and the mixture is smooth and uniform, creating a mousse-like consistency.
-
Cover the mixture and refrigerate for at least 30 minutes. This allows the mousse to firm up, making it easier to roll.
-
While the mousse chills, crush approximately half of an 11-ounce box of Nilla Wafers into 1 cup of fine crumbs using a food processor or by placing them in a plastic bag and crushing them with a rolling pin.
-
Once the mousse is firm, take about 1 tablespoon of the mixture. Quickly roll it between your clean, cool hands to form a smooth ball. (If the mixture becomes too soft, wash your hands in cold water or refrigerate the mousse briefly).
-
Immediately dunk the rolled chocolate ball into the Nilla Wafer crumbs, rotating until it is fully covered.
-
Place the coated ball on a plate or baking sheet and repeat the process until all the mousse mixture has been used.
-
Refrigerate the finished chocolate mousse balls for at least another 30 minutes to ensure they are fully set before serving. Enjoy!
-
This recipe yields approximately 60 delicious mousse balls.
Notes
(1) It is absolutely essential to ensure that the Cool Whip is fully thawed and that the melted chocolate is completely cooled to room temperature for this recipe. This critical step is the only way to achieve the desired light and airy “mousse” texture.
(2) Rolling these chocolate mousse balls can be a bit messy because the chocolate mousse tends to melt slightly in between your hands due to body heat. To make the process easier and cleaner, try to work quickly. Washing your hands with cold water periodically during the rolling process can help keep them cool and prevent the mousse from sticking too much.
Nutrition
Serving: 1 ball | Calories: 64kcal | Carbohydrates: 7.3g | Protein: 0.7g | Fat: 3.6g
Nutrition information is automatically calculated and should be used as an approximation only. Factors like specific ingredient brands and preparation methods can affect nutritional values.
Additional Info
Dessert, Snack
American
Tried this recipe?
Mention @perchancetocook or tag #perchancetocook! We’d love to see your creations!