
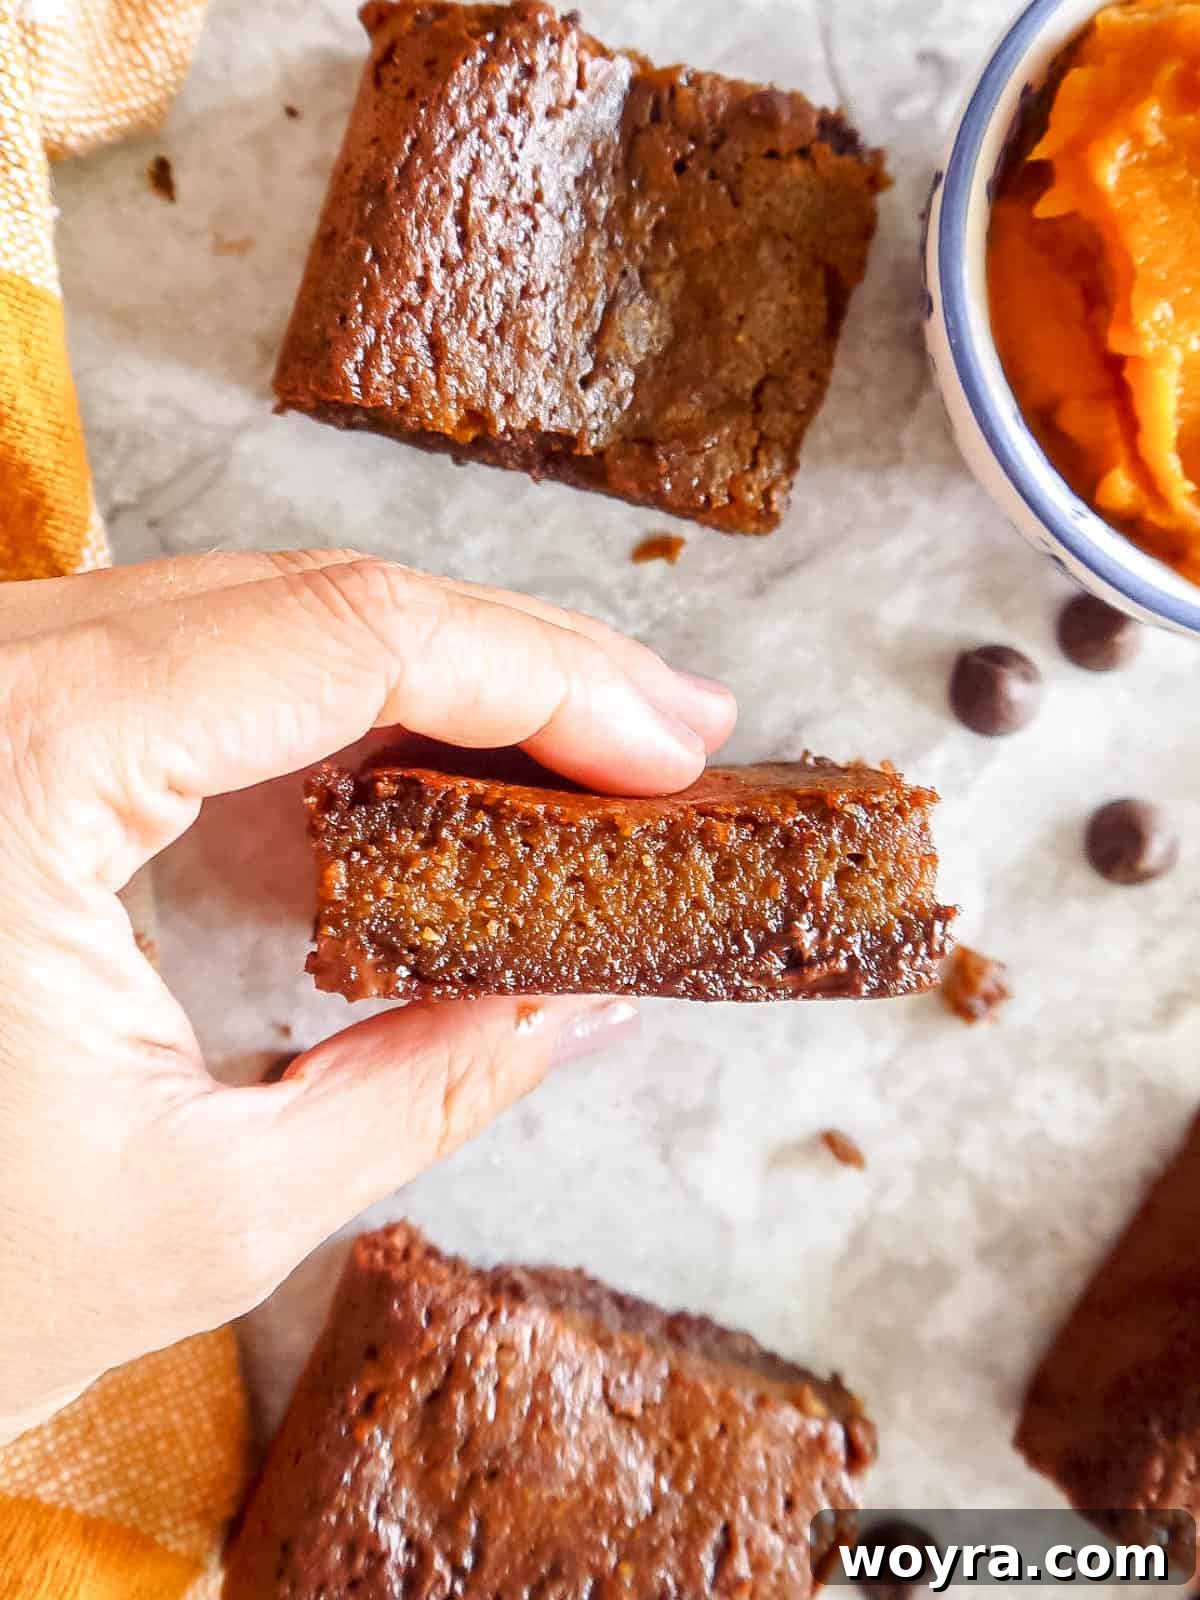
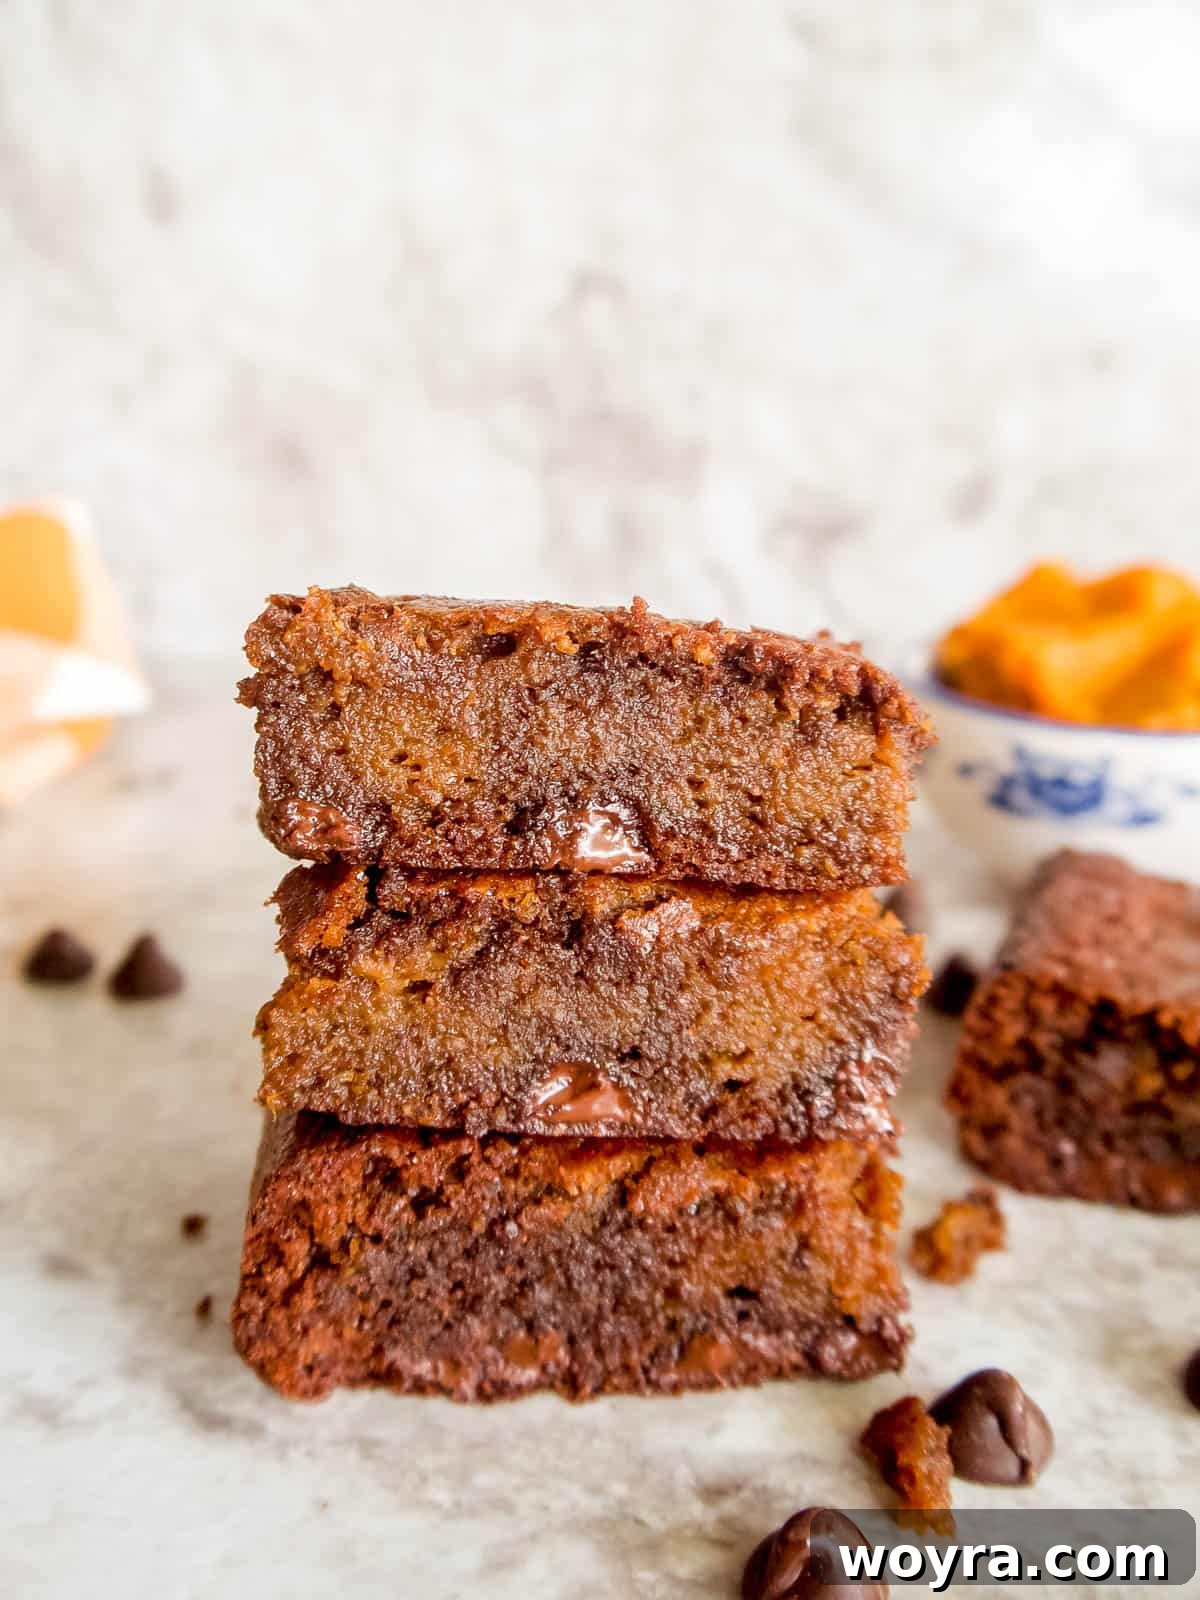
These Gluten-free Chocolate Pumpkin Brownies are a truly exceptional treat, embodying the rich flavors of Fall in a wholesome, gooey package. Made with nutritious ingredients like almond flour, heart-healthy olive oil, pure pumpkin, and a symphony of warm spices, they deliver the decadent experience of chocolate pumpkin pie in delightful brownie form. Perfect for any occasion, especially during the autumn season or as a healthier Thanksgiving dessert!
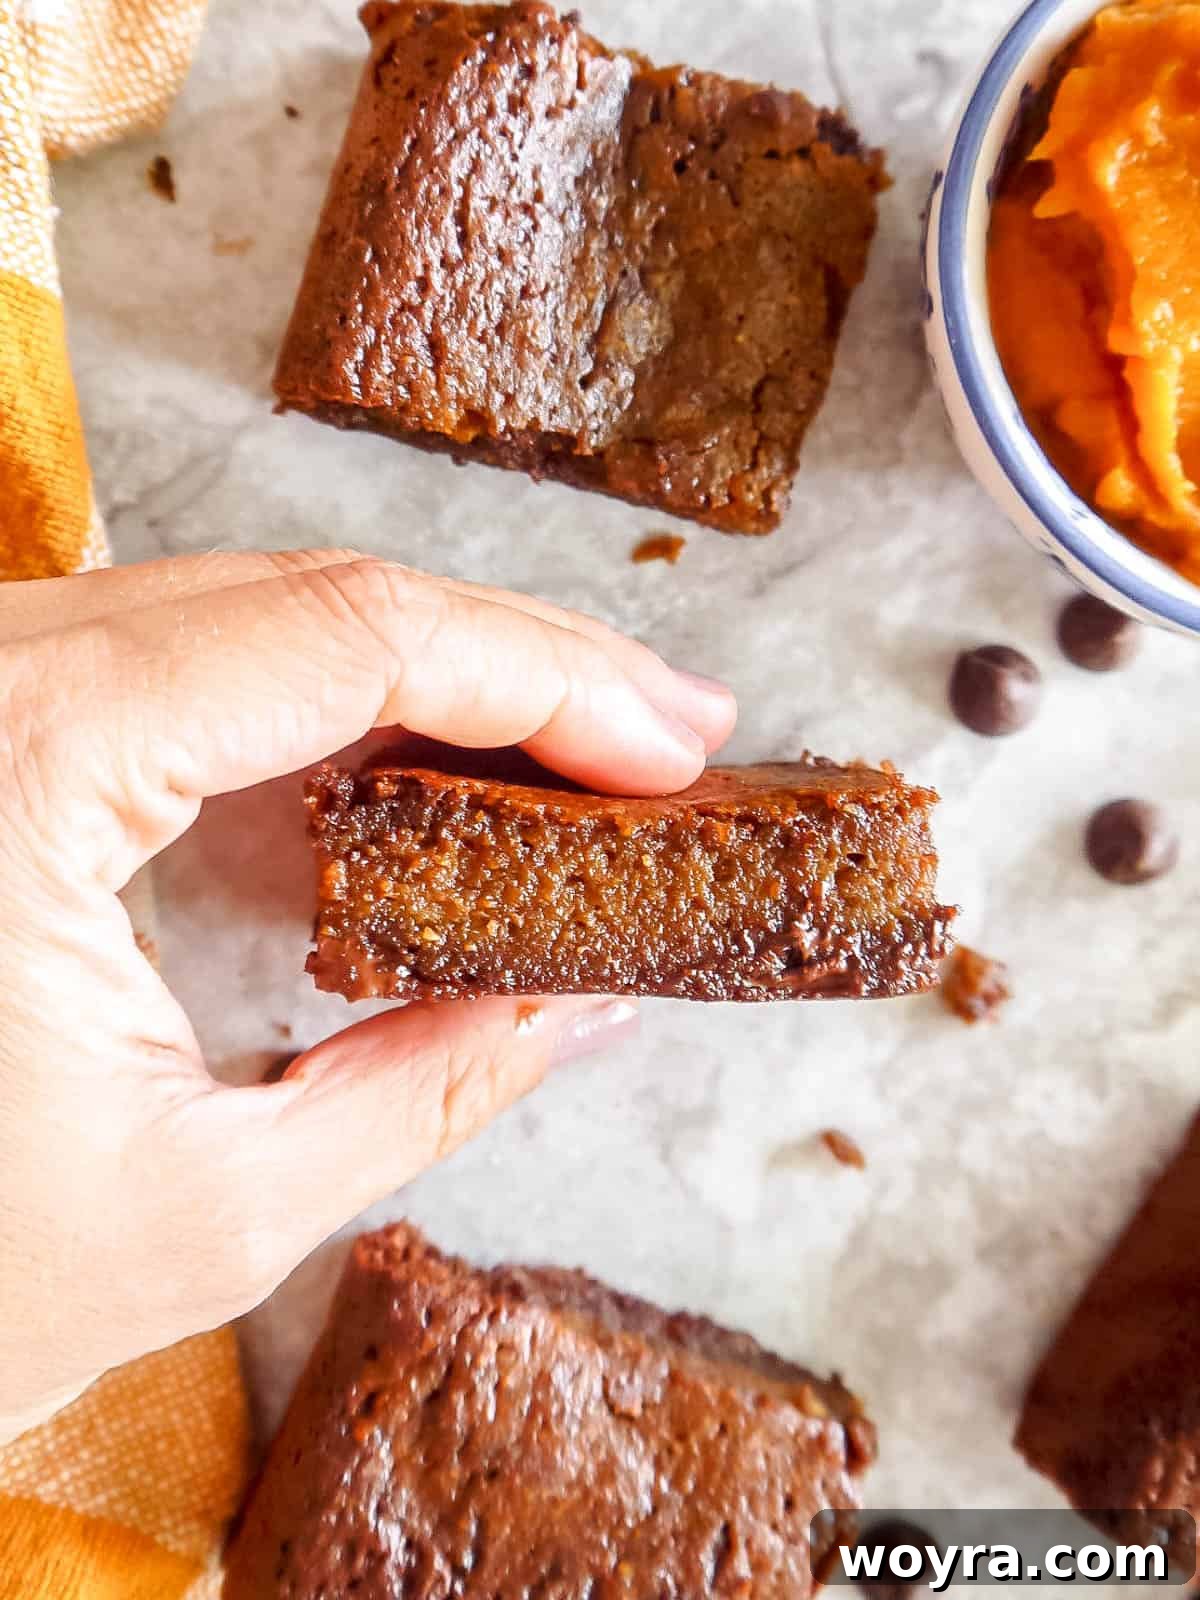
Prepare to be utterly captivated by these impossibly gooey and wonderfully healthy pumpkin brownies. Each bite offers a harmonious blend of classic brownie indulgence and the comforting, aromatic essence of spiced pumpkin pie. Imagine the fudgy richness of your favorite chocolate brownie, beautifully intertwined with the spiced sweetness of a homemade pumpkin pie – that’s precisely the magic these brownies deliver. They are an absolute game-changer, especially for those seeking delicious desserts that align with a healthier lifestyle, offering guilt-free indulgence.
What sets this recipe apart is its thoughtful use of alternative, wholesome ingredients. We swap traditional white flour for nutrient-dense almond flour, providing a gluten-free and grain-free base that’s also rich in protein and healthy fats. Instead of butter, we incorporate light olive oil, adding a subtle fruity note and a boost of monounsaturated fats, making these a truly lighter option without sacrificing an ounce of flavor or texture. These are not just brownies; they are the ultimate healthy Fall or Thanksgiving dessert, perfect for sharing with loved ones or savoring on a cozy evening. If you’re looking for more delightful autumn treats, be sure to explore my pumpkin olive oil cake or these easy Paleo pumpkin muffins for other inspiring Fall dessert ideas.
Table of Contents
- Why These Pumpkin Brownies Are a Must-Try
- Key Ingredients for Paleo Perfection
- Additions and Clever Substitutions
- Step-by-Step Guide to Baking Your Brownies
- Expert Tips for Flawless Brownies
- Frequently Asked Questions About Pumpkin Brownies
- More Delicious Brownie Recipes You’ll Love
- Gluten-Free Chocolate Pumpkin Brownies Recipe
Why These Pumpkin Brownies Are a Must-Try
These aren’t just any brownies; they’re a culinary masterpiece, perfectly marrying two beloved desserts into one unforgettable experience. Here’s why these Paleo pumpkin brownies will become your new go-to Fall favorite:
- The Ultimate Flavor Fusion: Imagine the rich, fudgy density of a classic brownie combined with the warm, aromatic, and comforting embrace of a spiced pumpkin pie. That’s precisely what you get! This recipe truly offers the best of both worlds, a delightful hybrid that will surprise and satisfy your taste buds. It’s like brownies and pumpkin pie had a delicious, harmonious baby, and these pumpkin brownies are the result.
- If you’re intrigued by dessert hybrids, and wonder what you’d get if brownies and cookies had a baby, you absolutely must try my Paleo Pumpkin Pie Chocolate Chip Cookies – another fantastic gluten-free option!
- For another creative twist on brownies, consider these unique sweet potato brownies from Running to the Kitchen. They offer a delightful earthiness and moisture.
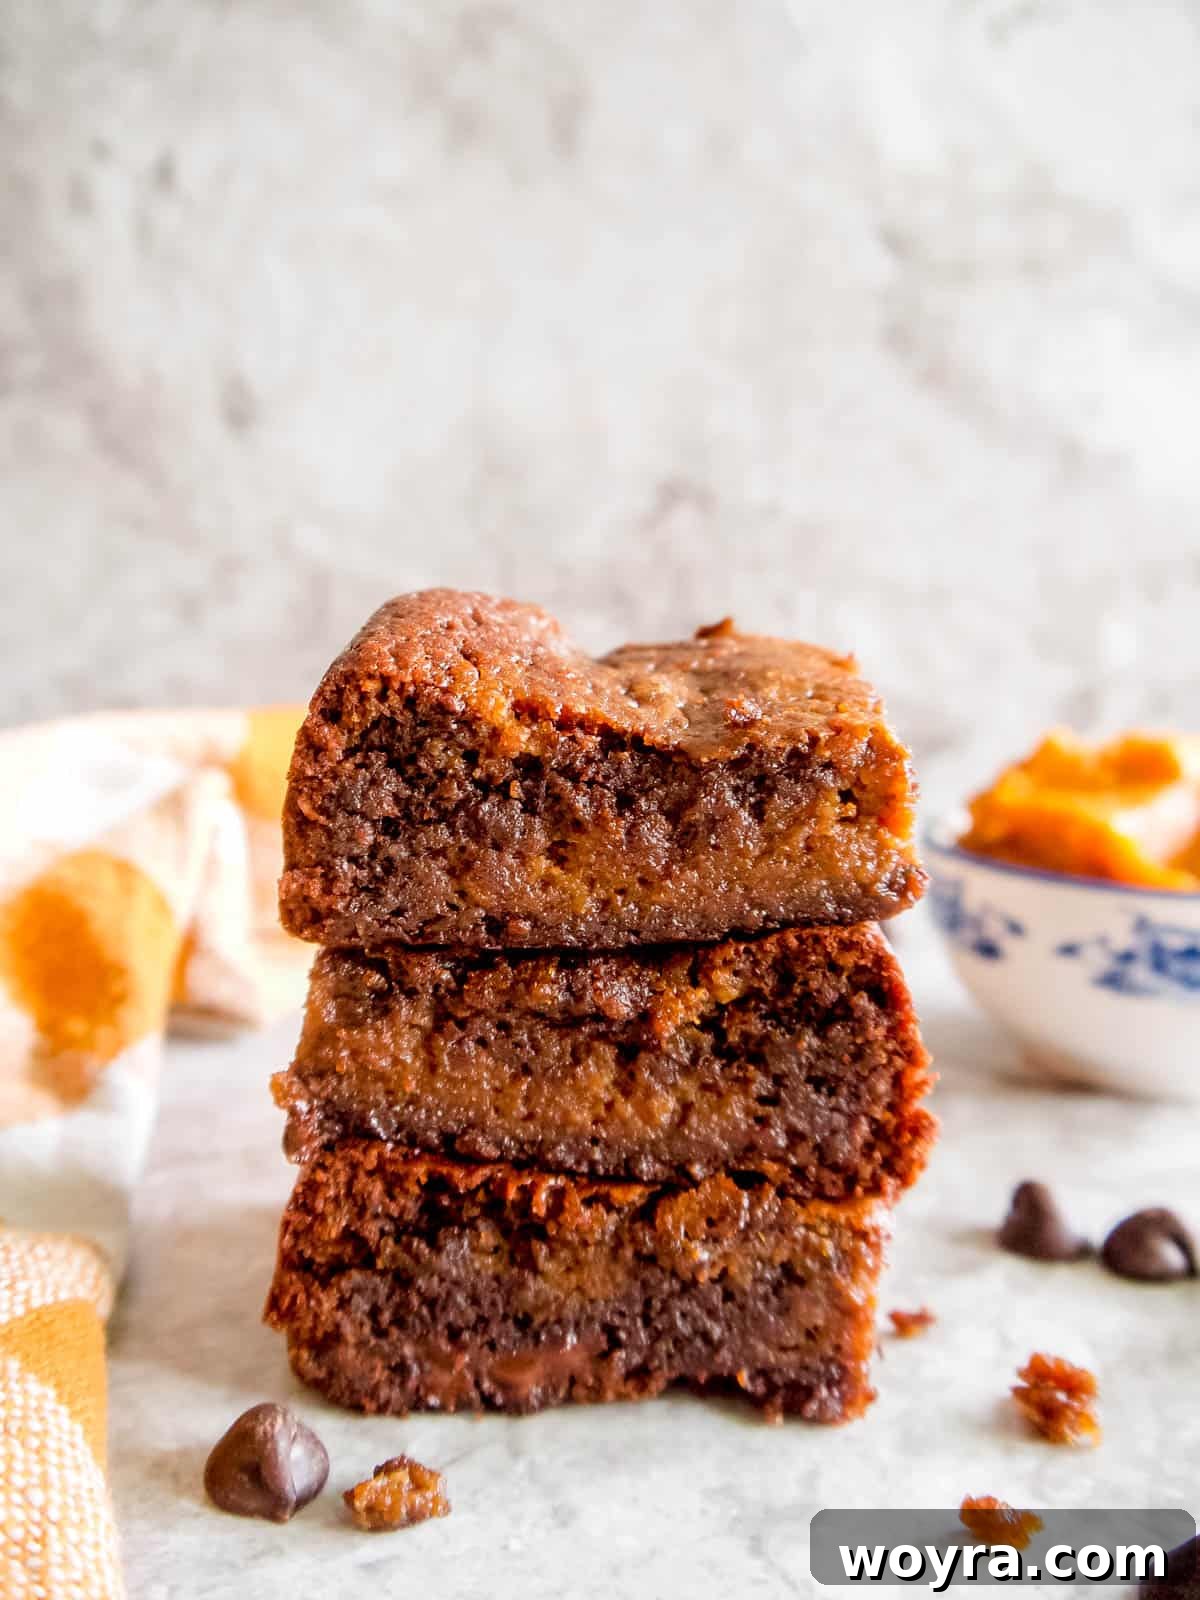
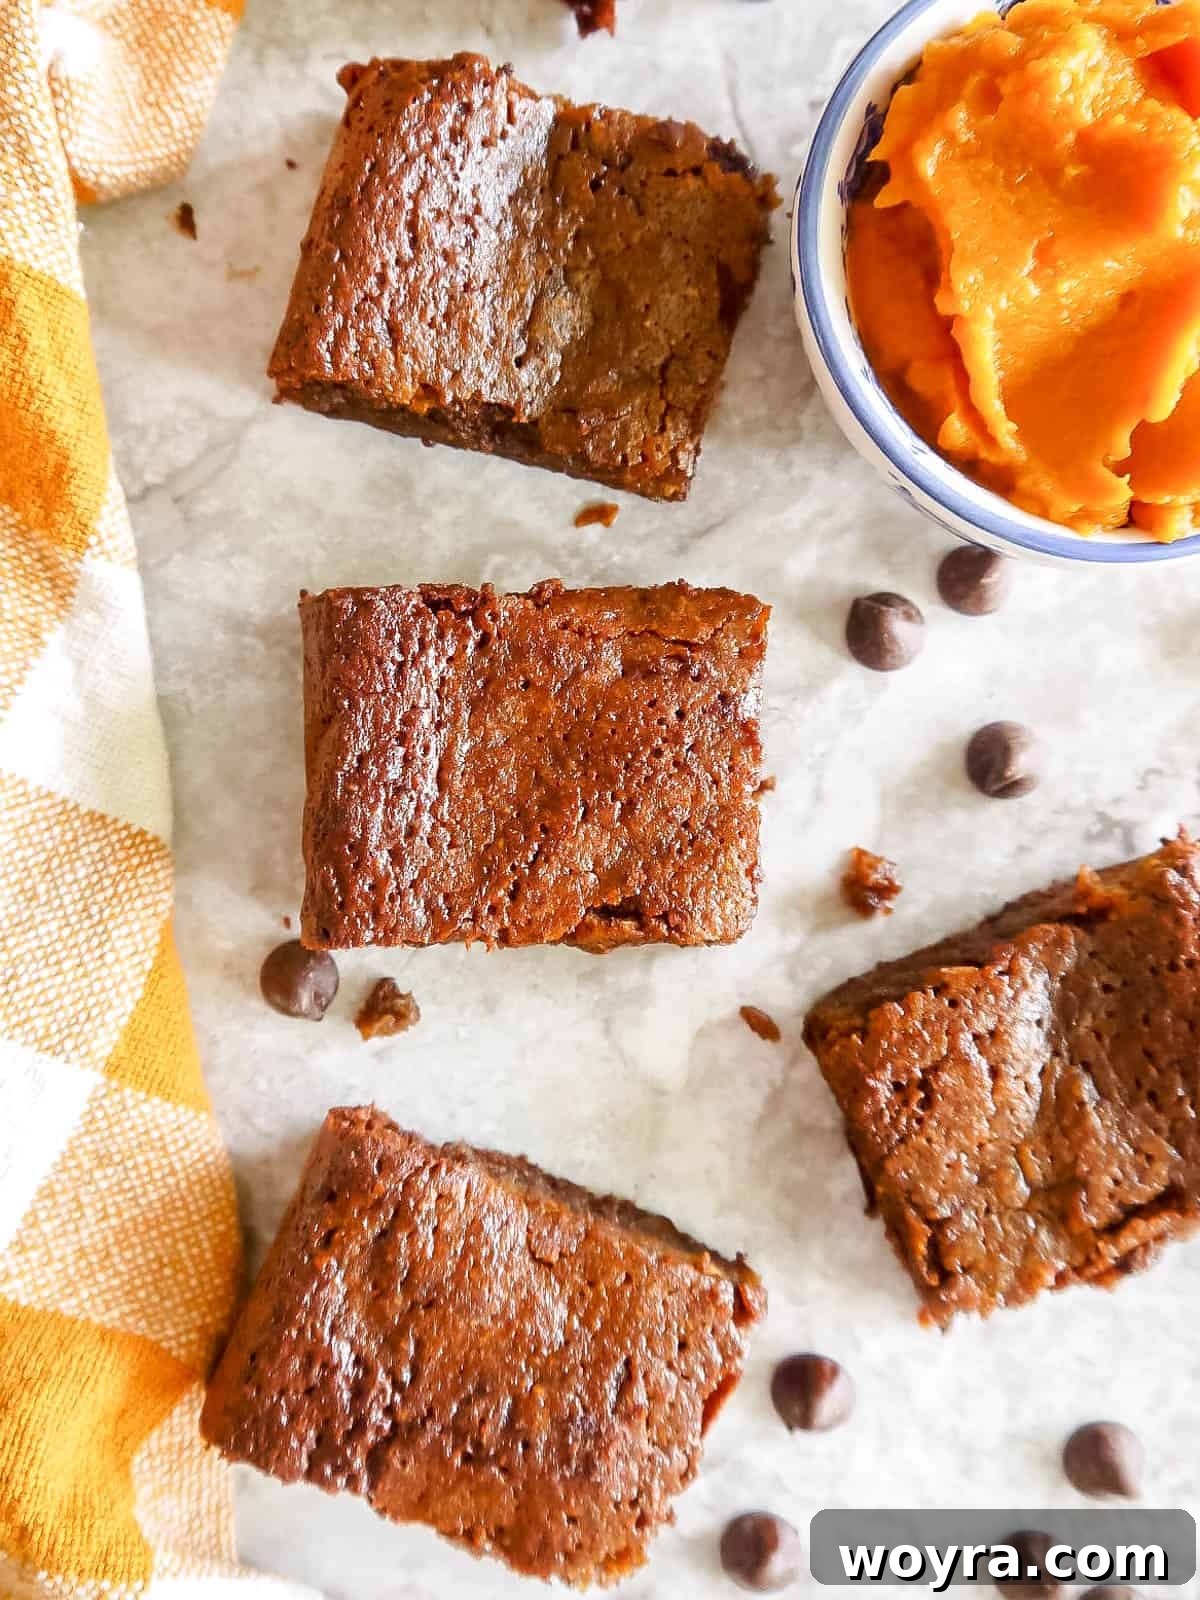
- A Feast for the Eyes and Palate: The process of swirling the rich chocolate brownie batter with the vibrant pumpkin batter isn’t just fun; it creates a stunning marbled effect that makes each brownie a work of art. The beautiful contrast of colors hints at the delightful flavor combination within, promising a treat that looks as good as it tastes.
- Health-Conscious Indulgence: This recipe is meticulously crafted to be dairy-free, gluten-free, and Paleo-friendly, making it an excellent choice for those with dietary sensitivities or anyone looking to enjoy a sweet treat with wholesome ingredients. You can indulge without compromise, knowing you’re nourishing your body with quality components.
- Simple Yet Sophisticated: Despite their gourmet taste and appearance, these brownies are surprisingly easy to make. The straightforward steps ensure that even novice bakers can achieve spectacular results, making them perfect for last-minute gatherings or a spontaneous baking session. No complicated techniques required!
- Seasonal Star: Pumpkin is synonymous with autumn, and these brownies celebrate the season beautifully. They are the ideal dessert for Halloween parties, Thanksgiving gatherings, or simply to enjoy during a crisp Fall afternoon with a cup of coffee or tea. Their warm spices truly evoke the spirit of Fall.
- Versatile for Dietary Needs: Beyond being Paleo, gluten-free, and dairy-free, this recipe is naturally grain-free. This makes it suitable for a wider range of dietary preferences, ensuring more people can enjoy this delicious treat without worry.
Key Ingredients for Paleo Perfection
Crafting these healthy and delicious brownies starts with selecting the right ingredients. Each component plays a crucial role in achieving the perfect texture, flavor, and nutritional profile. Here’s what you’ll need to create your batch of Paleo perfection:
- Almond Flour: The star of our gluten-free and grain-free base. For the best baking results, always opt for blanched almond flour. It has a finer texture and lighter color, which contributes to the brownies’ delicate crumb and prevents a gritty mouthfeel. As a bonus, almond flour is packed with protein, fiber, and healthy monounsaturated fats, making these brownies more satisfying.
- Baking Soda: This acts as our leavening agent, helping the brownies to rise slightly and achieve a desirable texture that is fudgy yet not overly dense. It reacts with the acidic components in the batter to create lightness.
- Salt: A small but mighty ingredient, salt is absolutely crucial for balancing the sweetness of the coconut sugar and enhancing the deep, complex flavors of both chocolate and pumpkin. Don’t skip it, as it truly elevates the entire taste profile, bringing out the best in every bite.
- Light Olive Oil: Our healthy fat choice, replacing traditional butter. It provides essential moisture and contributes to the brownies’ smooth texture. It’s important to select a light-tasting olive oil to avoid imparting an overpowering olive flavor to your dessert. While extra virgin olive oil can be used, a milder variety is generally preferred for baking applications where you want a neutral fat. It also adds heart-healthy monounsaturated fats.
- Coconut Sugar: A fantastic Paleo-friendly sweetener, coconut sugar boasts a lower glycemic index compared to other refined sugars. It offers a wonderfully rich, caramel-like sweetness that perfectly complements the earthy notes of pumpkin and the bitterness of cocoa, creating a balanced flavor without being overly sweet.
- Vanilla Extract: High-quality vanilla extract is a foundational flavor enhancer in almost any baked good. Whether you choose alcohol-based or alcohol-free, it adds a warm, aromatic dimension that deepens both the chocolate and pumpkin notes, rounding out the overall flavor profile beautifully.
- Eggs: Essential for binding all the ingredients together, eggs provide crucial structure to the brownies and contribute significantly to their signature gooey, chewy texture. They help create a cohesive batter that bakes up consistently and holds its shape.
- Unsweetened Cocoa Powder: The key to achieving that rich, deep chocolate flavor without any unwanted added sugars. Make sure to use unsweetened cocoa powder to maintain control over the overall sweetness of the brownies. For an even darker color and smoother flavor, consider using Dutch-processed cocoa powder.
- Dairy-Free Chocolate Chips: These little gems melt into delightful pockets of chocolate goodness throughout your brownies. Thankfully, many excellent dairy-free options are now widely available. Popular choices include the Trader Joe’s brand, HU Chocolate Chips, or Enjoy Life chocolate chips, all of which offer great taste and melt beautifully.
- Canned Pumpkin Puree: This is the vibrant heart of our pumpkin swirl! It’s absolutely crucial to use 100% pure canned pumpkin puree, which contains nothing but cooked and mashed pumpkin. Do NOT use pumpkin pie filling, as it already contains added sugars, spices, and other ingredients that will significantly alter the recipe’s balance and flavor. Freshly made pumpkin puree can also be used if you prefer.
- Ground Cinnamon: A beloved Fall spice, ground cinnamon provides comforting warmth and a sweet, woody aroma that instantly evokes autumn. Ceylon cinnamon is often favored for its more delicate and nuanced flavor.
- Ground Cloves: Offering a strong, sweet, and intensely aromatic flavor, ground cloves add depth and a unique complexity to the pumpkin spice blend. You can purchase them pre-ground or grind whole cloves yourself for a fresher, more potent flavor.
- Ground Nutmeg: This spice delivers a warm, nutty, and slightly sweet flavor, perfectly rounding out the aromatic spice profile. For the freshest and most vibrant taste, grating whole nutmeg yourself just before use is highly recommended.
- Ground Ginger: Ground ginger provides a delightful spicy “kick” and a zesty warmth that perfectly complements the other Fall spices. It adds an extra layer of vibrancy and a subtle zing to the pumpkin layer, making the flavors truly pop.
A complete list of ingredients and their exact measurements can be found in the detailed recipe card at the end of this article.
Additions and Clever Substitutions
This recipe is wonderfully versatile, allowing for minor adjustments to suit your pantry, dietary preferences, or even just your mood. Here are a couple of popular additions and substitutions you might consider to customize your batch of chocolate pumpkin brownies:
- Sweetener Swap for Brown Sugar: While coconut sugar is a cornerstone for Paleo baking, offering a lower glycemic index and lovely caramel notes, you can easily substitute it with an equal amount of regular brown sugar. Just keep in mind that using brown sugar will mean the recipe is no longer strictly Paleo, though it will still remain gluten-free and dairy-free. Brown sugar will also lend a slightly different, perhaps more pronounced molasses-like, flavor profile to the brownies.
- Convenient Pumpkin Pie Spice Blend: If you don’t have individual ground cinnamon, cloves, nutmeg, and ginger on hand, or simply prefer the convenience, you can easily replace the entire blend of individual spices with pre-mixed pumpkin pie spice. Typically, 1.5 teaspoons of a good quality pumpkin pie spice blend should provide a similar warm and inviting flavor to the pumpkin swirl. This is a great time-saver, especially during busy baking seasons!
- Alternative Oils for Baking: If olive oil isn’t your preferred choice, you have other excellent options. Avocado oil is a fantastic neutral-flavored alternative that is also rich in healthy monounsaturated fats and completely suitable for Paleo diets. Melted coconut oil is another popular choice, just ensure it is melted and slightly cooled before incorporating it into your wet ingredients to prevent it from solidifying too quickly or affecting the eggs.
- Adding a Nutty Crunch: For those who love extra texture, consider folding in a handful (about 1/2 cup) of chopped walnuts or pecans into either the chocolate or pumpkin batter, or sprinkling them generously on top before baking. This adds a delightful crunch that beautifully contrasts with the soft, gooey brownie texture.
- White Chocolate Variation: For a unique flavor twist, instead of dairy-free chocolate chips in the brownie batter, you could experiment with dairy-free white chocolate chips. This substitution would create a different, perhaps sweeter and creamier, profile that might further highlight the pumpkin elements.
Step-by-Step Guide to Baking Your Brownies
Follow these detailed steps to create your perfect batch of gooey, gluten-free chocolate pumpkin brownies:
Step 1: Prepare Your Baking Environment
Begin by preheating your oven to 350 degrees F (175°C). This ensures your oven is at the correct temperature for even baking, which is crucial for achieving the perfect brownie texture. Next, take an 8×8 inch square baking pan, lightly grease its interior, and then meticulously line it with parchment paper. It’s a good idea to leave some overhang on the sides of the parchment paper – this creates convenient “handles” that will make it incredibly easy to lift the cooled brownies cleanly out of the pan for neat slicing. This step also helps prevent any sticking, guaranteeing flawless removal.
Step 2: Combine Dry Ingredients
In a medium-sized mixing bowl, accurately measure out your blanched almond flour, baking soda, and salt. Whisk these dry ingredients together thoroughly using a fork or a small whisk for about 30 seconds. Mixing them well at this initial stage ensures that the leavening agent (baking soda) and salt are evenly distributed throughout the entire batch of batter. This even distribution is key for a consistent rise and a balanced flavor in your final brownies, preventing pockets of uneven taste or texture.
Step 3: Mix Wet Ingredients (First Batch)
In a separate, larger bowl, whisk together the light olive oil (or your chosen alternative like melted coconut oil, ensuring it’s cooled), coconut sugar, and vanilla extract until they are well combined and the coconut sugar begins to dissolve into the oil. This forms a sweet and aromatic liquid base for your brownies. Once this mixture is smooth and homogenous, crack in the three large eggs and continue to whisk vigorously until the mixture is visibly thickened, lighter in color, and fully emulsified. The eggs are absolutely crucial for binding all the ingredients, providing structure, and contributing significantly to the brownies’ signature gooey, chewy texture, so ensure they are thoroughly incorporated.
Step 4: Combine Wet and Dry Batters
Gently add the whisked dry flour mixture from Step 2 into the larger bowl containing the wet mixture from Step 3. Using a flexible spatula or a wooden spoon, stir until the ingredients are just combined. The key here is to avoid overmixing at all costs. Overmixing almond flour can sometimes lead to a tougher or denser texture in the final baked good. Stop mixing as soon as no dry streaks of flour remain visible in the batter; a few small lumps are perfectly acceptable.
Step 5: Divide and Flavor the Batter
Now for the exciting part – creating our signature chocolate and pumpkin swirl! Carefully split your freshly made brownie batter evenly into two separate bowls. You don’t need to be hyper-precise with measurements here; eyeballing it should be perfectly fine for an even split. This division is the critical step for creating our distinct chocolate and pumpkin layers.
- Into the first bowl, add the unsweetened cocoa powder and your chosen dairy-free chocolate chips. Gently fold these in using your spatula until the cocoa powder is completely incorporated, and the chocolate chips are evenly distributed throughout the batter. This will form your rich, dark, and decadent chocolate brownie layer.
- Into the second bowl, add the pure pumpkin puree, ground cinnamon, ground cloves, ground nutmeg, and ground ginger. Mix well with a spoon or spatula until all the spices are thoroughly combined with the pumpkin puree, creating a vibrant, aromatic, and beautifully colored pumpkin batter.
Step 6: Layer the Batters for Swirling
Pour approximately half of the chocolate brownie batter into the bottom of your prepared 8×8 inch baking pan. Using your spatula, gently spread this layer out evenly across the bottom of the pan. Next, carefully pour and gently spread about half of the pumpkin batter on top of the chocolate layer. At this stage, try not to mix them too much; the goal is to create distinct, relatively even layers as the foundation for our swirl effect.
Step 7: Create the Swirl Effect
Now, for the artistic and most enjoyable part! Add spoonfuls of the remaining chocolate brownie batter and the remaining pumpkin batter alternately over the layers already in the pan. Don’t worry about placing them perfectly; random dollops often create the most natural and appealing swirl patterns. Once all the batter is in the pan, take a knife, a thin skewer, or even a sturdy toothpick and gently drag it through the spoonfuls of batter, moving it in a figure-eight pattern or straight lines, to create beautiful marbled swirls. Avoid overdoing it; a few confident passes are typically enough to achieve that gorgeous marbled effect without completely blending the two distinct batters into one homogenous color.
Step 8: Bake to Perfection!
Carefully place your baking pan into the preheated oven. Bake for approximately 40 minutes. It’s important to note that baking times can vary slightly depending on your specific oven, so it’s always good to keep an eye on them. The brownies will be ready when the edges appear set and have started to pull away slightly from the sides of the pan. The top will look a bit hardened and firm, but the center should still appear quite moist, perhaps even a little jiggly. This slight “underbaked” appearance in the center is precisely what contributes to their incredibly delicious, fudgy, and gooey texture. Resist the urge to overbake, as this is the most common mistake that leads to dry, cakey brownies. Once baked, remove the pan from the oven and let the brownies cool completely in the pan for at least 10 minutes prior to lifting them out and cutting. This recipe makes 12 generous brownies.
Expert Tips for Flawless Brownies
Achieving brownie perfection, especially with a healthy, gluten-free twist, is easier than you think with these helpful tips:
- The “Done” Test for Gooeyness: This is arguably the most crucial tip for ensuring your brownies are perfectly gooey! You’ll know these beauties are properly baked when the edges are visibly set and have begun to pull away slightly from the sides of the baking pan. The surface of the brownies will look a bit hardened and firm, but the very center should still appear quite moist, perhaps even a little jiggly when gently shaken. When you delicately touch the center, it shouldn’t feel completely wet or unset. Remember, a truly fudgy brownie is often slightly underbaked. If a toothpick inserted into the center comes out with moist crumbs (not wet batter), they are likely perfect. Overbaking is the enemy of fudgy brownies, leading to a dry, cakey texture.
- Patience for Pristine Slices: As tempting as it is to dig into warm brownies immediately, always, always allow your brownies to cool completely in the pan before attempting to cut them. Warm brownies are notoriously delicate and difficult to slice cleanly; they are more prone to crumbling and tearing. Cooling them completely solidifies their structure, making for neat, clean, and impressive cuts. For extra precision and perfectly sharp edges, you can even chill them in the refrigerator for 30 minutes to an hour before slicing. Use a sharp, non-serrated knife and wipe it clean with a damp cloth between each cut for the cleanest edges.
- Pumpkin Puree vs. Filling – A Critical Distinction: This tip is vital for both the flavor and consistency of your brownies. Always use 100% pure canned pumpkin puree, which is simply cooked and mashed pumpkin. Do NOT use pumpkin pie filling, which is a pre-sweetened and pre-spiced mixture containing added sugars, spices, and sometimes different proportions of liquids and solids. Using pie filling will throw off the recipe’s delicate balance, resulting in an overly sweet brownie with an incorrect texture.
- Bring Eggs to Room Temperature: This simple step makes a big difference. Using room temperature eggs helps them incorporate more smoothly and evenly into the batter, creating a more uniform emulsion with the other wet ingredients. This leads to a more consistent and tender texture in your baked brownies. If you forget to take them out ahead of time, a quick trick is to place the eggs (still in their shells) in a bowl of warm water for 5-10 minutes.
- The Golden Rule: Don’t Overmix: After combining the wet and dry ingredients, mix just until no dry streaks of almond flour remain. Overmixing, even with gluten-free flours, can develop a tougher texture by creating too much elasticity. A light hand will ensure your brownies remain tender, soft, and fudgy.
- Smart Storage Solutions: Once completely cooled, these brownies store beautifully, making them excellent for meal prep or future enjoyment. You can keep them covered tightly with aluminum foil or plastic wrap at room temperature for up to 3-4 days, maintaining their moistness. For longer freshness, or if your kitchen is particularly warm, it’s best to immediately place them in an airtight container and store them in the refrigerator, where they will last for a good 5-7 days. For extended storage, individual brownies can be wrapped tightly in plastic wrap and then foil, and frozen for up to 2-3 months. Thaw at room temperature or gently warm in the microwave for a quick treat.
- Enhance the Swirl for Visual Appeal: For a more dramatic and eye-catching swirl pattern, avoid excessively stirring the layered batters initially. Focus on distinct dollops of each batter when you add the second half. Then, when creating the swirl, use a light hand with your knife or skewer for just a few confident passes. The less you mix, the more distinct and beautiful your marbled effect will be, making each brownie a visual delight.
Frequently Asked Questions About Pumpkin Brownies
Absolutely! If you prefer the convenience or a specific flavor profile of a pre-blended pumpkin pie spice, you can certainly use it as a direct substitute. Simply replace the individual measurements of ground cinnamon, cloves, nutmeg, and ginger in this recipe with 1.5 teaspoons of a good quality pumpkin pie spice blend. This substitution will yield a similar warm and inviting autumn flavor in your pumpkin swirl, making baking a bit quicker.
While light olive oil contributes to the unique moistness and health benefits of these brownies, you have several excellent alternatives depending on your dietary needs and preference. Avocado oil is a fantastic neutral-flavored option that is also rich in healthy fats and completely suitable for Paleo diets. Melted coconut oil is another popular choice; just ensure it’s melted and then slightly cooled before adding it to the wet ingredients to prevent it from solidifying prematurely or “cooking” the eggs. Any other mild-flavored liquid oil that is suitable for baking would generally work well here.
These delicious brownies store very well, maintaining their gooey texture. For short-term storage, you can leave them out on the counter, covered tightly with aluminum foil or plastic wrap in their pan or on a plate, for up to 3-4 days. To extend their freshness, or if your kitchen is particularly warm, it’s best to immediately place them in an airtight container and store them in the refrigerator. They should last a good 5-7 days in the fridge. For longer storage, individual brownies can be wrapped tightly in plastic wrap and then again in foil, and frozen for up to 2-3 months. Simply thaw at room temperature or gently warm in the microwave when ready to enjoy.
These versatile brownies are absolutely delicious on their own, but they also pair beautifully with a variety of toppings and accompaniments to elevate the dessert experience:
- Serve them slightly warm with a generous scoop of your favorite dairy-free vanilla ice cream for a classic dessert indulgence.
- Top with a dollop of fluffy coconut whipped cream for an elegant and light finish that complements the richness.
- For added texture and a boost of healthy fats, sprinkle with chopped nuts (like pecans or walnuts) or a drizzle of your favorite nut butter.
- A scattering of roasted pumpkin seeds adds a lovely crunch and a touch of seasonal charm.
- Consider a light dusting of powdered coconut sugar (or powdered sugar) for a simple yet attractive presentation.
- Enjoy them alongside a warm cup of coffee, herbal tea, or a spiced chai latte for the ultimate cozy Fall treat.
When compared to traditional brownies typically made with refined white flour, processed sugar, and butter, these Paleo-friendly brownies are indeed a significantly healthier alternative. They wisely use almond flour (which is rich in protein, fiber, and healthy fats), olive oil (a heart-healthy monounsaturated fat), and coconut sugar (a natural, less processed sweetener with a lower glycemic index). Furthermore, the pumpkin puree itself adds valuable vitamins, minerals, and fiber to the mix. While they are still a dessert and should be enjoyed in moderation, they are crafted with more wholesome, nutrient-dense ingredients, allowing for a more guilt-free indulgence.
More Delicious Brownie Recipes You’ll Love
If you’re a fan of these chocolate pumpkin brownies, you’re in for a treat! Explore some of my other favorite brownie creations that are sure to satisfy your sweet cravings, many of which are also crafted with healthier ingredients and dietary considerations in mind:
Paleo Almond Butter and Jelly Brownies: A nostalgic and comforting twist on a classic, these brownies bring together the beloved flavors of creamy almond butter and sweet jelly in a wholesome, gluten-free, and grain-free package. They’re like a grown-up, healthier PB&J in brownie form!
Dairy-free Brownies with Caramel: Indulge in rich, intensely chocolatey dairy-free brownies generously topped with a luscious, gooey caramel sauce. This recipe offers an extra layer of decadence for those who appreciate a truly luxurious dessert, all while keeping it dairy-free.
Paleo Brookies (Brownie/Cookies Bars): Can’t decide between a fudgy brownie and a chewy cookie? Get the best of both worlds with these delightful Paleo brookies! They combine the rich, dense texture of a brownie with the soft, crumbly chewiness of a cookie, all in one satisfying bar. A perfect compromise for indecisive dessert lovers.
White Chocolate Brownies: For those who prefer a lighter, creamy chocolate flavor profile, these white chocolate brownies offer a wonderfully sweet and luxurious experience. They’re a delightful departure from traditional dark chocolate brownies, providing a smooth and mellow sweetness.
And for even more seasonal inspiration and delicious recipes suitable for the holidays, be sure to check out my comprehensive collection of Paleo Thanksgiving recipes here! You’ll find a wide array of healthy and mouth-watering dishes perfect for your holiday feast, from appetizers to main courses and, of course, more desserts.
Did you try this amazing recipe? We’d love to hear your thoughts and see your creations! Please leave a ⭐ review below and share your experience! Your feedback is incredibly valuable, as it helps us grow and inspires other home bakers in their culinary adventures.
Gluten-Free Chocolate Pumpkin Brownies Recipe
⭐ ⭐ ⭐ ⭐ ✨ (4.34 from 3 votes)
By: Dominique
Servings: 12 brownies
Prep time: 15 mins
Cook time: 40 mins
Total time: 55 mins

Ingredients
- 3/4 cup blanched almond flour
- 1/4 teaspoon baking soda
- 1/2 teaspoon salt
- 3/4 cup light olive oil (or melted and cooled coconut oil)
- 1 1/4 cups coconut sugar
- 2 teaspoons vanilla extract
- 3 large eggs
- 1/4 cup unsweetened cocoa powder
- 1/2 cup dairy-free chocolate chips (e.g., Trader Joe’s, HU, or Enjoy Life)
- 1/2 cup pure pumpkin puree (not pie filling)
- 3/4 tsp ground cinnamon
- 1/4 tsp ground cloves
- 1/4 tsp ground nutmeg
- 1/4 tsp ground ginger
Instructions
- Preheat your oven to 350°F (175°C). Grease an 8×8 inch baking pan and line it with parchment paper, allowing some overhang on the sides for easy lifting.
- In a large bowl, whisk together the almond flour, baking soda, and salt until well combined.
- In a separate, larger bowl, whisk the olive oil, coconut sugar, and vanilla extract. Add the eggs and mix until thickened and fully incorporated.
- Gradually add the dry flour mixture to the wet ingredients. Stir gently with a spatula until just combined, being careful not to overmix.
- Divide the brownie batter evenly into two separate bowls.
- To the first bowl, add the cocoa powder and dairy-free chocolate chips. Stir until fully incorporated, creating the chocolate brownie batter.
- To the second bowl, add the pumpkin puree, ground cinnamon, ground cloves, ground nutmeg, and ground ginger. Mix thoroughly to create the spiced pumpkin batter.
- Pour half of the chocolate brownie batter into the bottom of the prepared baking pan, spreading it evenly. Then, gently spoon half of the pumpkin batter on top of the chocolate layer.
- Add spoonfuls of the remaining chocolate brownie batter and pumpkin batter over the layers. Using a knife or a skewer, gently drag it through the batters to create a marbled swirl effect. Avoid overmixing to maintain distinct layers.
- Bake for 40 minutes, or until the edges are set and begin to pull away from the pan, and the center looks slightly moist but not raw. Let the brownies cool completely in the pan for at least 10 minutes before lifting them out using the parchment paper and cutting into 12 squares.
Recipe Notes
- For a non-Paleo option, you can substitute coconut sugar with an equal amount of brown sugar. The brownies will still be gluten-free and dairy-free.
- Instead of individual spices (cinnamon, cloves, nutmeg, ginger), you can use 1.5 teaspoons of pre-mixed pumpkin pie spice for convenience.
- Store cooled brownies in an airtight container at room temperature for up to 3-4 days, or in the refrigerator for up to 5-7 days for extended freshness.
Nutrition Information (per brownie)
Nutrition information is automatically calculated and should be used as an approximation.
- Calories: 277 kcal
- Carbohydrates: 23g
- Protein: 4g
- Fat: 21g
- Saturated Fat: 4g
- Polyunsaturated Fat: 2g
- Monounsaturated Fat: 10g
- Trans Fat: 0.004g
- Cholesterol: 41mg
- Sodium: 169mg
- Potassium: 66mg
- Fiber: 2g
- Sugar: 15g
- Vitamin A: 1649 IU
- Vitamin C: 0.4mg
- Calcium: 37mg
- Iron: 1mg
Additional Info
Course: Dessert
Cuisine: American