

Indulge in these incredibly easy and delightful chocolate mousse balls, crafted with just three simple ingredients: creamy Cool Whip, rich Hershey’s chocolate, and crunchy Nilla Wafers. They’re the ultimate no-bake dessert, perfect for any occasion, from festive holiday gatherings to a sweet everyday treat!

Who doesn’t need a touch of effortless magic in their dessert repertoire? These exquisite chocolate mousse balls are precisely that – a legendary treat that brings smiles and satisfaction with minimal fuss. Especially during the bustling holiday season, when time is a precious commodity, a recipe that delivers incredible flavor without hours of baking and elaborate steps is an absolute lifesaver. Picture delicate, velvety chocolate mousse, enveloped in a delightfully crunchy coating of crushed vanilla wafers – that’s the pure joy encapsulated in every bite of these easy-to-make wonders.
These aren’t just good; they’re truly exceptional. I can’t count the times I’ve been asked for this recipe after sharing these delightful chocolate treats at gatherings. While I’d love to take full credit for such a crowd-pleaser, the original genius behind these Nilla Wafer-covered chocolate mousse balls belongs to my wonderful former babysitter, Mrs. Marge. Her simple yet brilliant creation has graced countless tables and become a cherished staple in my recipe collection, and now, it can be in yours too!
Why You’ll Love This Easy Chocolate Mousse Ball Recipe:
This recipe isn’t just easy; it’s foolproof and delivers irresistible results every single time. Here’s why these chocolate mousse balls are about to become your new favorite:
- Minimal Ingredients: You only need three readily available ingredients to create these gourmet-tasting treats. No long shopping lists or obscure items required!
- Effortlessly Simple: With straightforward steps and no baking involved, this recipe is perfect for beginners and seasoned cooks alike. It’s a fantastic project for making with kids too!
- Decadent Flavor and Texture: These bites taste like luxurious chocolate mousse truffles, elevated by the satisfying crunch and sweet vanilla notes of crushed Nilla Wafers. The contrast in textures is simply divine.
- Perfect for Any Occasion: Whether it’s a holiday party, a casual get-together, a potluck, or just a quiet evening craving, these chocolate mousse balls fit the bill. They’re especially popular as festive holiday treats!
- No-Bake Convenience: Skip the oven and the stress. This no-bake chocolate dessert means less clean-up and more time to enjoy your culinary creation.
- Crowd-Pleasing Potential: Their bite-sized nature and universally loved chocolate-vanilla combination make them disappear quickly at any event. Be prepared for recipe requests!
Key Ingredients for Chocolate Mousse Balls:
The beauty of this recipe lies in its simplicity. Just three components come together to create a truly magical dessert:
- Hershey’s Chocolate: For a classic, comforting chocolate flavor that pairs perfectly with the other ingredients. While I often opt for gourmet chocolates in other baking endeavors, Hershey’s chocolate brings a unique nostalgic quality and ideal melting consistency to these specific mousse balls, reminiscent of beloved childhood treats like s’mores. Its familiar taste is surprisingly fantastic in this no-bake application.
- Cool Whip: This ready-to-use whipped topping is the secret to achieving that light, airy “mousse” texture without the hassle of whipping fresh cream. It provides a stable base that blends beautifully with the melted chocolate and holds its shape exceptionally well once chilled. Remember to thaw it completely before use for the best results.
- Nilla Wafers: These iconic vanilla wafers lend a delicate sweetness and a wonderfully crunchy coating. Their subtle vanilla flavor complements the chocolate without overpowering it, providing the perfect contrast to the creamy interior. Crushing them creates a fine crumb that adheres perfectly to the mousse balls.
You might be wondering about ingredient substitutions. While these three work together harmoniously to create the classic Mrs. Marge flavor, you can experiment if you wish. For the chocolate, semi-sweet chocolate chips or even another brand of milk chocolate could work, though the specific flavor profile might shift slightly. As for the coating, graham cracker crumbs or crushed Oreos (for a chocolate-on-chocolate twist) could be interesting alternatives, but Nilla Wafers truly make these chocolate mousse balls special.
Step-by-Step Instructions to Make Your Chocolate Mousse Balls:
Follow these simple steps to create your own batch of delicious chocolate mousse balls. Precision in chilling and cooling is key to achieving the perfect mousse texture!
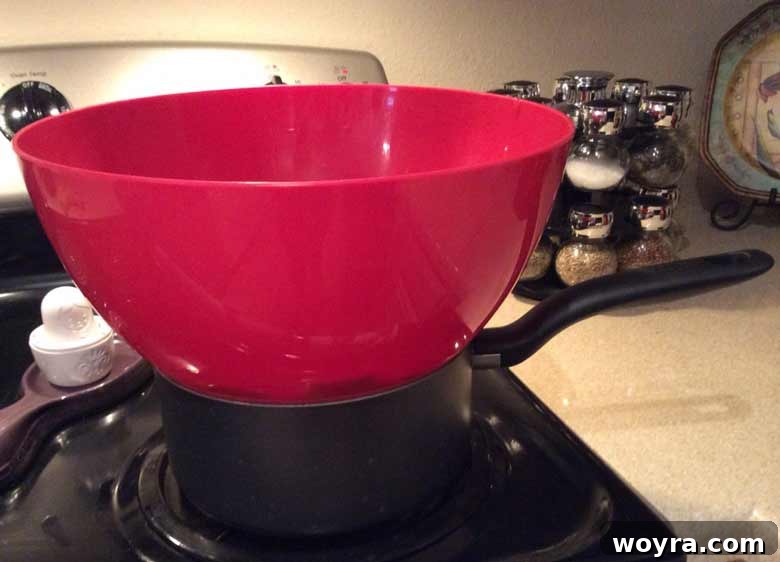
Step 1: Melt the Chocolate. Begin by carefully melting 16 ounces of Hershey’s chocolate. While you can microwave the chocolate, doing so requires constant vigilance to prevent burning. If using a microwave, heat in 30-second intervals, stirring thoroughly after each, until smooth. My preferred method is using a double boiler: place a heat-safe bowl over a pot of simmering (not boiling) water, ensuring the bottom of the bowl does not touch the water. Stir the chocolate gently until it’s completely smooth and melted. This method provides a more even, gentle heat, reducing the risk of scorching and ensuring the chocolate doesn’t get excessively hot, which means less cooling time later.
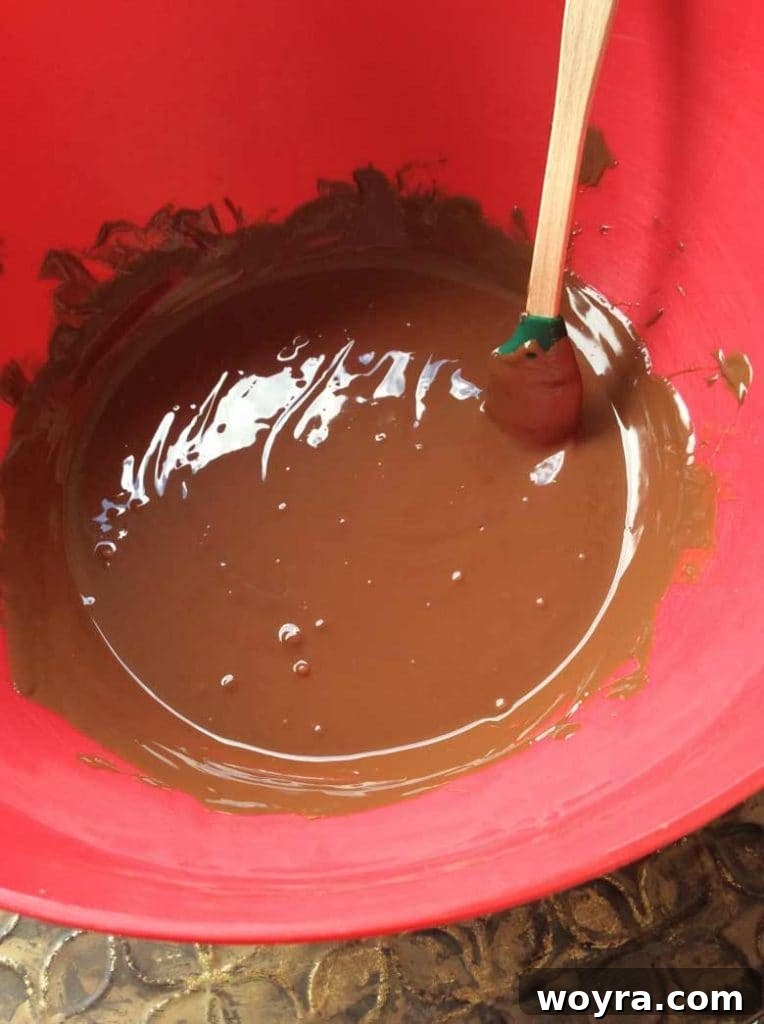
Step 2: Cool the Melted Chocolate. This step is CRUCIAL for the success of your chocolate mousse balls. Once the chocolate is fully melted and smooth, remove the bowl from the heat and allow it to cool completely to room temperature. This isn’t just about making it safe to handle; if the chocolate is still warm or hot when combined with the Cool Whip, it will cause the Cool Whip to lose its airy texture, potentially hardening the mixture and preventing the delicate mousse consistency we’re aiming for. The outside of the bowl should feel entirely cool to the touch before proceeding.
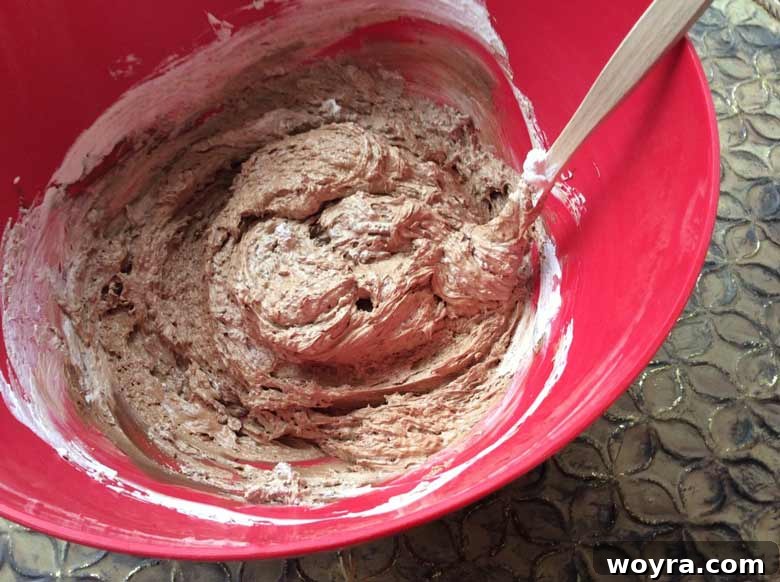
Step 3: Combine and Chill the Mousse Mixture. Take one 8-ounce tub of thoroughly thawed Cool Whip and gently fold it into the cooled, room-temperature melted chocolate. Mix until the two ingredients are totally combined and the mixture is thick, smooth, and evenly colored, with no streaks of white. Avoid overmixing, which can deflate the Cool Whip. Once combined, transfer this chocolate mousse mixture to the refrigerator and chill for at least 30 minutes. This chilling period is essential for the mixture to firm up enough, making it much easier to roll into perfect, spherical chocolate mousse balls.
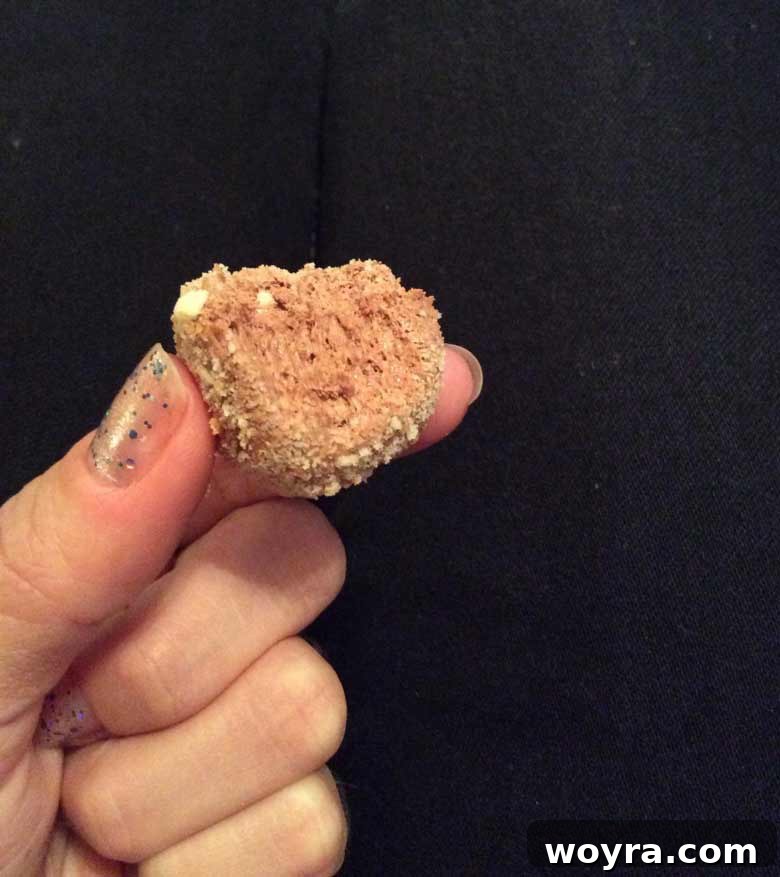
Step 4: Prepare Wafers and Roll the Balls. While your mousse chills, prepare your Nilla Wafer crumbs. You’ll need about 1 cup of finely crushed wafers, which is approximately half of an 11-ounce box. The quickest way to achieve this is by pulsing them in a food processor until fine crumbs form. Alternatively, place the wafers in a sturdy plastic bag and use a rolling pin or even a hammer to crush them by hand. Once your mousse mixture has hardened in the fridge, take approximately one tablespoon of the mixture and quickly roll it between your hands to form a ball. Immediately dunk the chocolate ball into the Nilla Wafer crumbs, ensuring it’s fully coated. Place the coated ball on a clean plate or baking sheet. Repeat this process until all the mousse mixture has been used up. You might find it helpful to wash your hands periodically during rolling to prevent stickiness.
Step 5: Final Chill and Serve. Once all your chocolate mousse balls are rolled and coated, return them to the refrigerator for a final chill of at least 30 minutes. This last chilling period helps them set completely, firm up their shape, and ensures they are perfectly cold and ready to enjoy. Serve them as a delightful dessert, a charming party treat, or a sweet indulgence for yourself!
Expert Tips for Perfect Chocolate Mousse Balls:
Achieving bakery-quality chocolate mousse balls at home is easy with these simple expert tips:
- Temperature is Everything: As mentioned, ensuring your Cool Whip is thawed and your melted chocolate is completely cooled to room temperature is paramount. This delicate balance is the *only* way to achieve that light, airy, and stable “mousse” texture. Don’t rush these cooling and thawing steps!
- Rolling Smart, Not Hard: Rolling the chocolate mousse balls can indeed get a bit messy, as the warmth from your hands can cause the chocolate mousse to melt slightly. To minimize stickiness and make the process smoother, keep a small bowl of cold water or a damp cloth nearby. Periodically wash and dry your hands during the rolling process. Cold hands are your best friend here! You can also briefly chill the mixture again if it becomes too soft to handle.
- Batch Size for Parties: These chocolate mousse balls are incredibly popular and tend to disappear quickly, especially at parties. If you’re planning to serve them to a crowd, I highly recommend doubling the recipe. It’s just as easy to make a larger batch, and you’ll be grateful to have plenty to go around!
- Uniformity for Presentation: For a more professional look, use a small cookie scoop or a measuring spoon (like a tablespoon) to portion out the mousse mixture. This helps ensure that all your chocolate mousse balls are roughly the same size.
- Storage Solutions: Store any leftover chocolate mousse balls in an airtight container in the refrigerator for up to 3-4 days. They taste wonderful chilled!
- Creative Variations: While delicious as is, feel free to get creative with your coatings! Instead of just Nilla Wafer crumbs, consider rolling them in finely chopped nuts (like pecans or almonds), cocoa powder for a rich finish, shredded coconut, or even festive sprinkles for holiday occasions.
Frequently Asked Questions about Chocolate Mousse Balls:
- Can I use real whipped cream instead of Cool Whip?
- While Cool Whip is specifically chosen for its stability and ease, you can try using freshly whipped cream. However, it will be less stable and may not yield the exact same firm “mousse” texture. You would need to whip heavy cream with a little powdered sugar until stiff peaks form, then gently fold in the cooled chocolate. Be aware that the mixture might be softer and require longer chilling times.
- How long do these chocolate mousse balls last?
- When stored in an airtight container in the refrigerator, these mousse balls will stay fresh and delicious for 3-4 days. They are best enjoyed within this timeframe.
- Can I freeze these mousse balls?
- Yes, you can! For longer storage, arrange the finished chocolate mousse balls in a single layer on a baking sheet and freeze until firm. Once solid, transfer them to an airtight freezer-safe container or bag. They can be frozen for up to 1-2 months. Thaw them in the refrigerator for a few hours before serving.
- What if my chocolate seizes when melting?
- Chocolate seizing usually happens when it comes into contact with even a tiny amount of water or is overheated too quickly. Using the double boiler method helps prevent this. If it does seize, try stirring in a teaspoon of neutral oil (like vegetable oil or grapeseed oil) or melted butter, one drop at a time, until it smooths out, but this might slightly alter the final texture and flavor.
- Can I make these ahead of time?
- Absolutely! These chocolate mousse balls are an excellent make-ahead dessert. You can prepare them a day or two in advance and store them in the refrigerator. In fact, they often taste even better after a day or so, as the flavors meld together beautifully.
Other Chocolate Mousse Truffle Recipes You May Enjoy:
If you’re a fan of these easy chocolate mousse balls and looking for variations or healthier alternatives, I have a couple of other delicious recipes that you might love:
If you are looking for a healthier dairy-free version of these mousse balls, then try my Dairy-Free Chocolate Mousse Balls (Gluten-free).
If you are looking for a Paleo version of these mousse balls, try my Paleo Mousse balls.
Did you try this recipe? Please leave me a ⭐ review below!
Easy Chocolate Mousse Balls (No-Bake)
These easy chocolate mousse balls are made from Cool Whip, Hershey’s chocolate, and Nilla Wafers. They make for a wonderful dessert or party treat!
Servings: 60 mousse balls
Prep Time: 1 hour
Total Time: 1 hour

Ingredients
- 1 (8 ounce) tub of Cool Whip (thawed)
- 1 cup crushed Nilla Wafers (approximately 1/2 of an 11 ounce box)
- 16 ounces Hershey’s Chocolate (bars or baking chocolate)
Instructions
- Ensure Cool Whip is fully thawed.
- Melt the 16 ounces of Hershey’s chocolate in a heat-safe bowl set over a pot of simmering water (double boiler method), stirring until completely smooth.
- Remove the melted chocolate from the heat and allow it to cool completely to room temperature. The bowl should feel cool to the touch. This step is critical to prevent the Cool Whip from hardening.
- Once the chocolate is cooled, gently fold the thawed Cool Whip into the melted chocolate until thoroughly combined and the mixture is smooth and consistent.
- Refrigerate the chocolate mousse mixture for at least 30 minutes to allow it to firm up, making it easier to roll.
- While the mousse chills, prepare the Nilla Wafer crumbs. Crush approximately half of an 11-ounce box of Nilla Wafers in a food processor until you have about 1 cup of fine crumbs. Alternatively, place wafers in a sealed plastic bag and crush with a rolling pin.
- Remove the chilled mousse mixture from the refrigerator. Take about 1 tablespoon of the mixture and quickly roll it between your hands to form a smooth ball. Wash your hands frequently to prevent stickiness.
- Immediately roll the chocolate mousse ball in the Nilla Wafer crumbs until it is fully coated.
- Place the coated mousse ball on a plate or baking sheet. Repeat the rolling and coating process until all the mousse mixture is used.
- Refrigerate the finished chocolate mousse balls for at least another 30 minutes before serving to ensure they are firm and well-set.
- Enjoy your delicious no-bake chocolate mousse balls! This recipe yields approximately 60 mousse balls.
Notes
(1) Critical Temperature Control: It is paramount to ensure both the Cool Whip is thawed and the melted chocolate is completely cooled to room temperature. This is the only way to achieve the desired light and airy “mousse” texture and prevent the mixture from becoming grainy or too firm.
(2) Managing Stickiness During Rolling: The warmth from your hands can cause the chocolate mousse to soften and become sticky while rolling. To counter this, periodically wash your hands with cold water and dry them thoroughly during the process. This will help maintain the firmness of the mousse and make rolling much easier.
Nutrition
Calories: 64 kcal
Carbohydrates: 7.3 g
Protein: 0.7 g
Fat: 3.6 g
Nutrition information is automatically calculated, so should only be used as an approximation.
Additional Info
Cuisine: American