
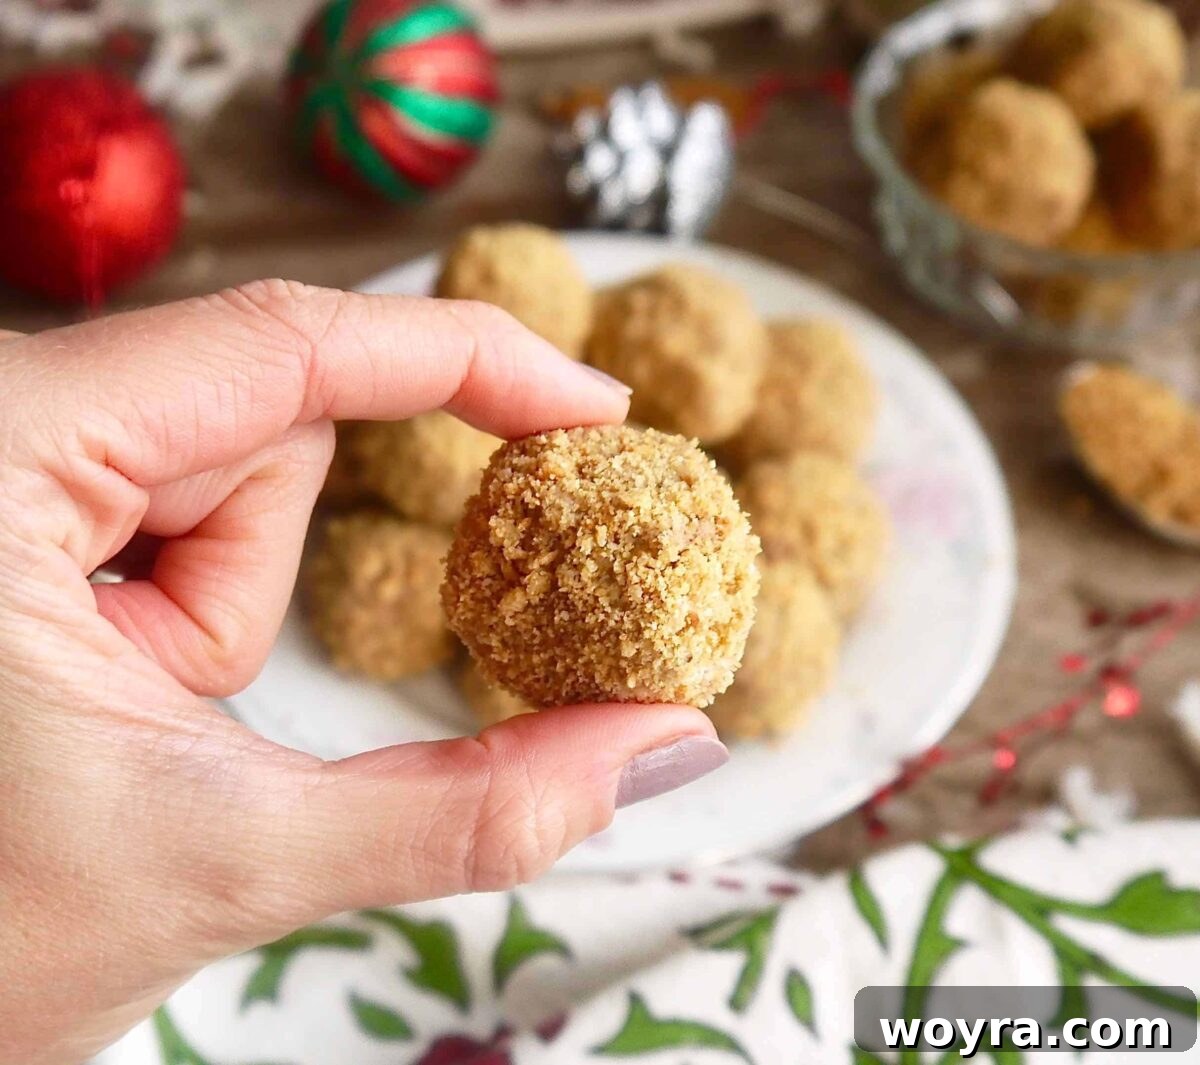
Indulge your sweet tooth with these exquisite Paleo Chocolate Mousse Truffles, a truly decadent yet health-conscious dessert. Crafted by chilling a rich dairy-free chocolate mousse, these delightful treats are then meticulously rolled into perfect balls and coated with a homemade blend of crumbled, grain-free cookies. Each bite offers a harmonious balance of creamy chocolate and a delightful textural crunch, making them an unforgettable experience for anyone seeking a healthier, yet utterly delicious, treat.
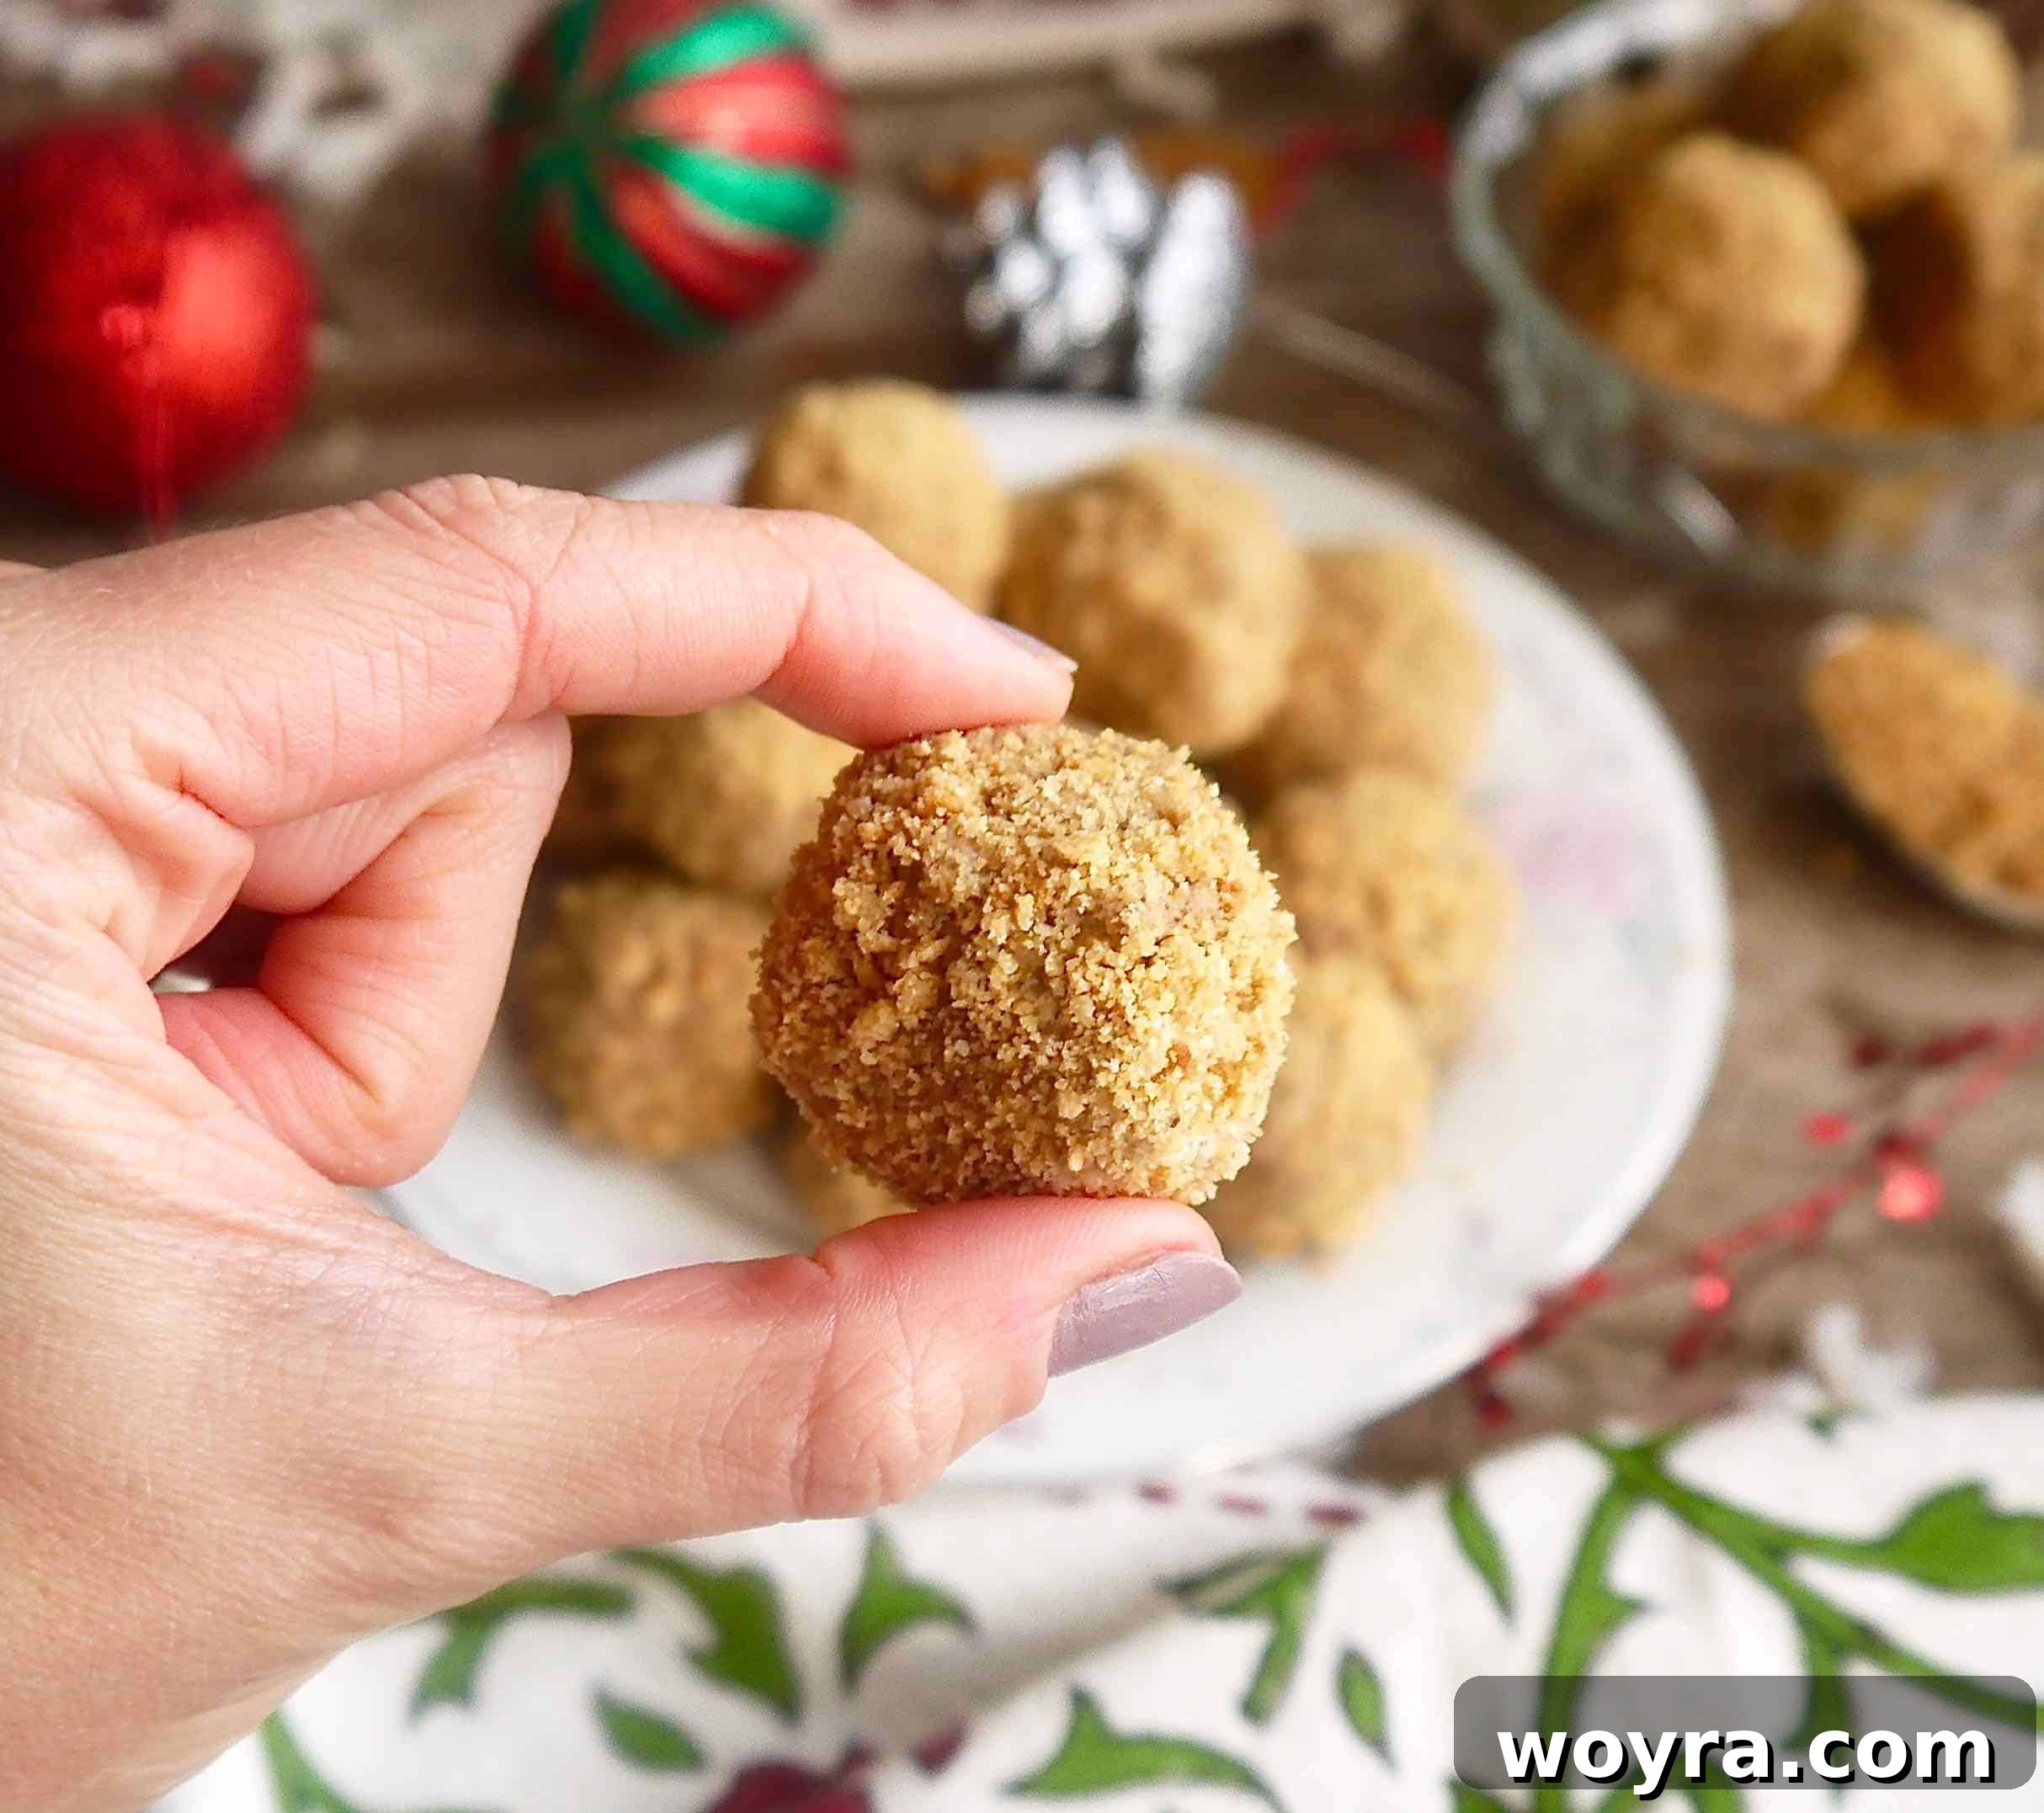
Prepare to fall in love with one of the most irresistible paleo chocolate desserts you’ll ever encounter! Imagine the luscious texture of a classic chocolate mousse, seamlessly combined with the bite-sized elegance of gourmet chocolate truffles. Now, picture all of that bliss in a form that is completely dairy-free, grain-free, and gluten-free. These Paleo Chocolate Mousse Truffles are a testament to how truly decadent healthy eating can be, without compromising on flavor or satisfaction.
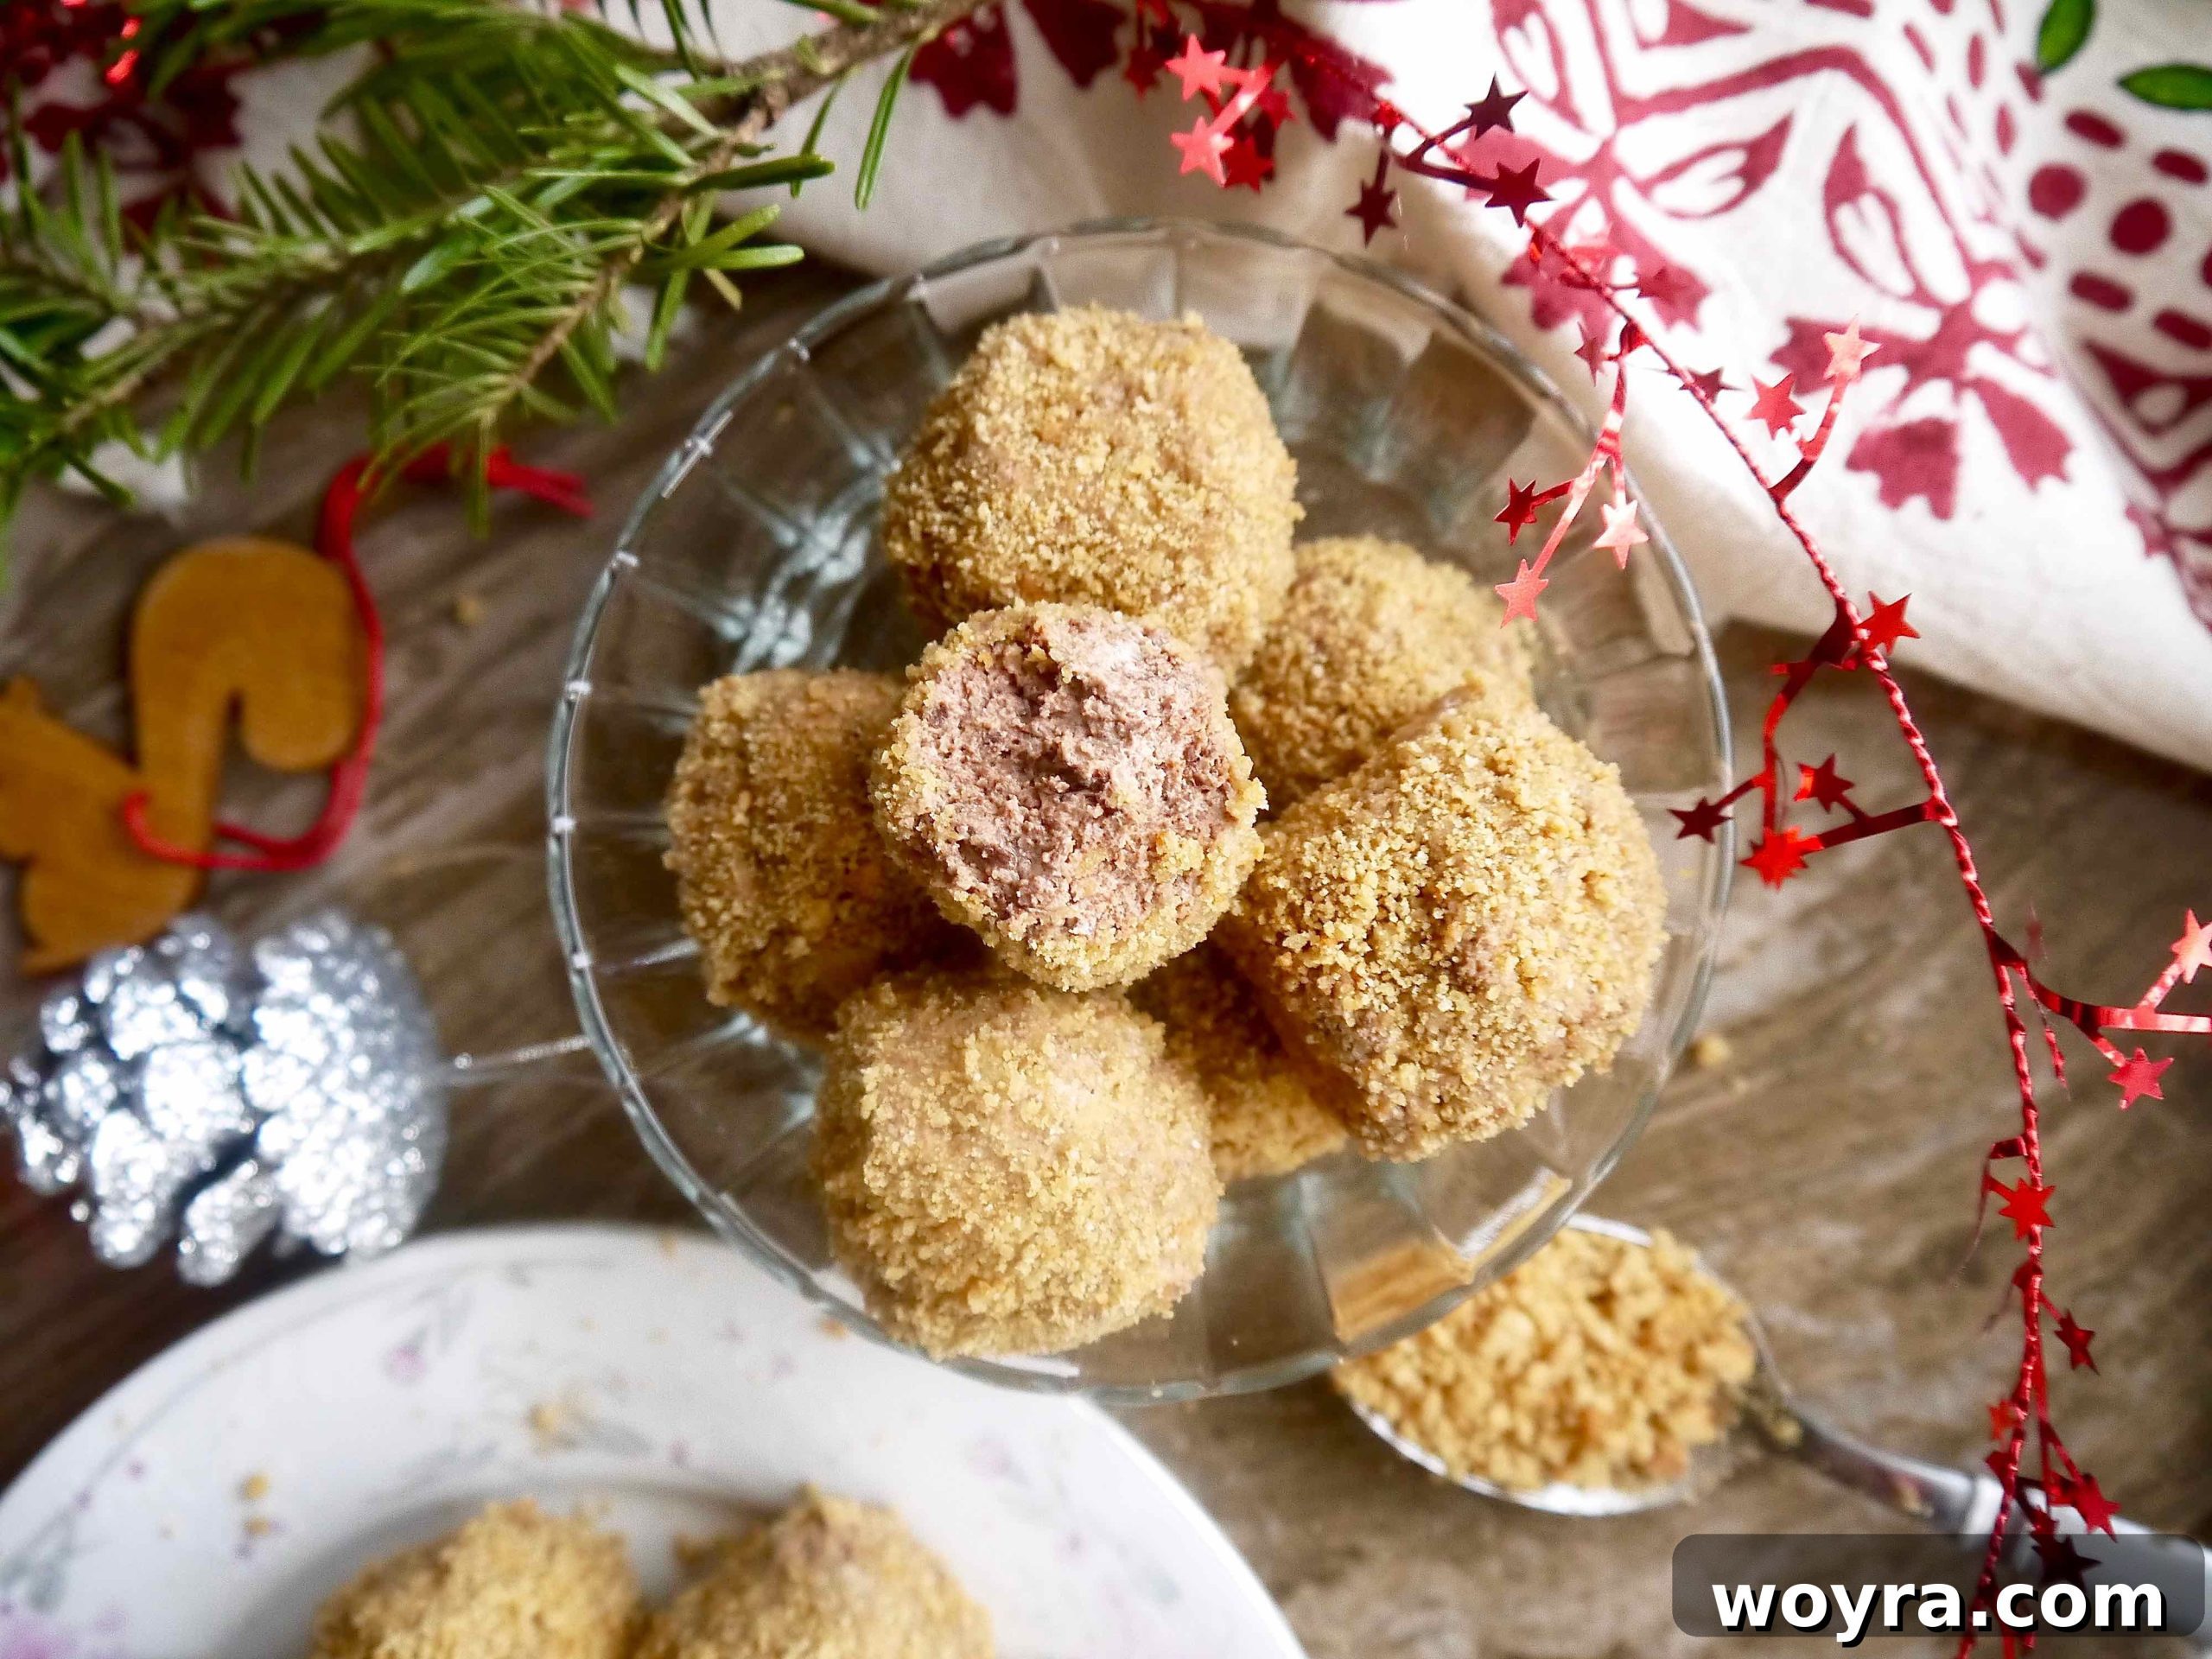
The journey to creating these dreamy truffles begins with a silky-smooth chocolate mousse, expertly prepared using rich coconut cream and premium dairy-free chocolate. This forms the luxurious heart of our truffles. Complementing this, we craft delicate homemade Paleo vanilla cookies, entirely gluten-free and bursting with natural flavor. Once baked to perfection, these cookies are crushed into fine, aromatic crumbs, ready to embrace the chilled mousse. The grand finale involves rolling the velvety mousse balls in these fragrant cookie crumbs, creating a masterpiece of texture and taste. The result is pure confectionary bliss, a dessert that’s not only guilt-free but also profoundly satisfying.
Why These Paleo Chocolate Mousse Truffles Are a Must-Try
These Paleo Chocolate Mousse Truffles aren’t just a dessert; they’re a revelation for anyone looking to enjoy sweet treats without compromise. Here’s why this recipe stands out as a true gem in the world of healthy indulgence:
- Uncompromisingly Allergy-Friendly: In an age where dietary restrictions are common, these truffles shine as a beacon of inclusivity. They are meticulously crafted without dairy or gluten, making them a safe and delightful option for those with lactose intolerance, celiac disease, or general sensitivities to these common allergens. You can share them with confidence, knowing everyone can partake in the joy.
- Certified Paleo Perfection: Adhering strictly to Paleo principles, every ingredient in this recipe is thoughtfully selected to be wholesome and natural. Free from grains, legumes, refined sugars, and industrial oils, these truffles are a pure expression of ancestral eating, ensuring your dessert supports your well-being rather than undermining it.
- Healthier, Real Food Ingredients: Unlike many conventional desserts laden with artificial flavors, preservatives, and unhealthy fats, our Paleo Chocolate Mousse Truffles are a celebration of real, nourishing ingredients. By swapping processed components for wholesome alternatives like coconut cream, almond flour, and coconut sugar, we create a dessert that’s not just delicious but also contributes to a balanced diet. This recipe elevates the concept of a healthier treat, offering a guilt-free indulgence that truly satisfies.
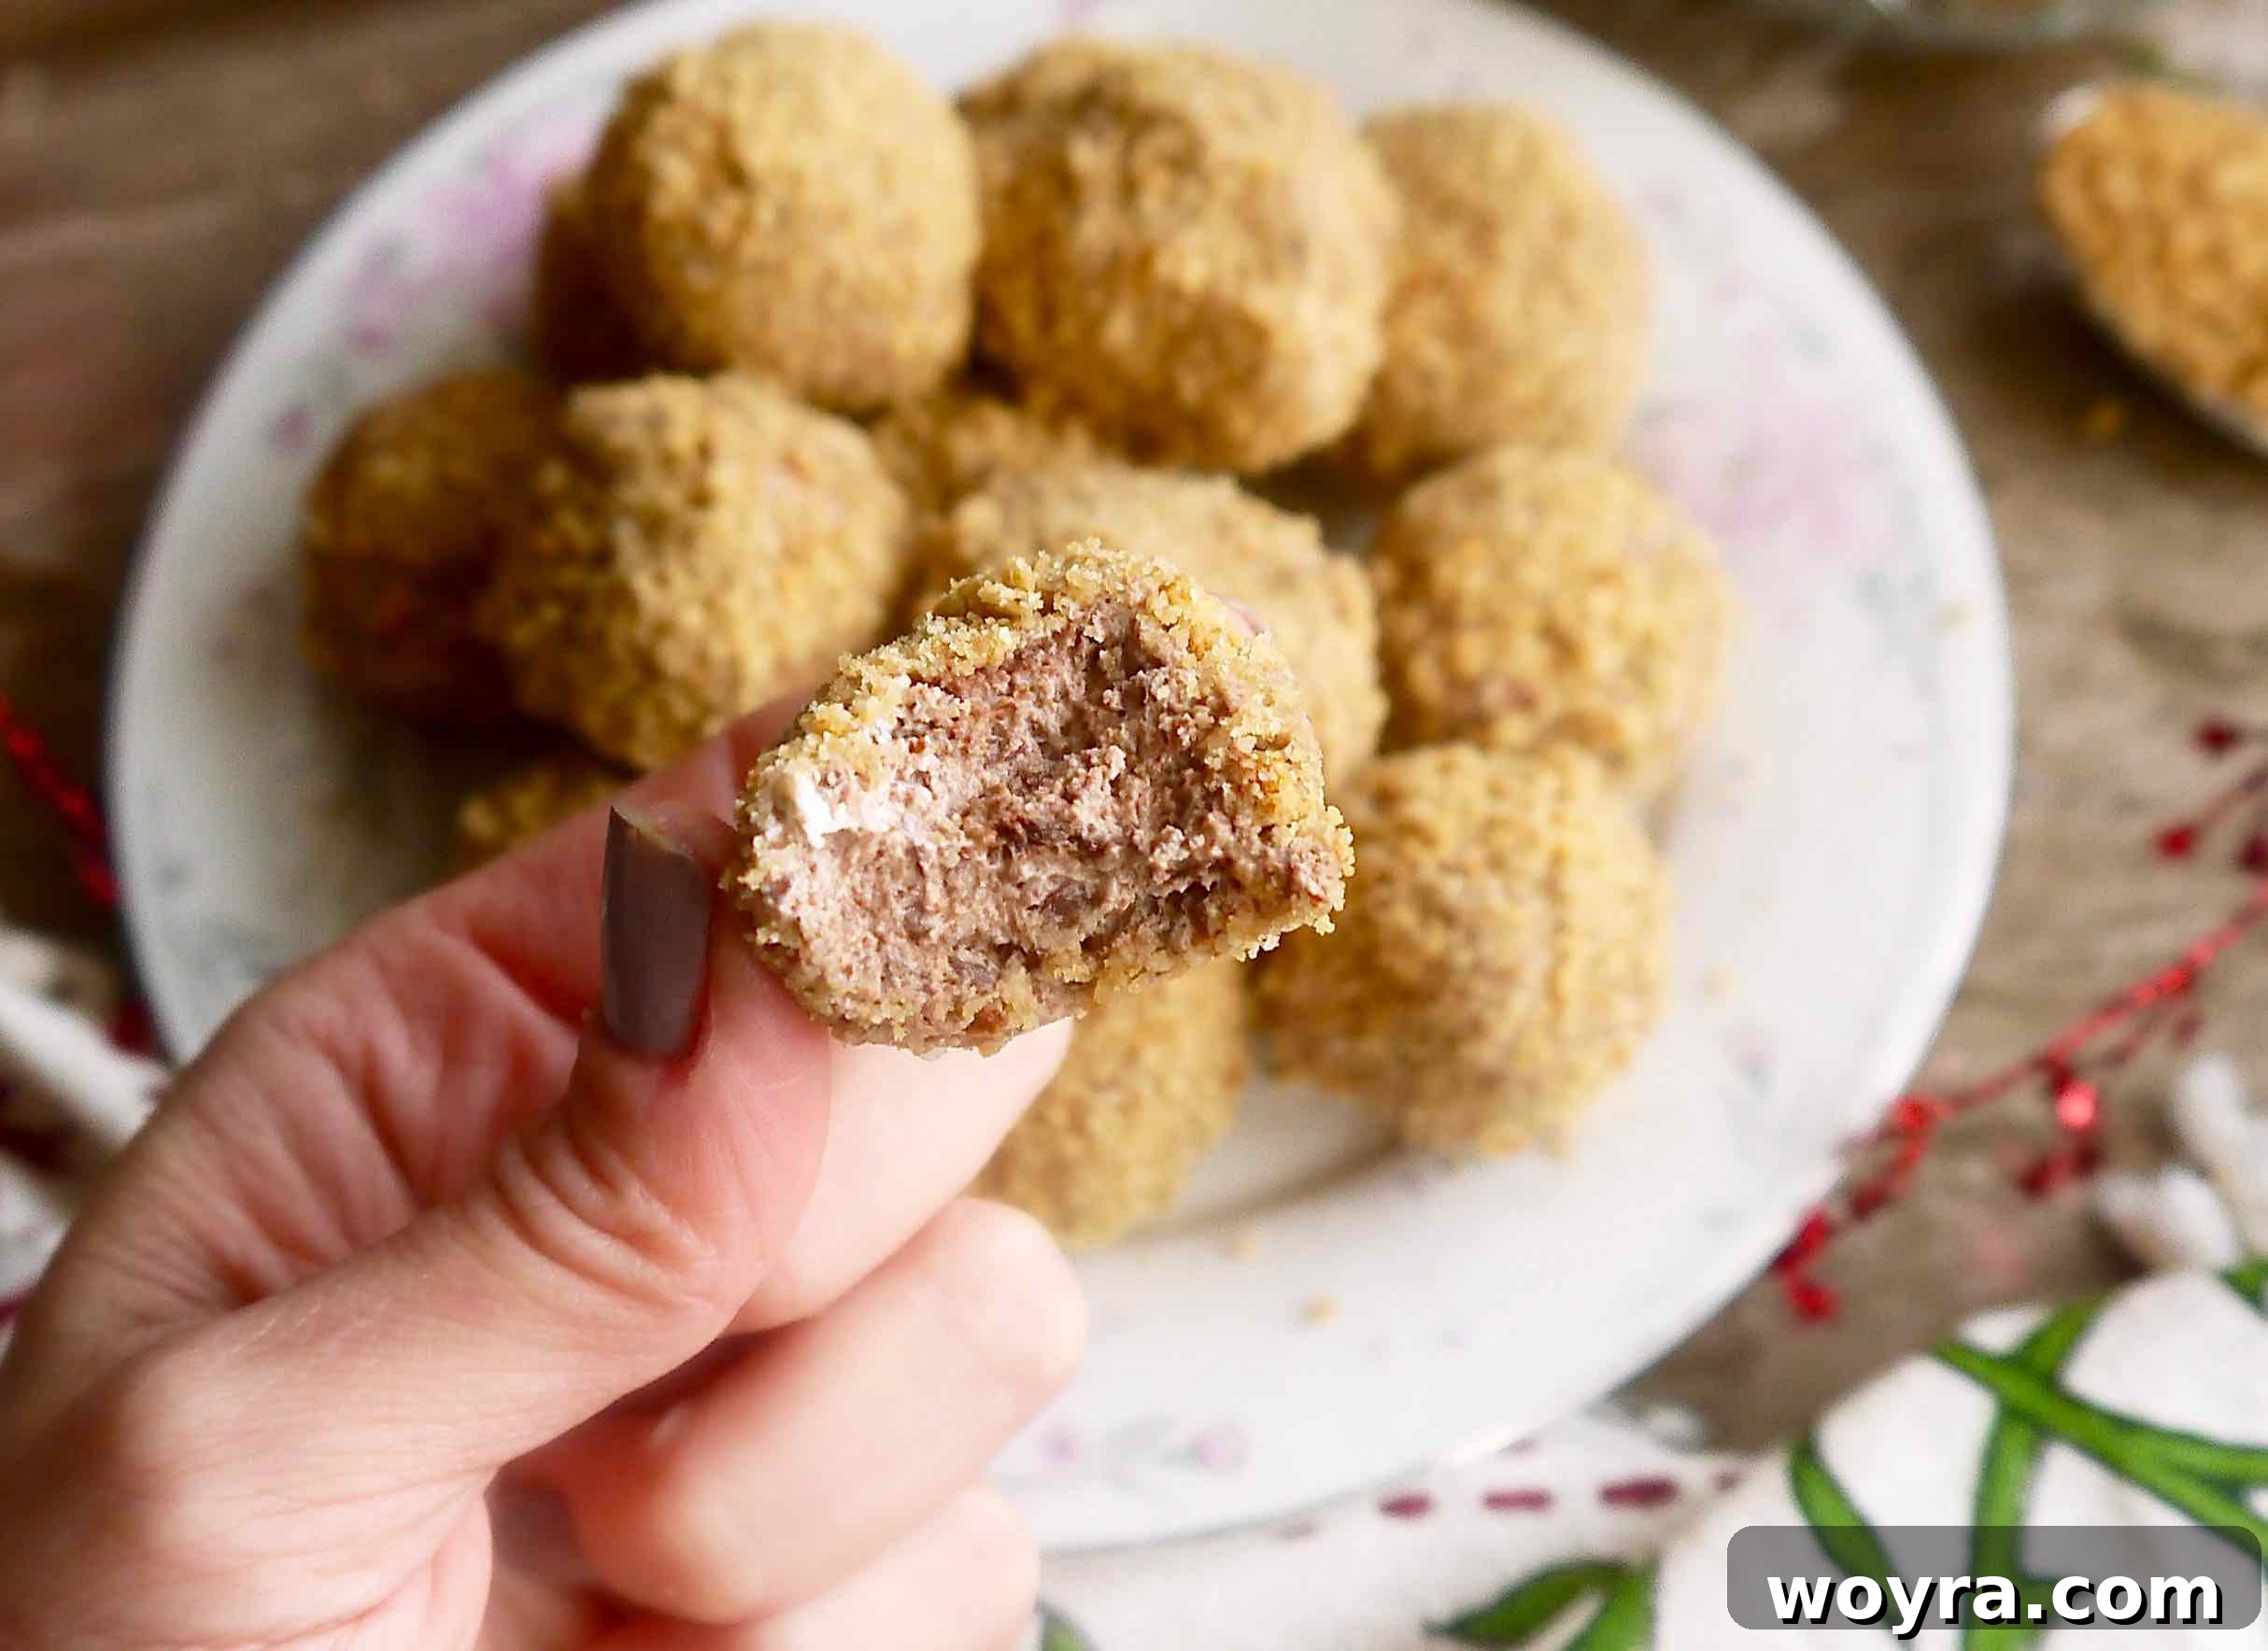
- Irresistibly Delicious Flavor Profile: Prepare for a sensory explosion! These truffles boast a deep, rich dark chocolate mousse center, enveloped in the comforting, slightly sweet crunch of vanilla-infused grain-free cookies. The combination is a symphony of flavors and textures that tantalize the palate, providing a gourmet experience that belies its healthy credentials. The quality of ingredients truly shines through, offering a sophisticated taste that will impress even the most discerning dessert connoisseur.
- Addictively Good, Yet Wholesome: Be warned: these paleo chocolate truffles are incredibly addicting! Their perfect balance of sweetness, richness, and texture makes it hard to stop at just one. They evoke the same irresistible allure as popular holiday treats, but with the added benefit of being made from wholesome, nourishing ingredients. They are the ideal treat for satisfying intense chocolate cravings in a way that aligns with a health-conscious lifestyle, proving that healthy can be utterly captivating.
The Secret Behind Decadent Paleo Truffles: Key Ingredients
Creating these magical Paleo Chocolate Mousse Truffles requires a careful selection of high-quality ingredients that adhere to Paleo principles while delivering maximum flavor and perfect texture. Each component plays a vital role in transforming simple elements into an extraordinary dessert:
- Coconut Oil: This versatile fat is crucial for both the cookies and the mousse. Opt for extra virgin coconut oil, as it imparts a less pronounced coconut flavor, allowing the rich chocolate and delicate vanilla notes to shine through. It also provides healthy medium-chain triglycerides.
- Coconut Sugar: A fantastic natural sweetener with a lower glycemic index compared to traditional sugars. Its caramel-like notes complement the chocolate beautifully without being overly sweet, providing a healthier alternative that keeps the recipe Paleo-friendly.
- Apple Cider Vinegar: A secret ingredient in our cookies! Just a touch of apple cider vinegar reacts with the baking soda to create a light and airy texture in the grain-free cookies, ensuring they are perfectly crisp and crumbly. Any brand will work effectively.
- Egg: Essential for binding the cookie dough together, the egg provides structure and moisture, allowing the cookies to hold their shape and develop a tender crumb once baked.
- Vanilla Extract: A pantry staple that adds a warm, aromatic depth to the Paleo cookies. Its sweet, fragrant notes enhance the overall flavor profile, creating a delightful contrast with the dark chocolate mousse.
- Almond Flour: The primary flour for our grain-free cookies. Blanched almond flour is highly recommended for baking, as its fine texture ensures a smooth, consistent dough and a tender, delicate crumb, far superior to coarser almond meal.
- Coconut Flour: This highly absorbent flour is used in conjunction with almond flour to achieve the ideal cookie texture. It helps balance the richness of the almond flour and contributes to a perfectly soft yet sturdy cookie.
- Baking Soda: Working in harmony with the apple cider vinegar, baking soda is the leavening agent that helps our cookies rise slightly and become wonderfully light and crisp, making them perfect for crushing into crumbs.
- Dairy-Free Chocolate Chips: The star of the show for the mousse! Choose a high-quality dairy-free chocolate that you genuinely love, as its flavor will be central to the truffle experience. The richness and quality of your chocolate will make all the difference in the final taste of your mousse.
- Coconut Cream: This is the foundation of our unbelievably creamy dairy-free mousse. For the best results, select coconut cream that contains no gums or preservatives. These additives can interfere with the cream’s ability to whip properly and can impart an unwanted texture or taste. A pure, rich coconut cream is key to a velvety mousse.
- Honey: A natural, unrefined sweetener used in the chocolate mousse. Raw honey adds a subtle sweetness and a beautiful depth of flavor that complements the chocolate without overpowering it.
- Olive Oil: A light-flavored extra virgin olive oil is used to help achieve a silky, smooth consistency when melting the dairy-free chocolate, preventing it from seizing and ensuring a luxurious texture for the mousse.
For a precise breakdown of quantities and detailed measurements, please refer to the comprehensive recipe card located further down below.
Crafting Your Paleo Chocolate Mousse Truffles: A Step-by-Step Guide
Embark on the delightful journey of creating these exquisite Paleo Chocolate Mousse Truffles. This recipe is thoughtfully divided into three core stages: first, preparing the tender Paleo vanilla cookies; second, whipping up the velvety Paleo chocolate mousse; and finally, combining these elements by rolling the chilled mousse into balls and coating them generously in the delicious cookie crumbs. Each step is designed for ease and enjoyment, promising a truly rewarding baking experience.
Step 1: Master the Art of Paleo Vanilla Cookies
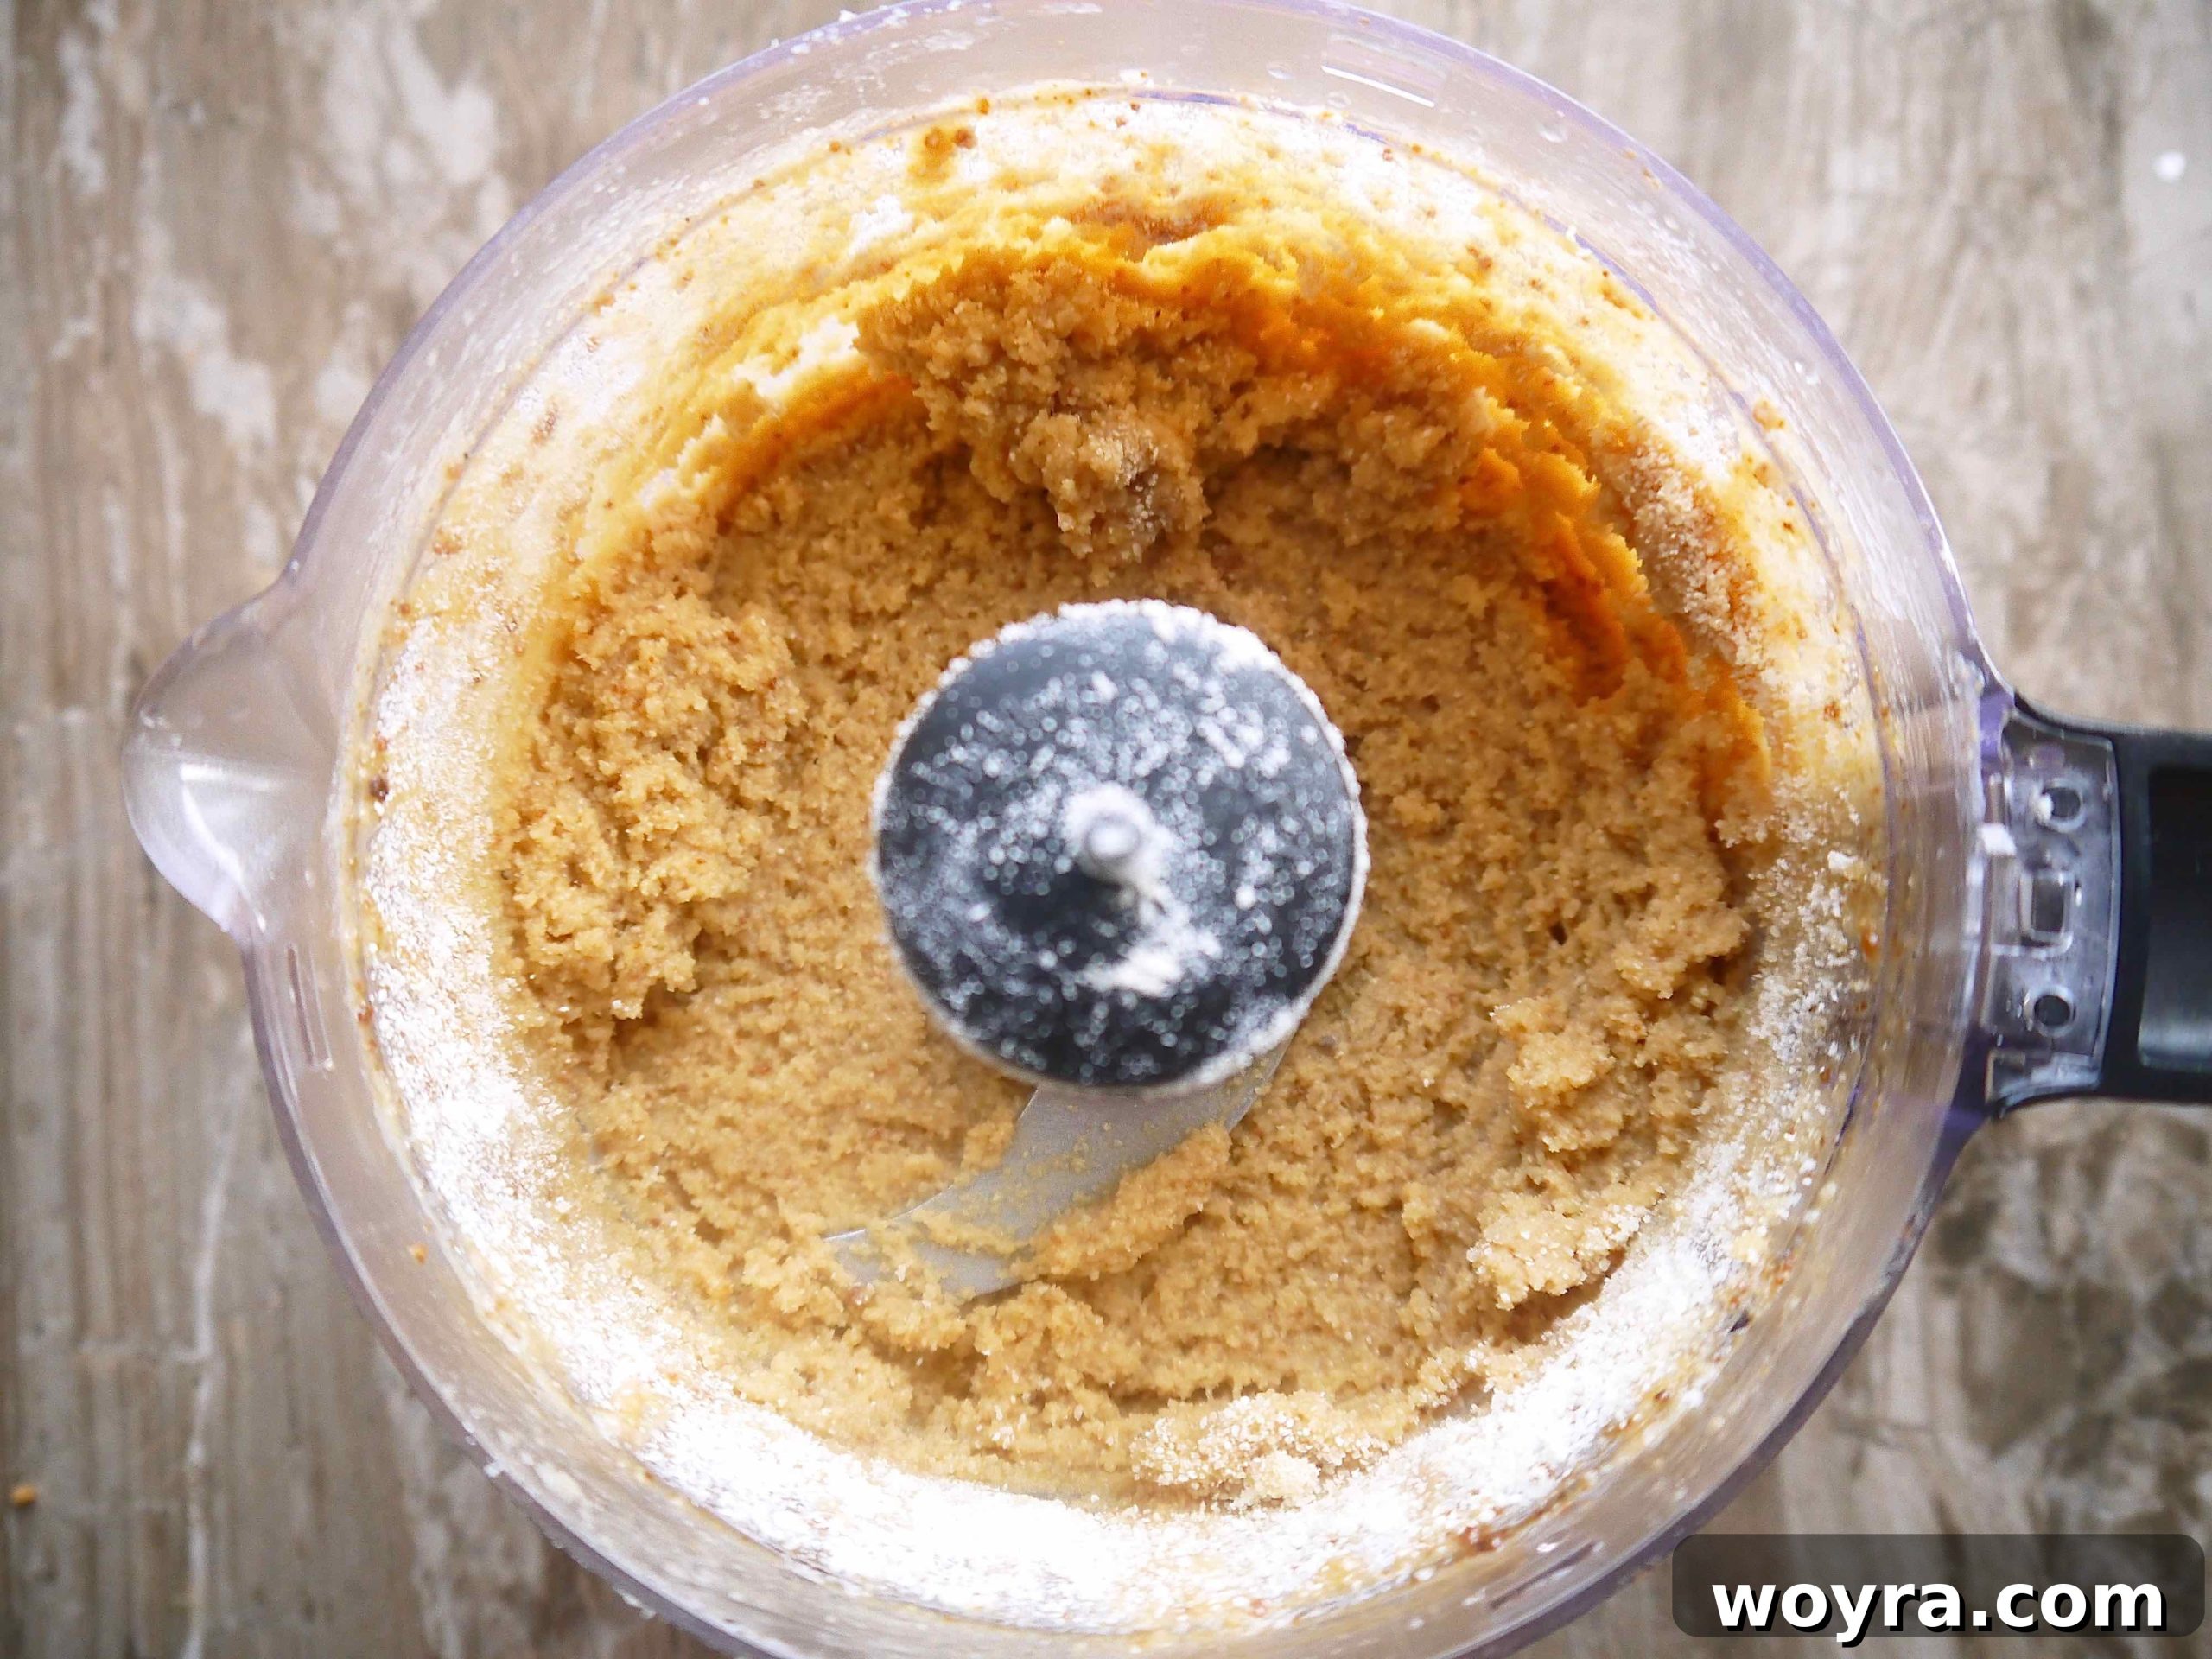
- Prepare the Cookie Dough: Begin by combining your wet and dry ingredients. For optimal consistency and ease, I highly recommend using a food processor to mix the dough until it’s thoroughly combined and forms a cohesive mass. This method ensures a uniform texture, which is crucial for perfect cookies.
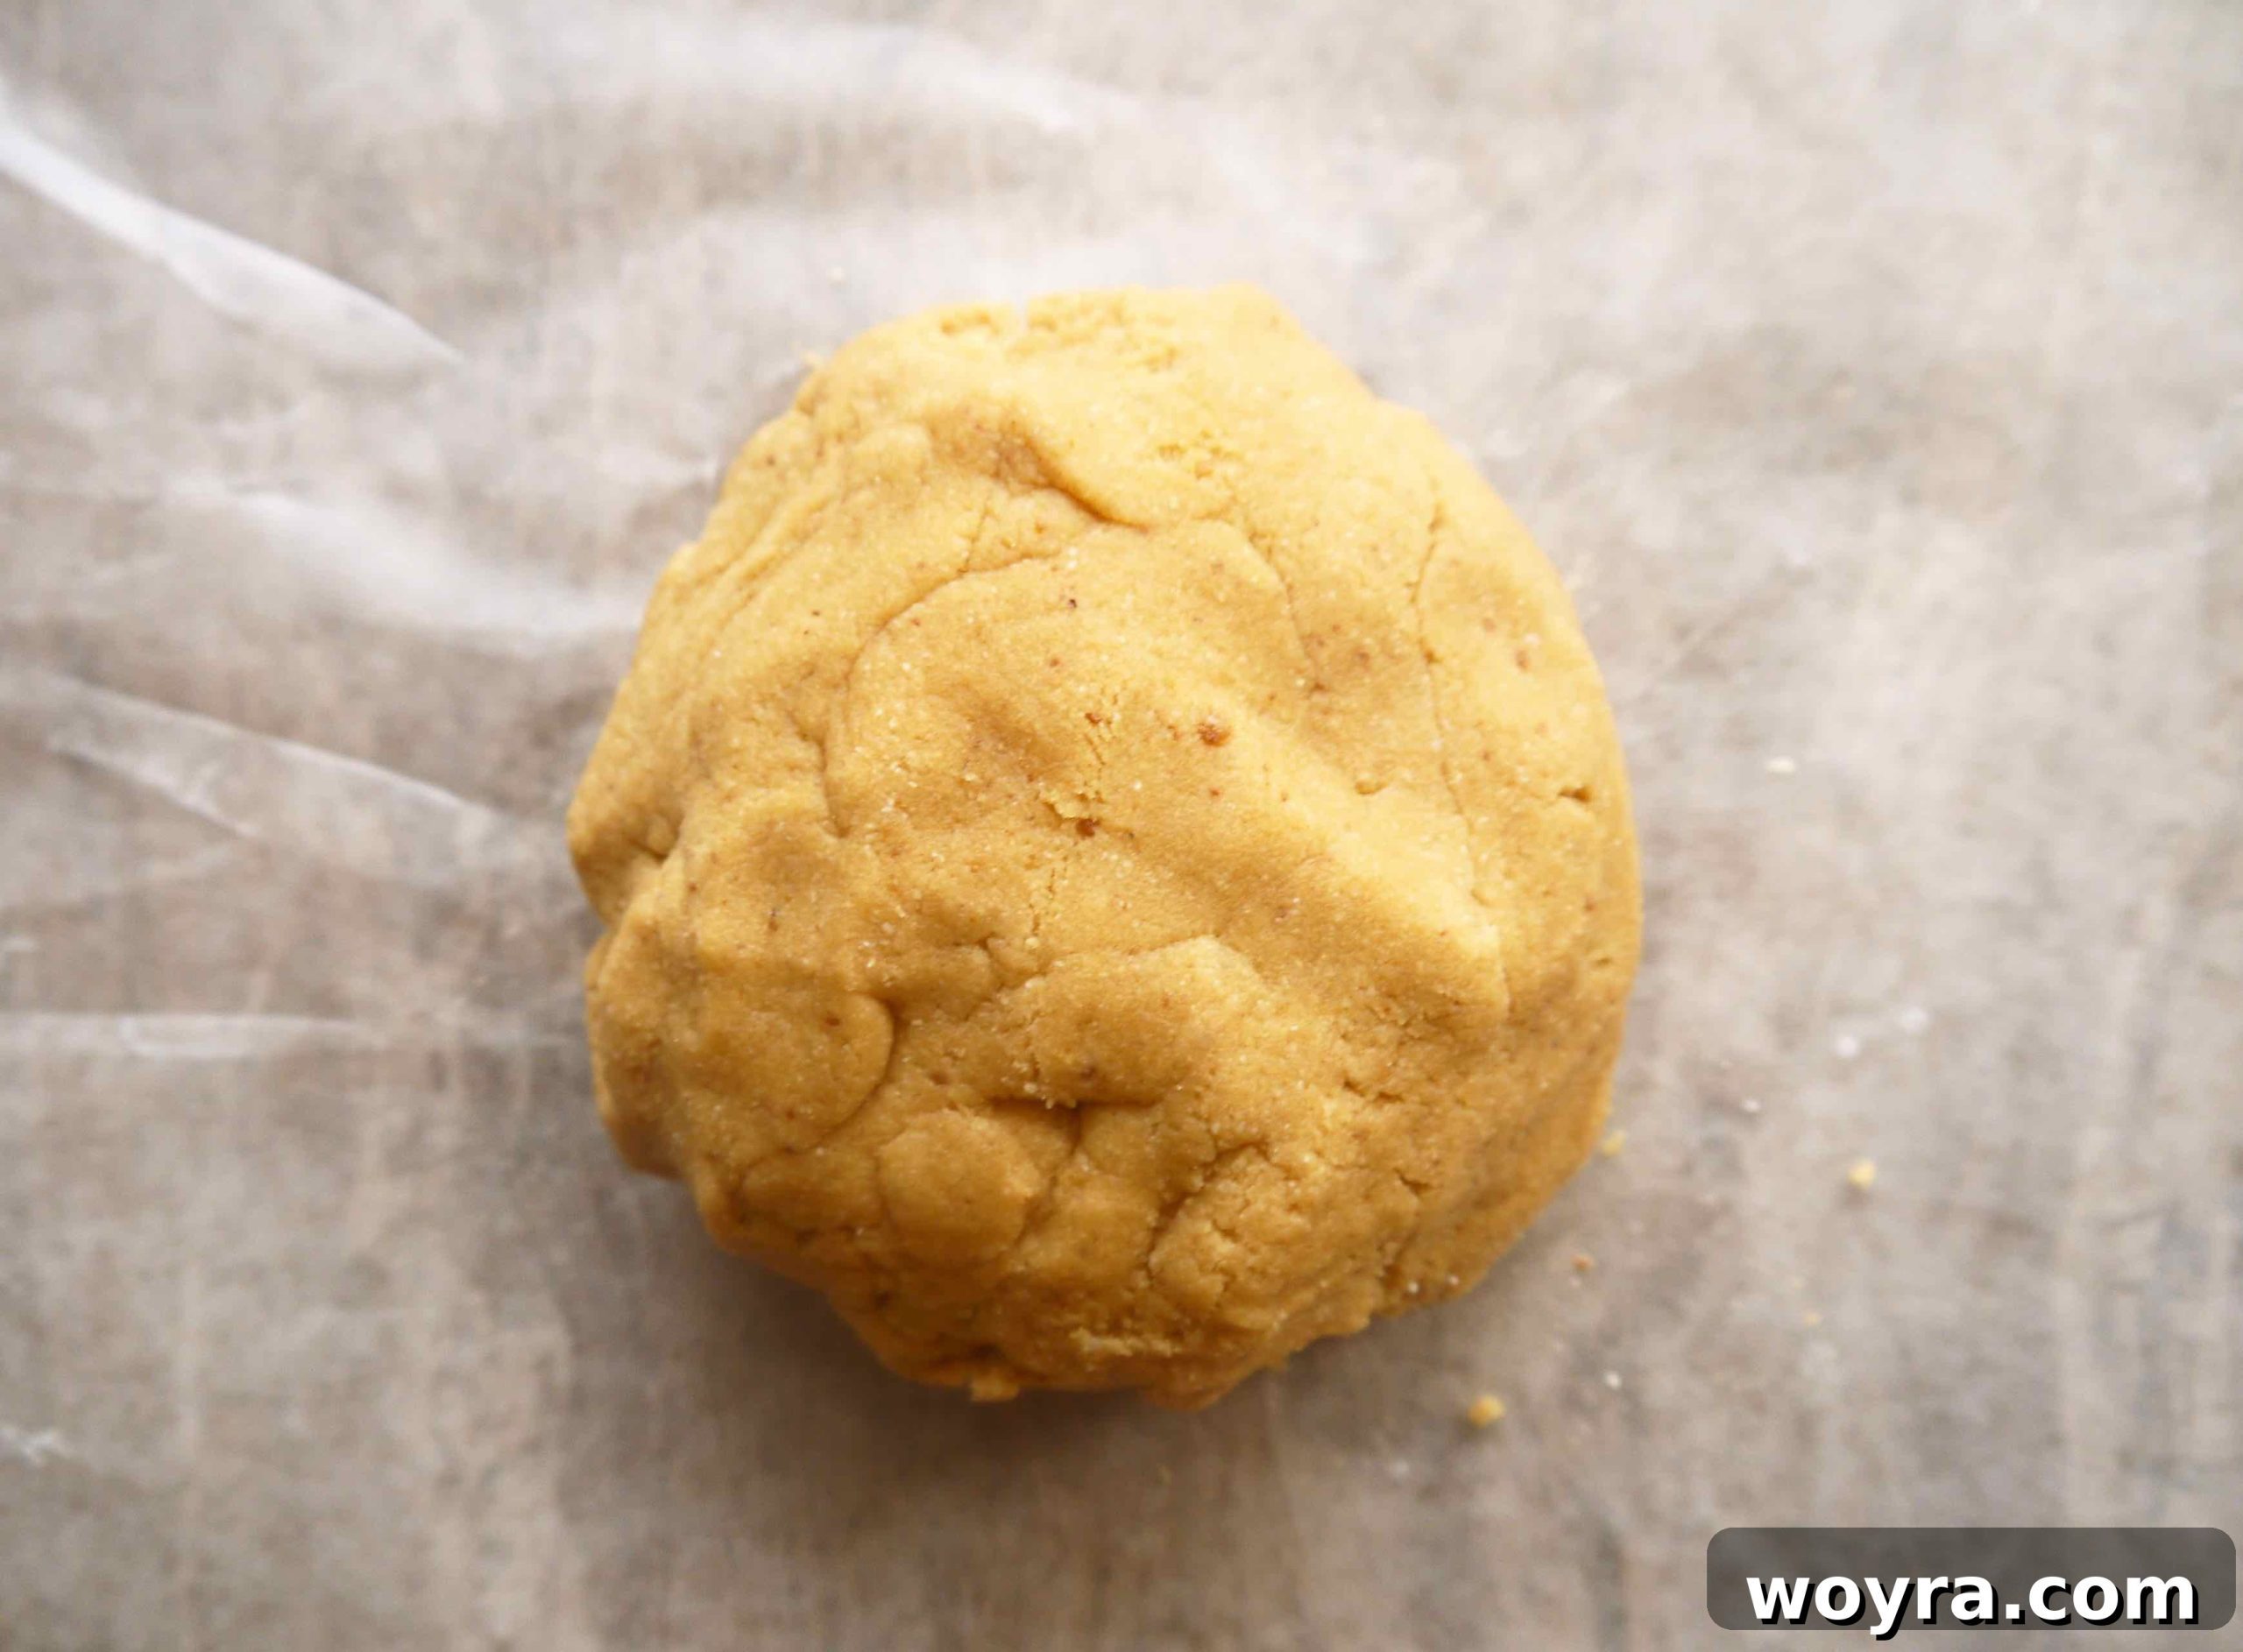
2. Shape the Cookies: Once the dough is ready, gently roll it into a neat ball. Place this dough ball between two sheets of wax paper. Using a rolling pin, carefully roll the dough out to an even thickness, aiming for approximately 1/4 inch. For uniform and charming mini cookies, use the rim of a shot glass or a small round cookie cutter to cut out individual shapes from the rolled dough. Arrange these delicate circles onto your prepared baking sheet.
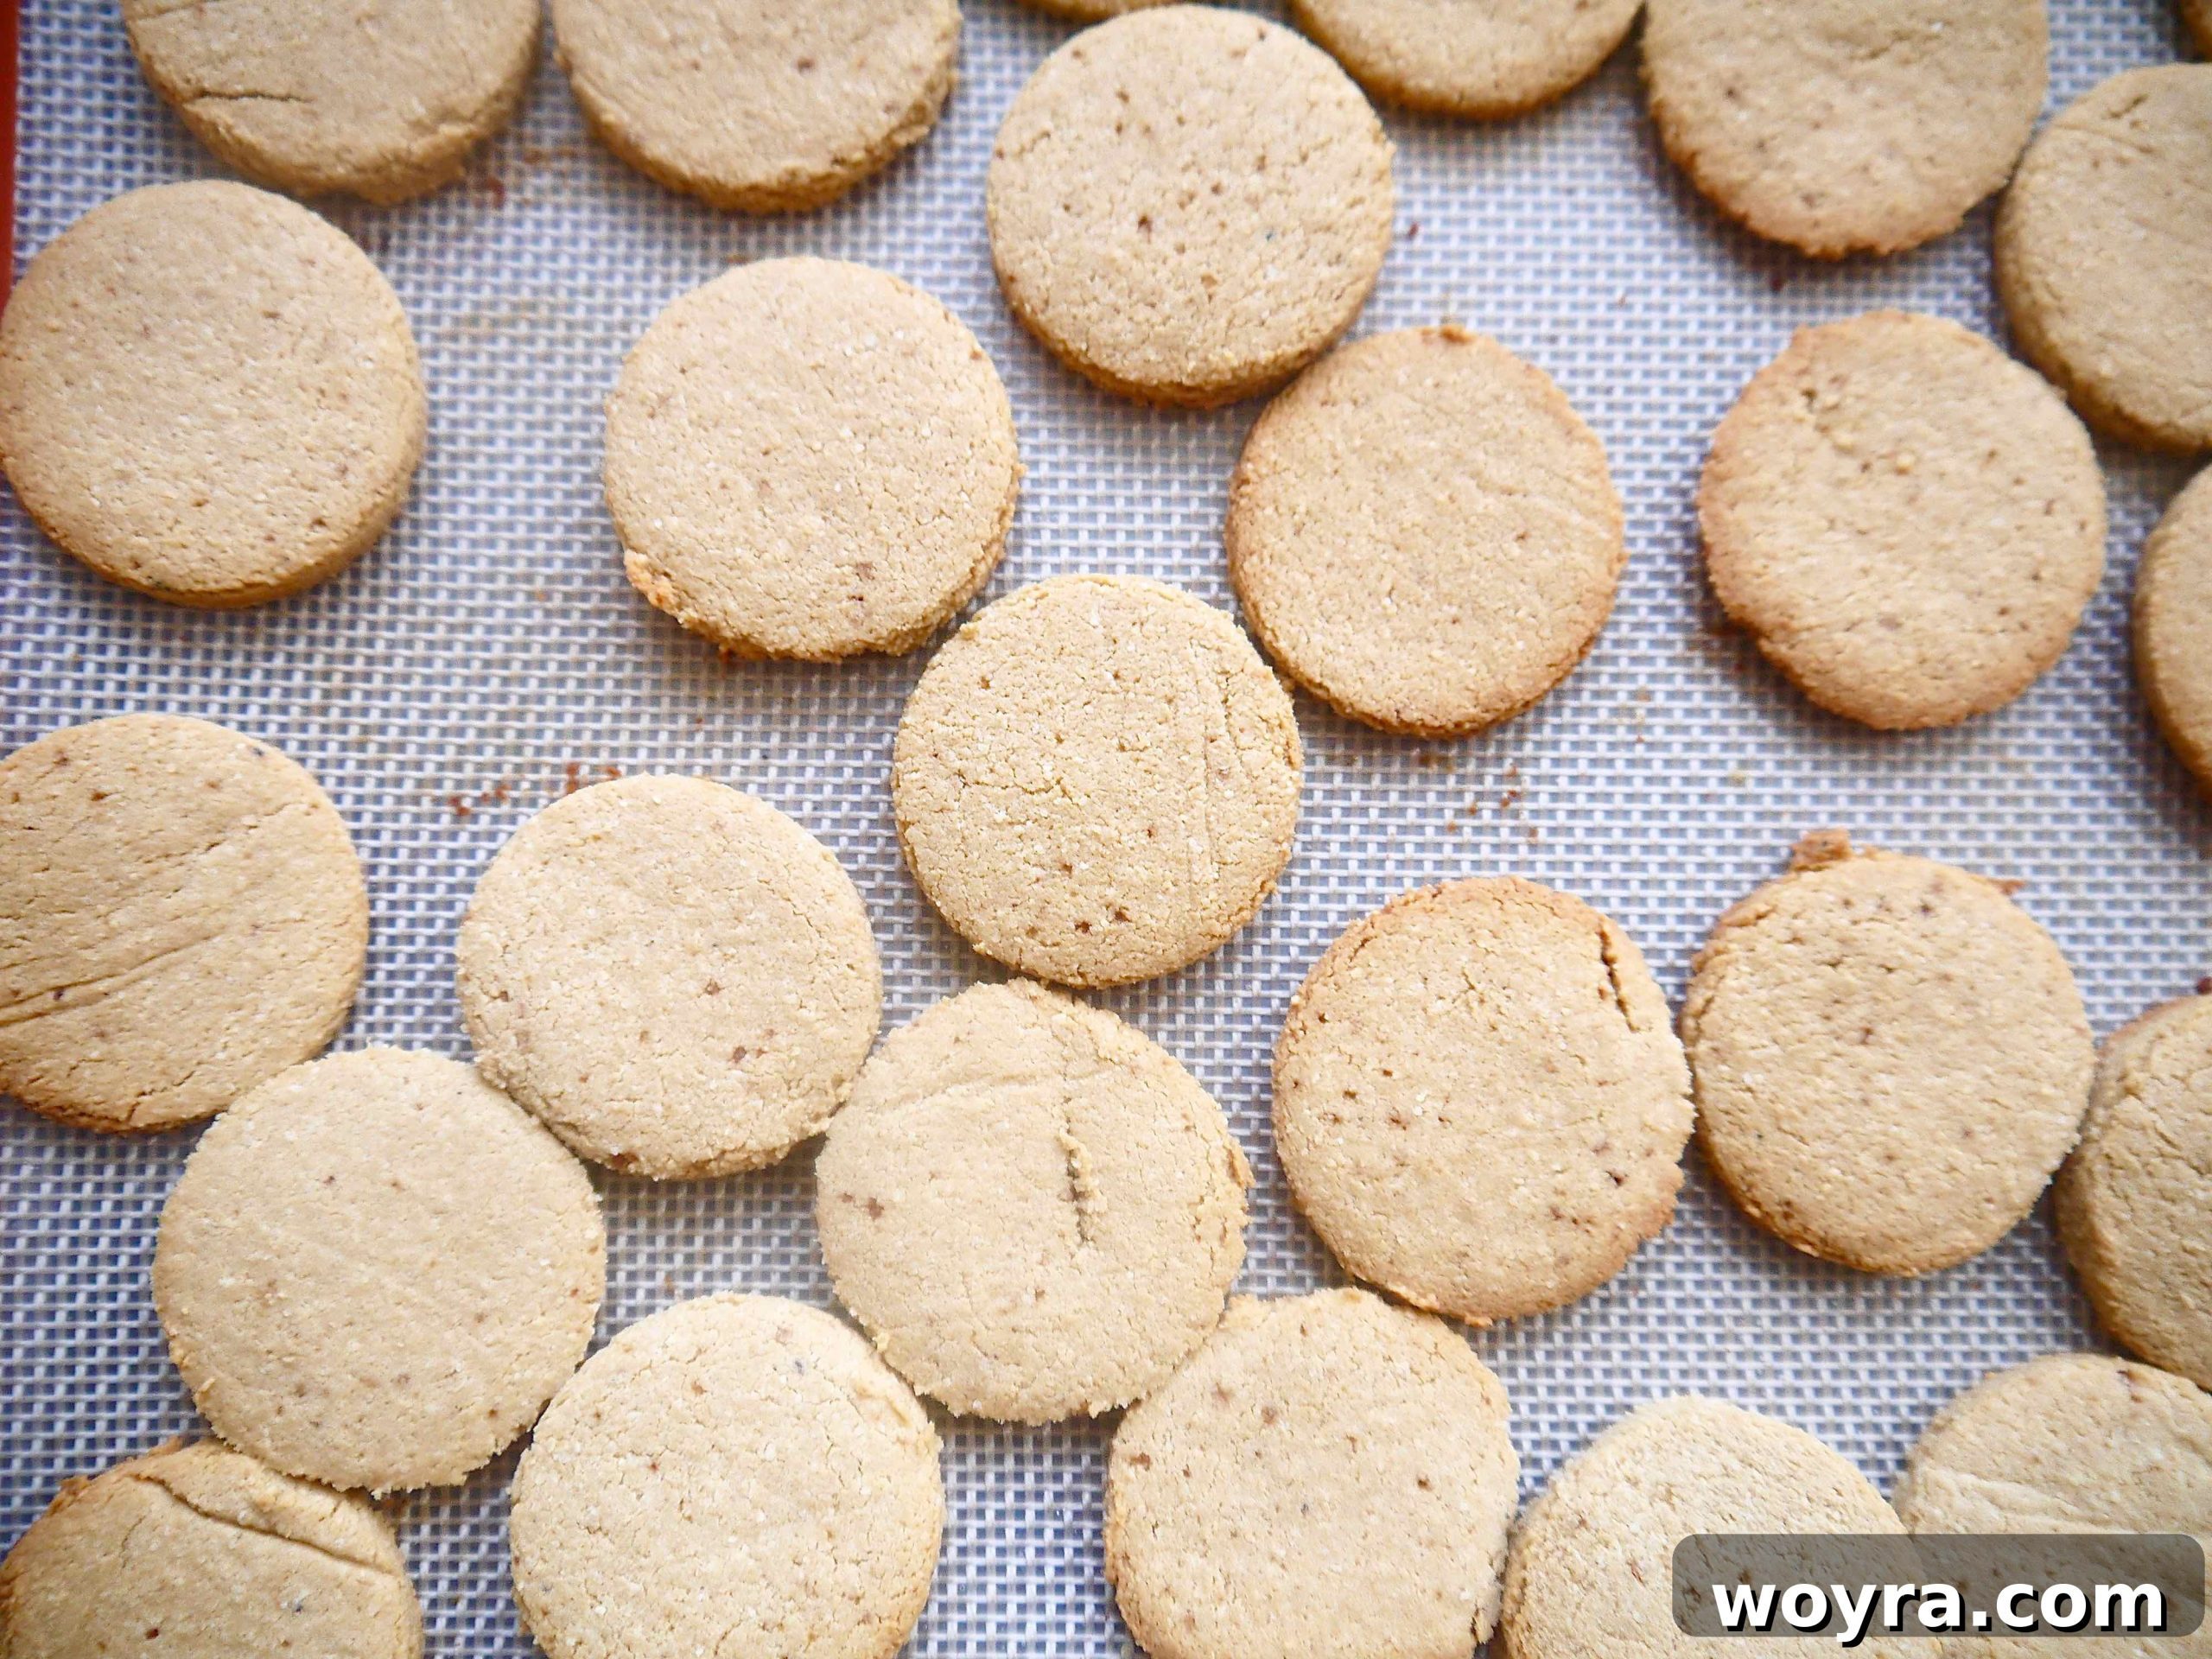
3. Bake to Perfection: Transfer your cookie sheet to the preheated oven and bake the cookies until they are lightly golden around the edges and firm to the touch. The baking time will vary, so keep a close eye on them to prevent over-browning. Once baked, allow them to cool completely on the baking sheet; this is crucial for them to crisp up properly, making them ideal for crushing.
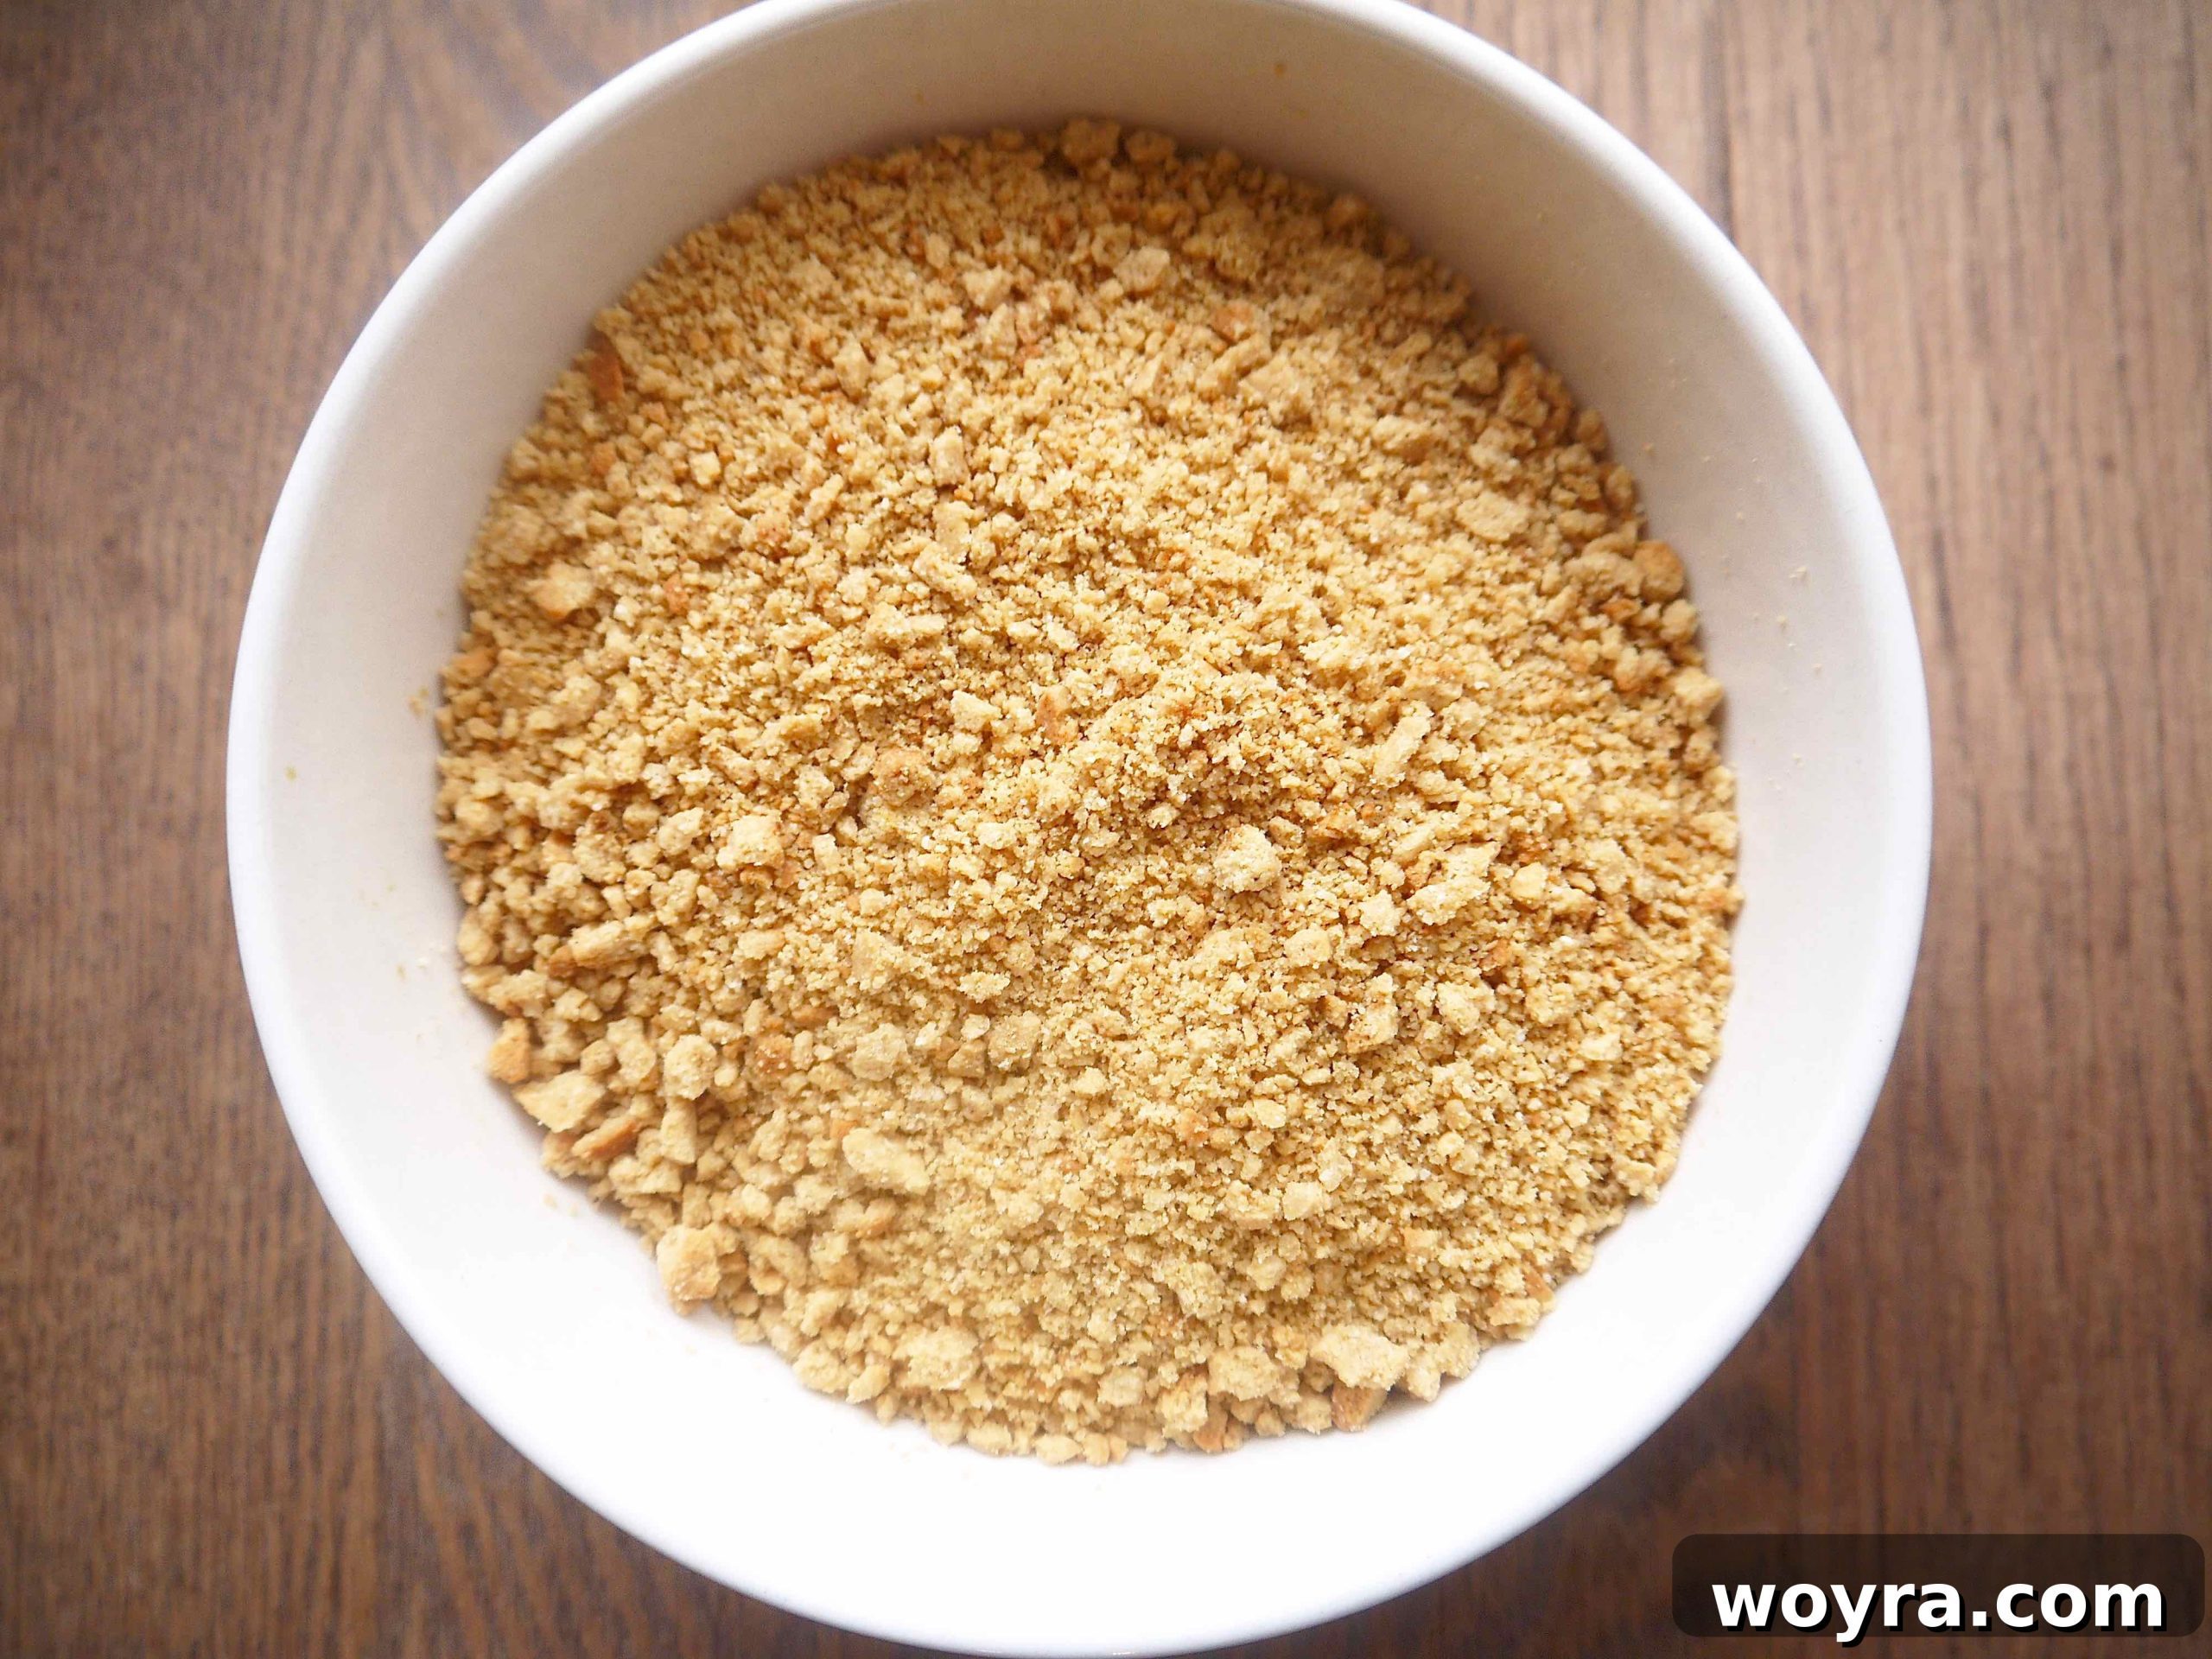
4. Crumble the Cookies: After the cookies have cooled entirely and achieved their desired crispness, it’s time to turn them into crumbs. Place the cooled cookies into a food processor and pulse until they form fine, even crumbs. Alternatively, you can place them in a zip-top bag and crush them with a rolling pin. Transfer these fragrant cookie crumbs into a shallow bowl, setting them aside for the final assembly.
Step 2: Conjure the Creamy Paleo Chocolate Mousse
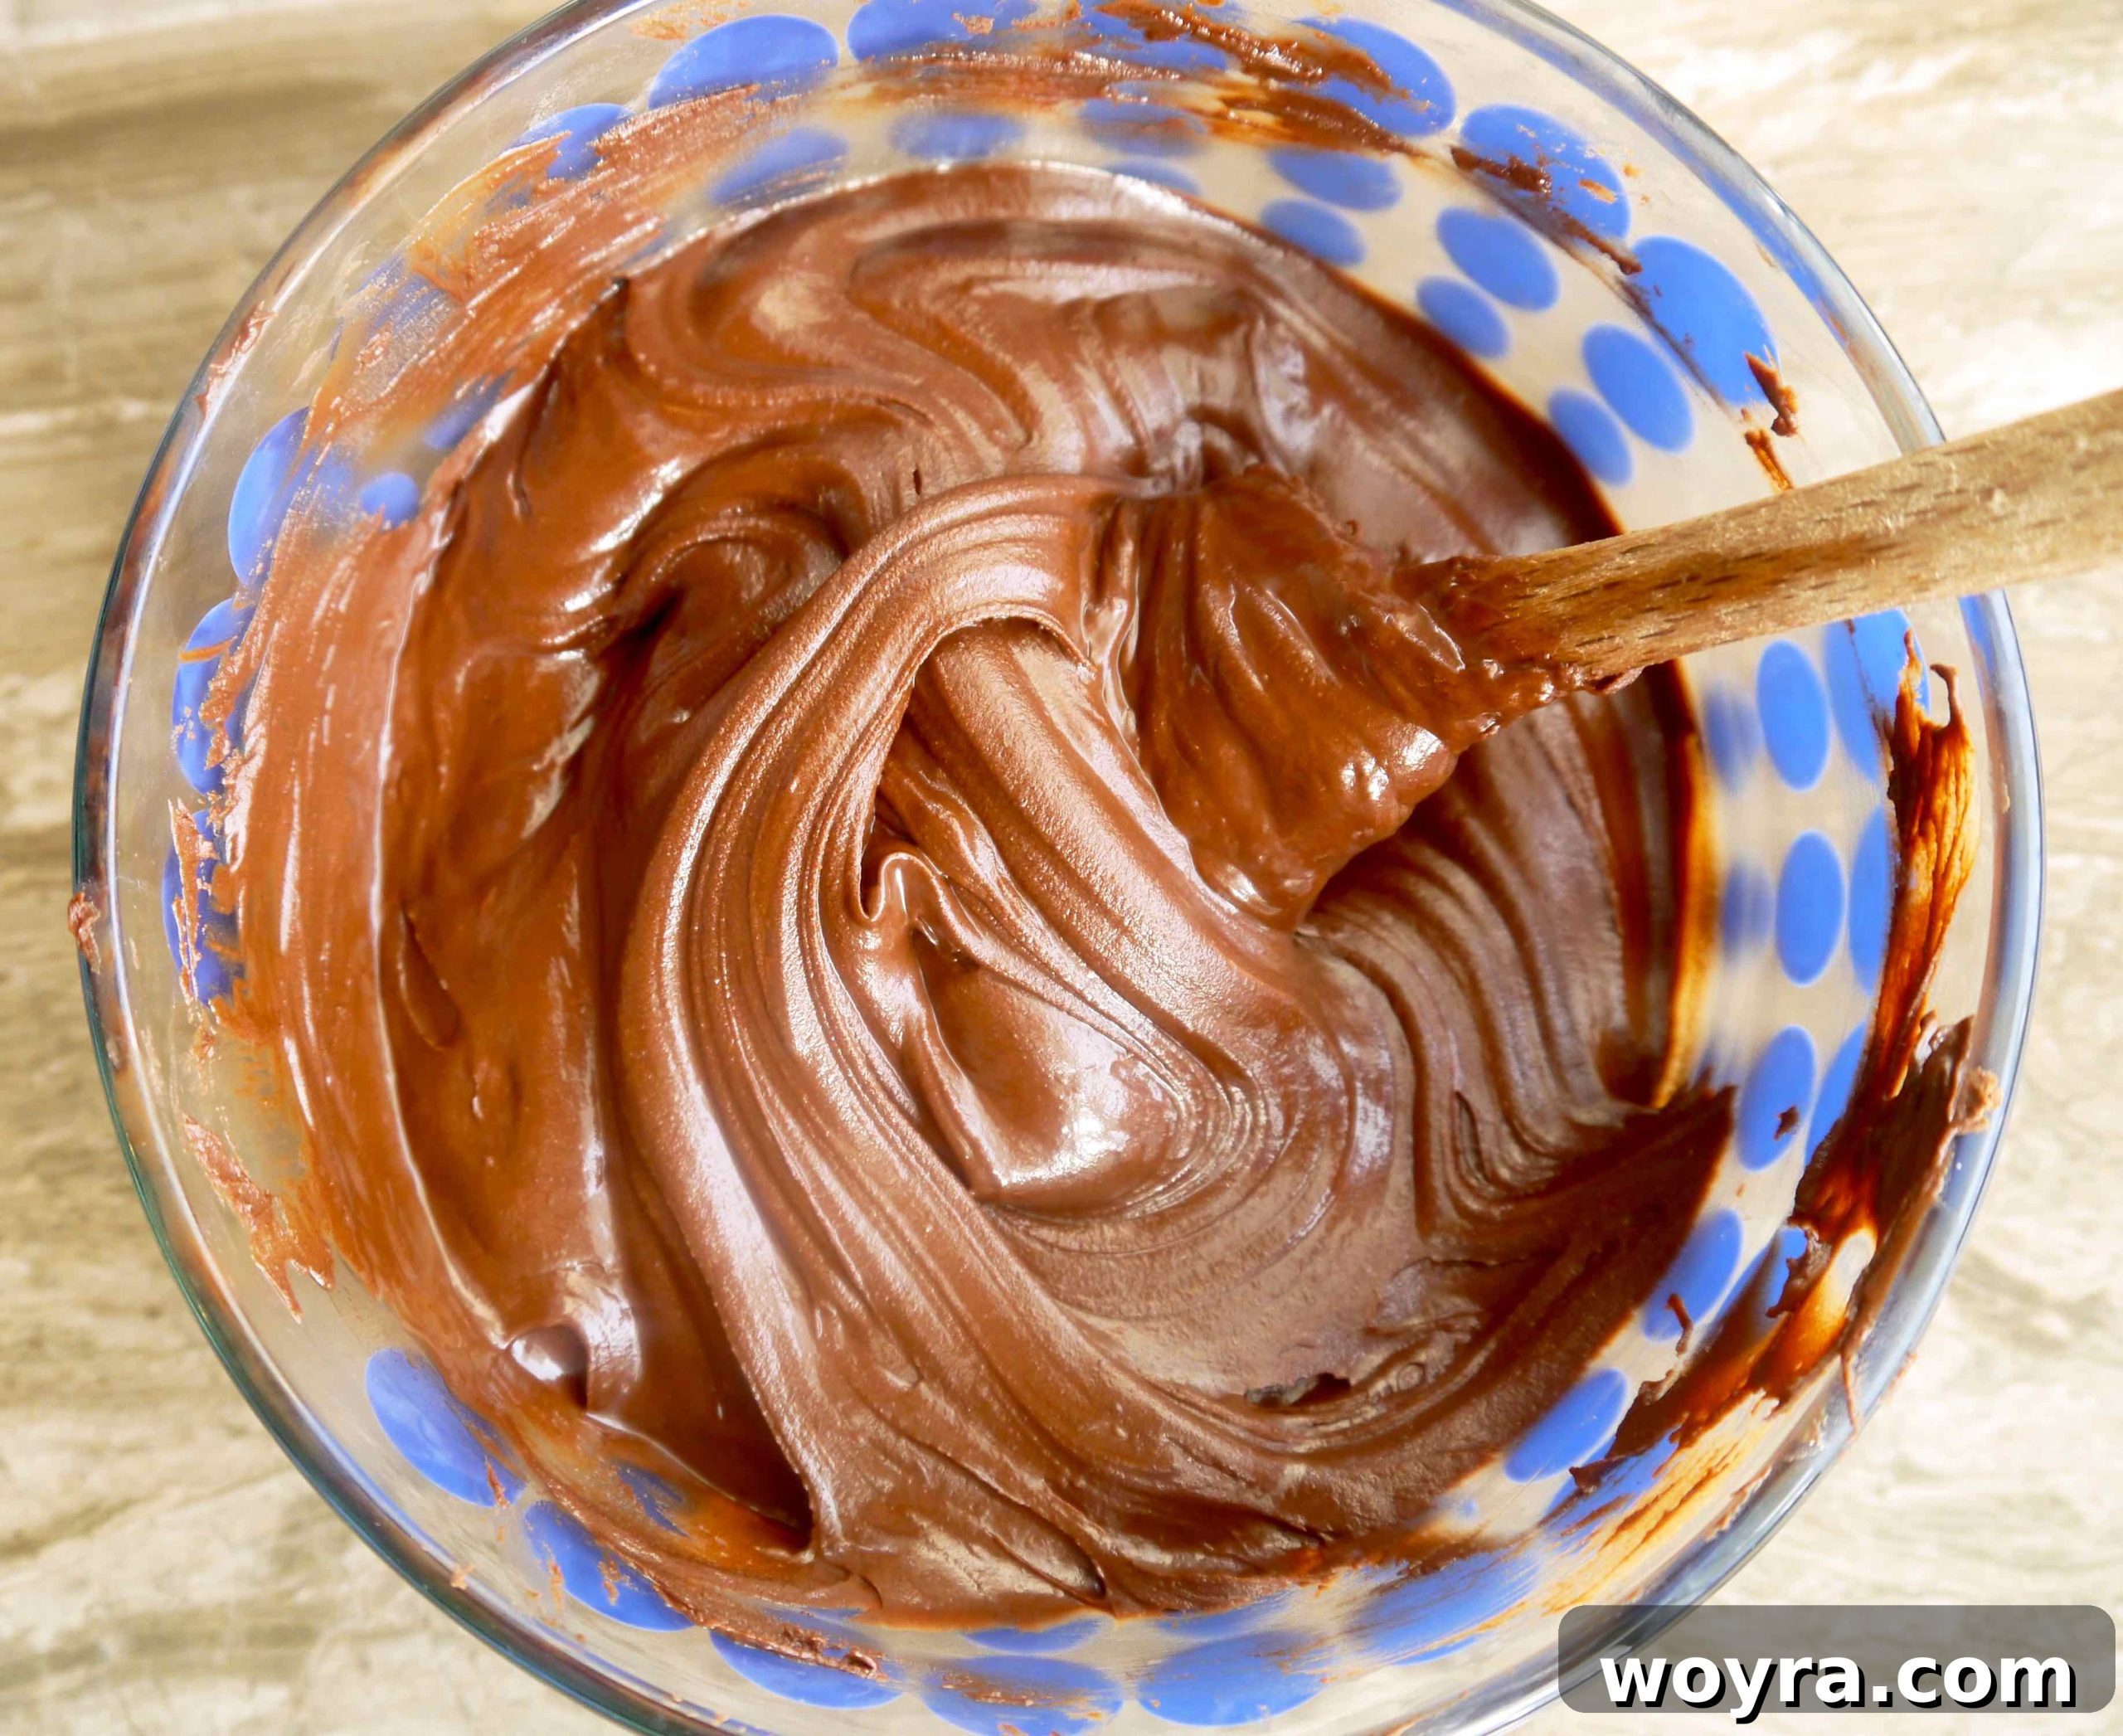
- Melt the Dairy-Free Chocolate: Carefully melt your chosen dairy-free chocolate chips. This can be done either in a microwave-safe bowl, stirring frequently to prevent burning, or using a double boiler on the stove for a more controlled melt. The key is to achieve a completely smooth, glossy liquid. Once melted, set the chocolate aside and allow it to cool to room temperature while remaining liquid and silky.
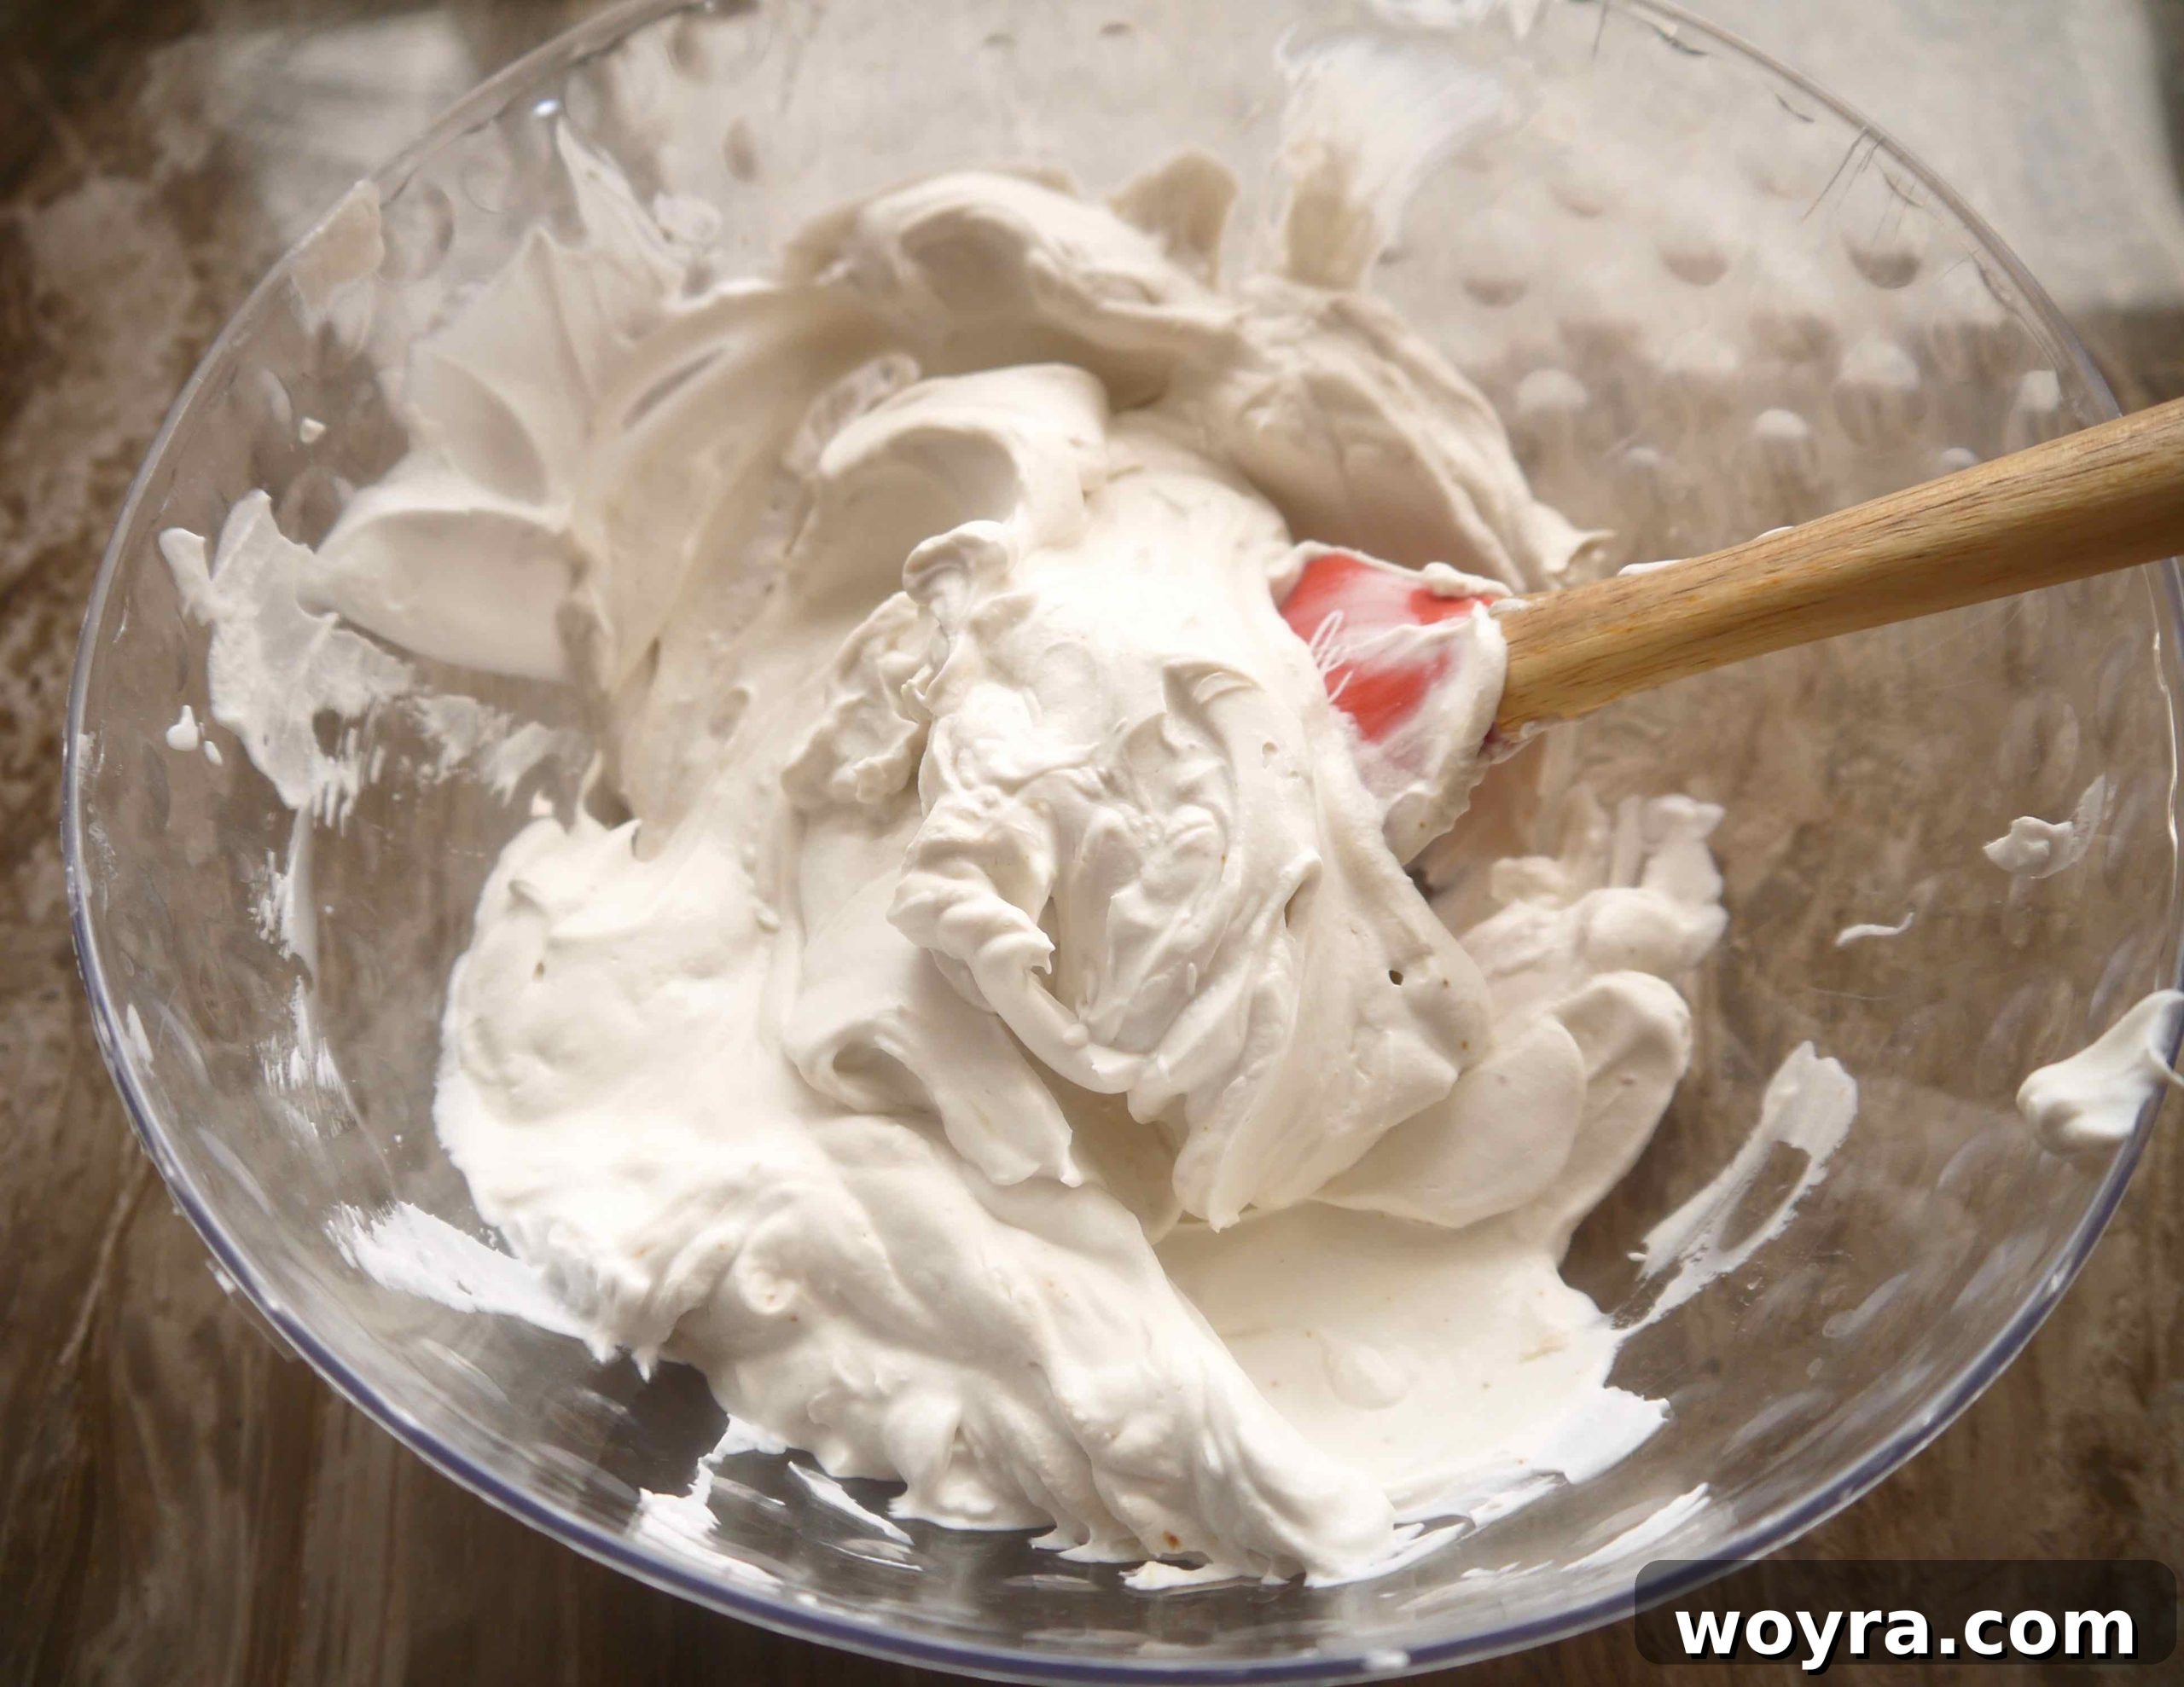
2. Whip the Coconut Cream: Retrieve your chilled coconut cream (ensuring it’s been refrigerated for several days for optimal separation). Scoop out the thick, solid cream from the top of the can into a mixing bowl. Using an electric mixer, whip the coconut cream until it becomes light, airy, and forms soft peaks, much like traditional whipped cream. Incorporate the honey during this stage for a touch of natural sweetness.
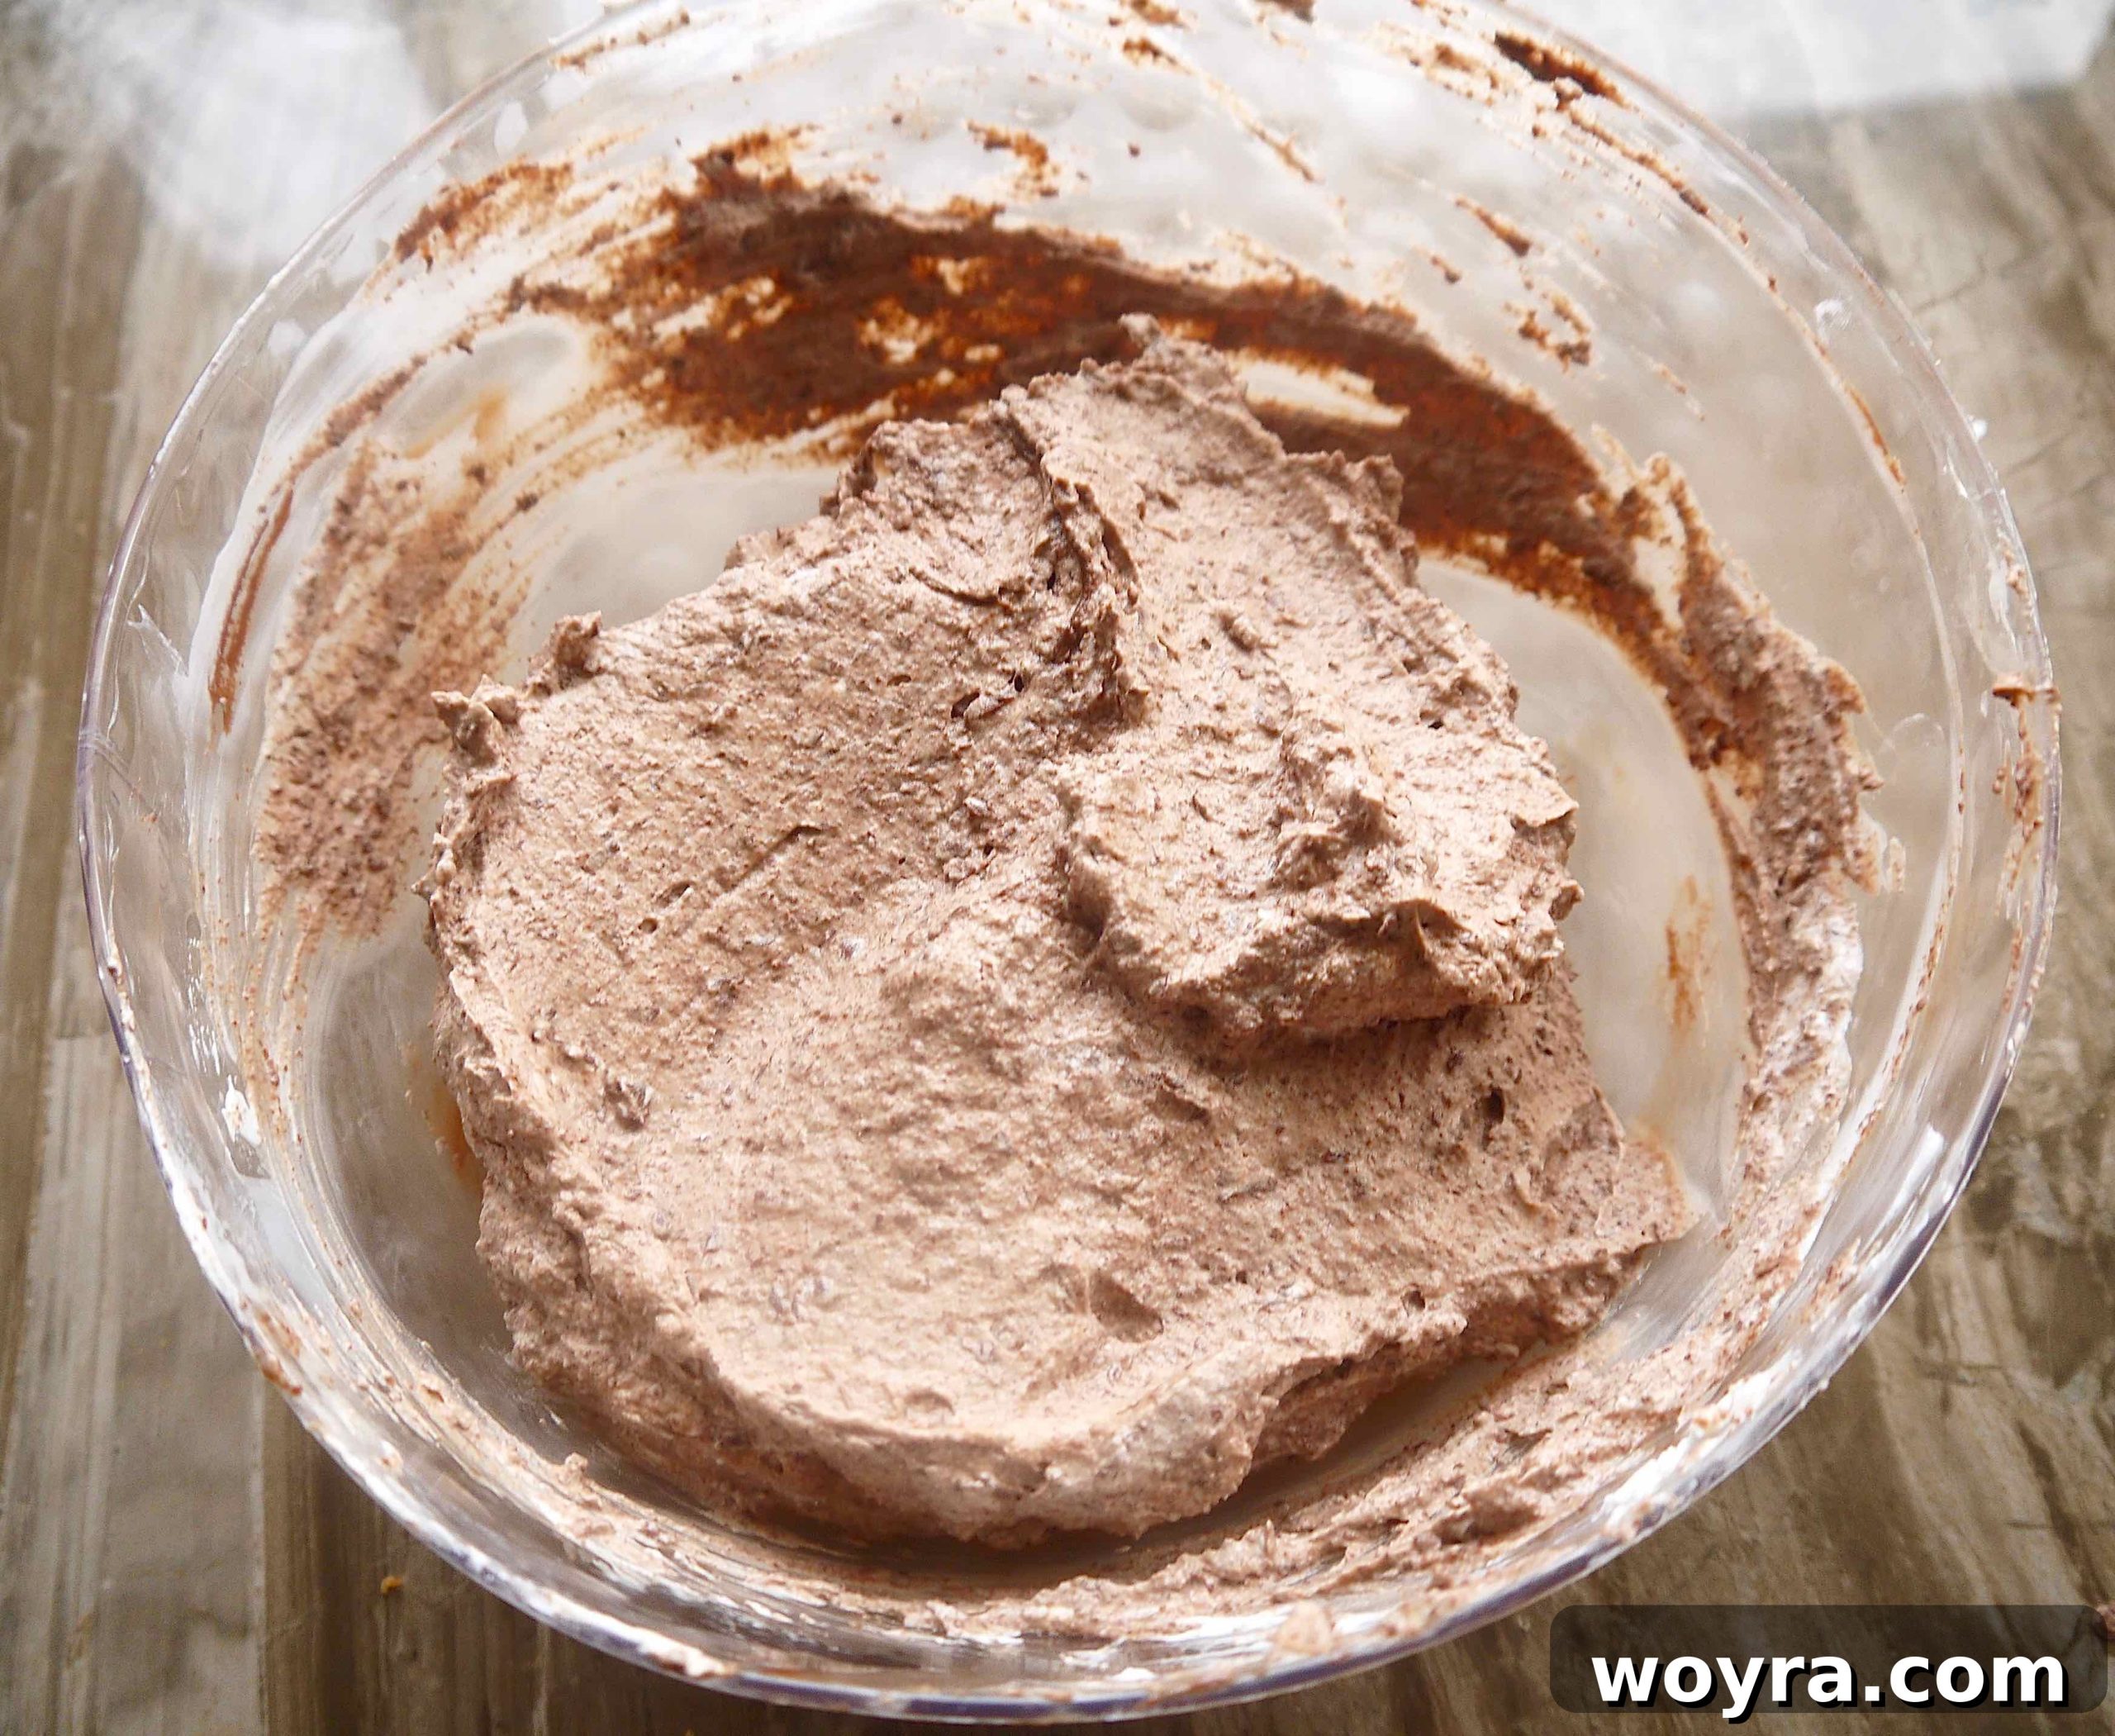
3. Fold in the Chocolate: This is where the magic happens! Once the melted chocolate has cooled completely but remains fluid, gently fold it into the whipped coconut cream. Work quickly and carefully with a spatula to combine the two mixtures until a uniform, airy, and luscious chocolate mousse forms. Be careful not to overmix, which can deflate the mousse. Transfer the finished mousse to the freezer for about 20 minutes to firm up slightly, then move it to the refrigerator until you’re ready to assemble the truffles.
Step 3: Assemble and Adorn Your Paleo Chocolate Mousse Truffles
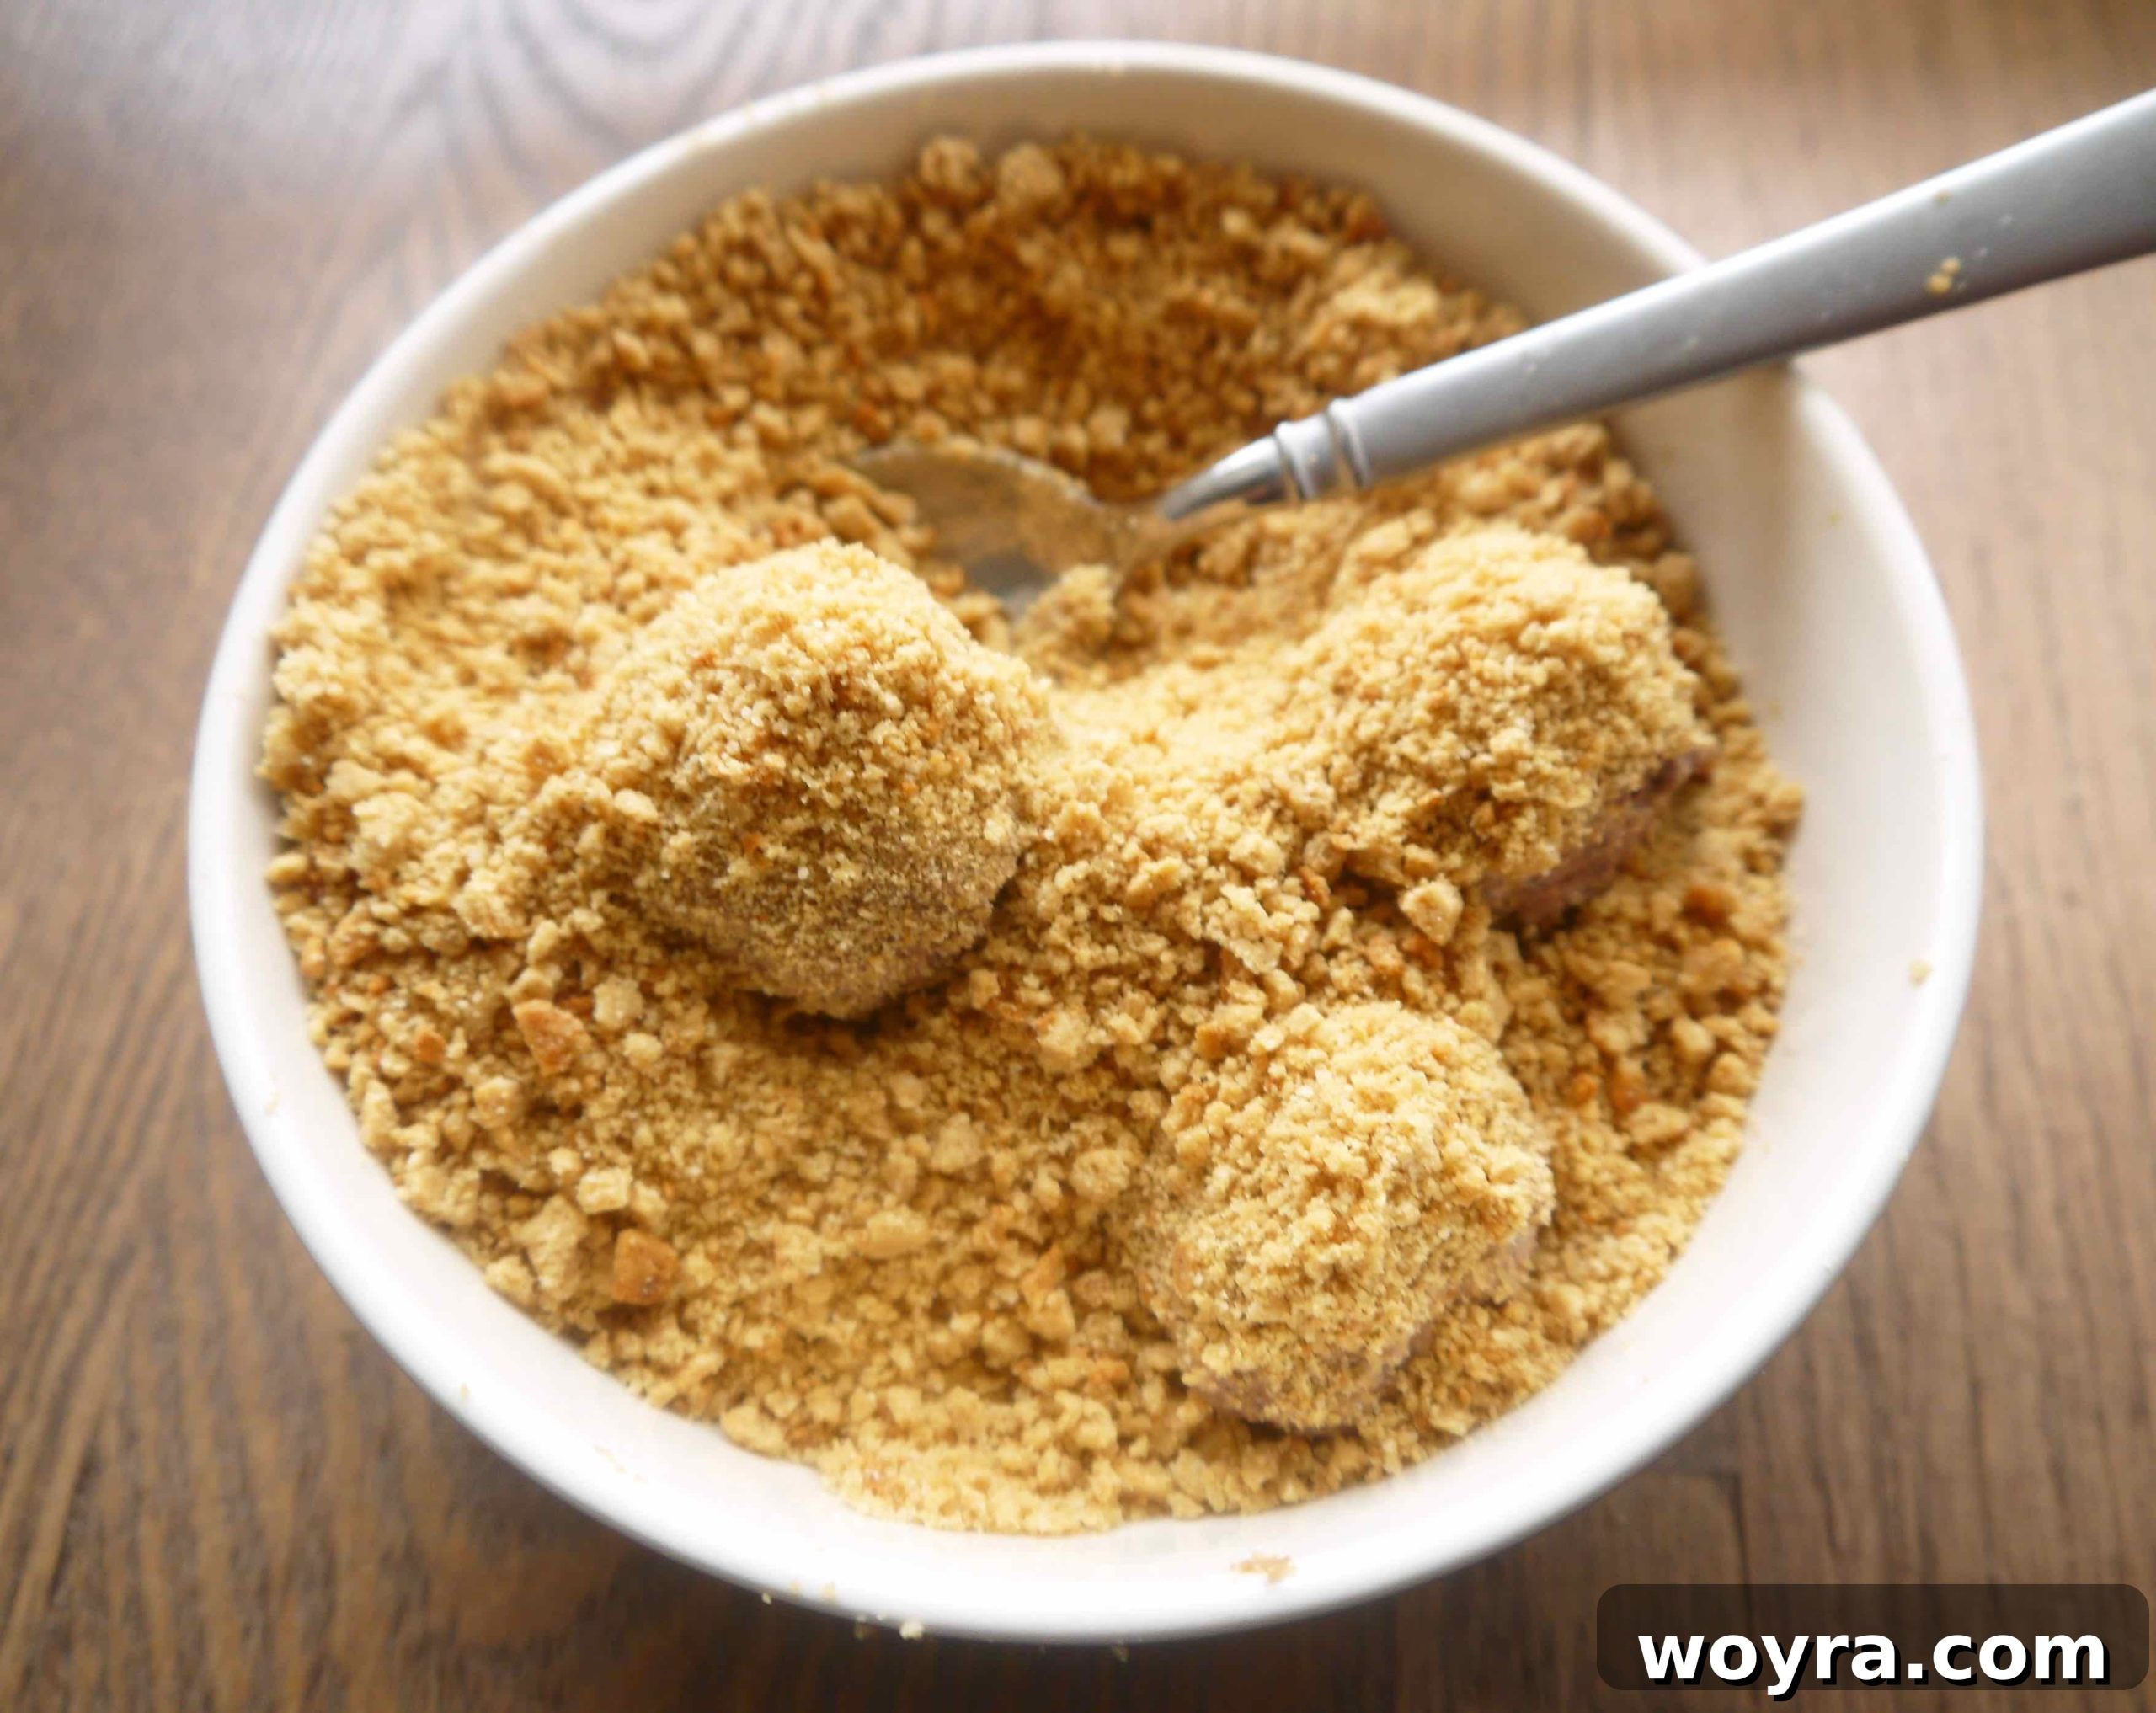
- Initial Crumb Coating: Take approximately one tablespoon of the chilled, firm chocolate mousse. Gently drop this spoonful into the bowl of prepared cookie crumbs. Using a spoon, delicately roll and cover the mousse in the crumbs. This initial coating helps to manage the sticky mousse and gives a foundational layer for shaping.
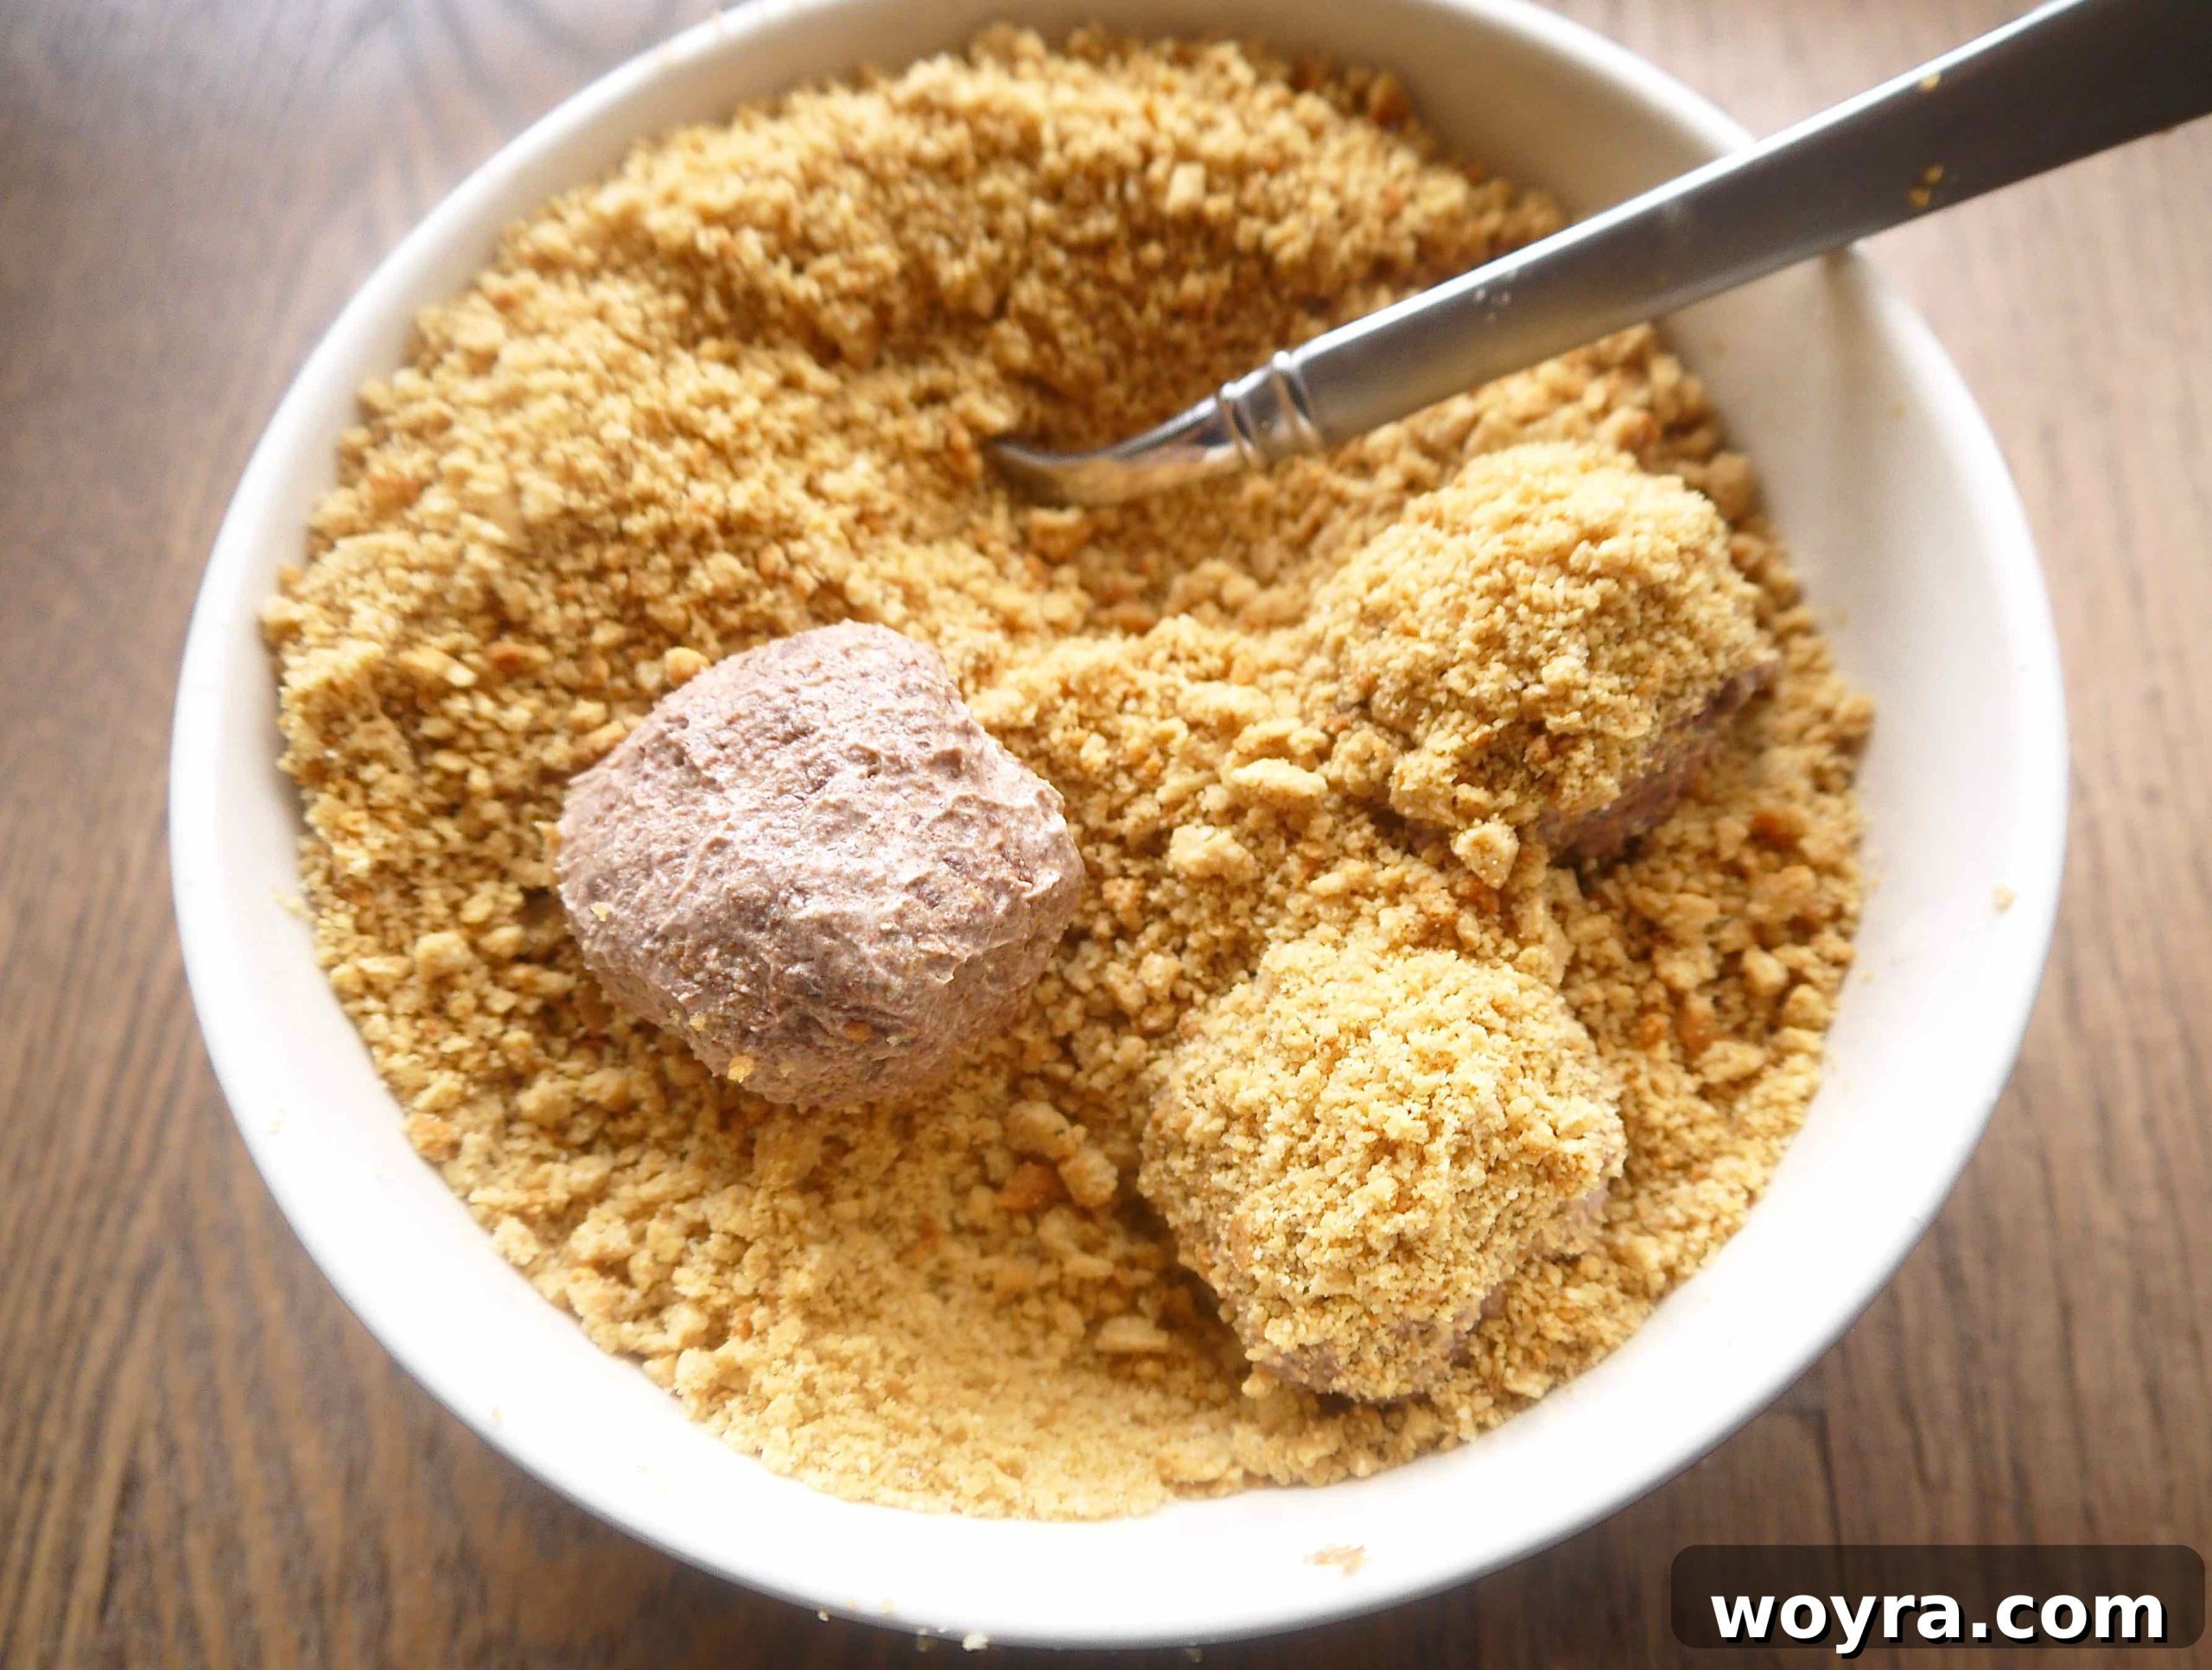
2. Shape and Perfect the Coating: Once lightly covered in crumbs, carefully pick up the mousse (now less sticky) and roll it gently between your palms to form a smooth, spherical truffle. Immediately return the perfectly shaped ball to the bowl of cookie crumbs and roll it again, ensuring it’s completely and generously coated. This double coating method creates a beautiful, even layer and helps the truffle maintain its round shape. Don’t hesitate to wash your hands periodically throughout this process to prevent the mousse from becoming too sticky on your hands.
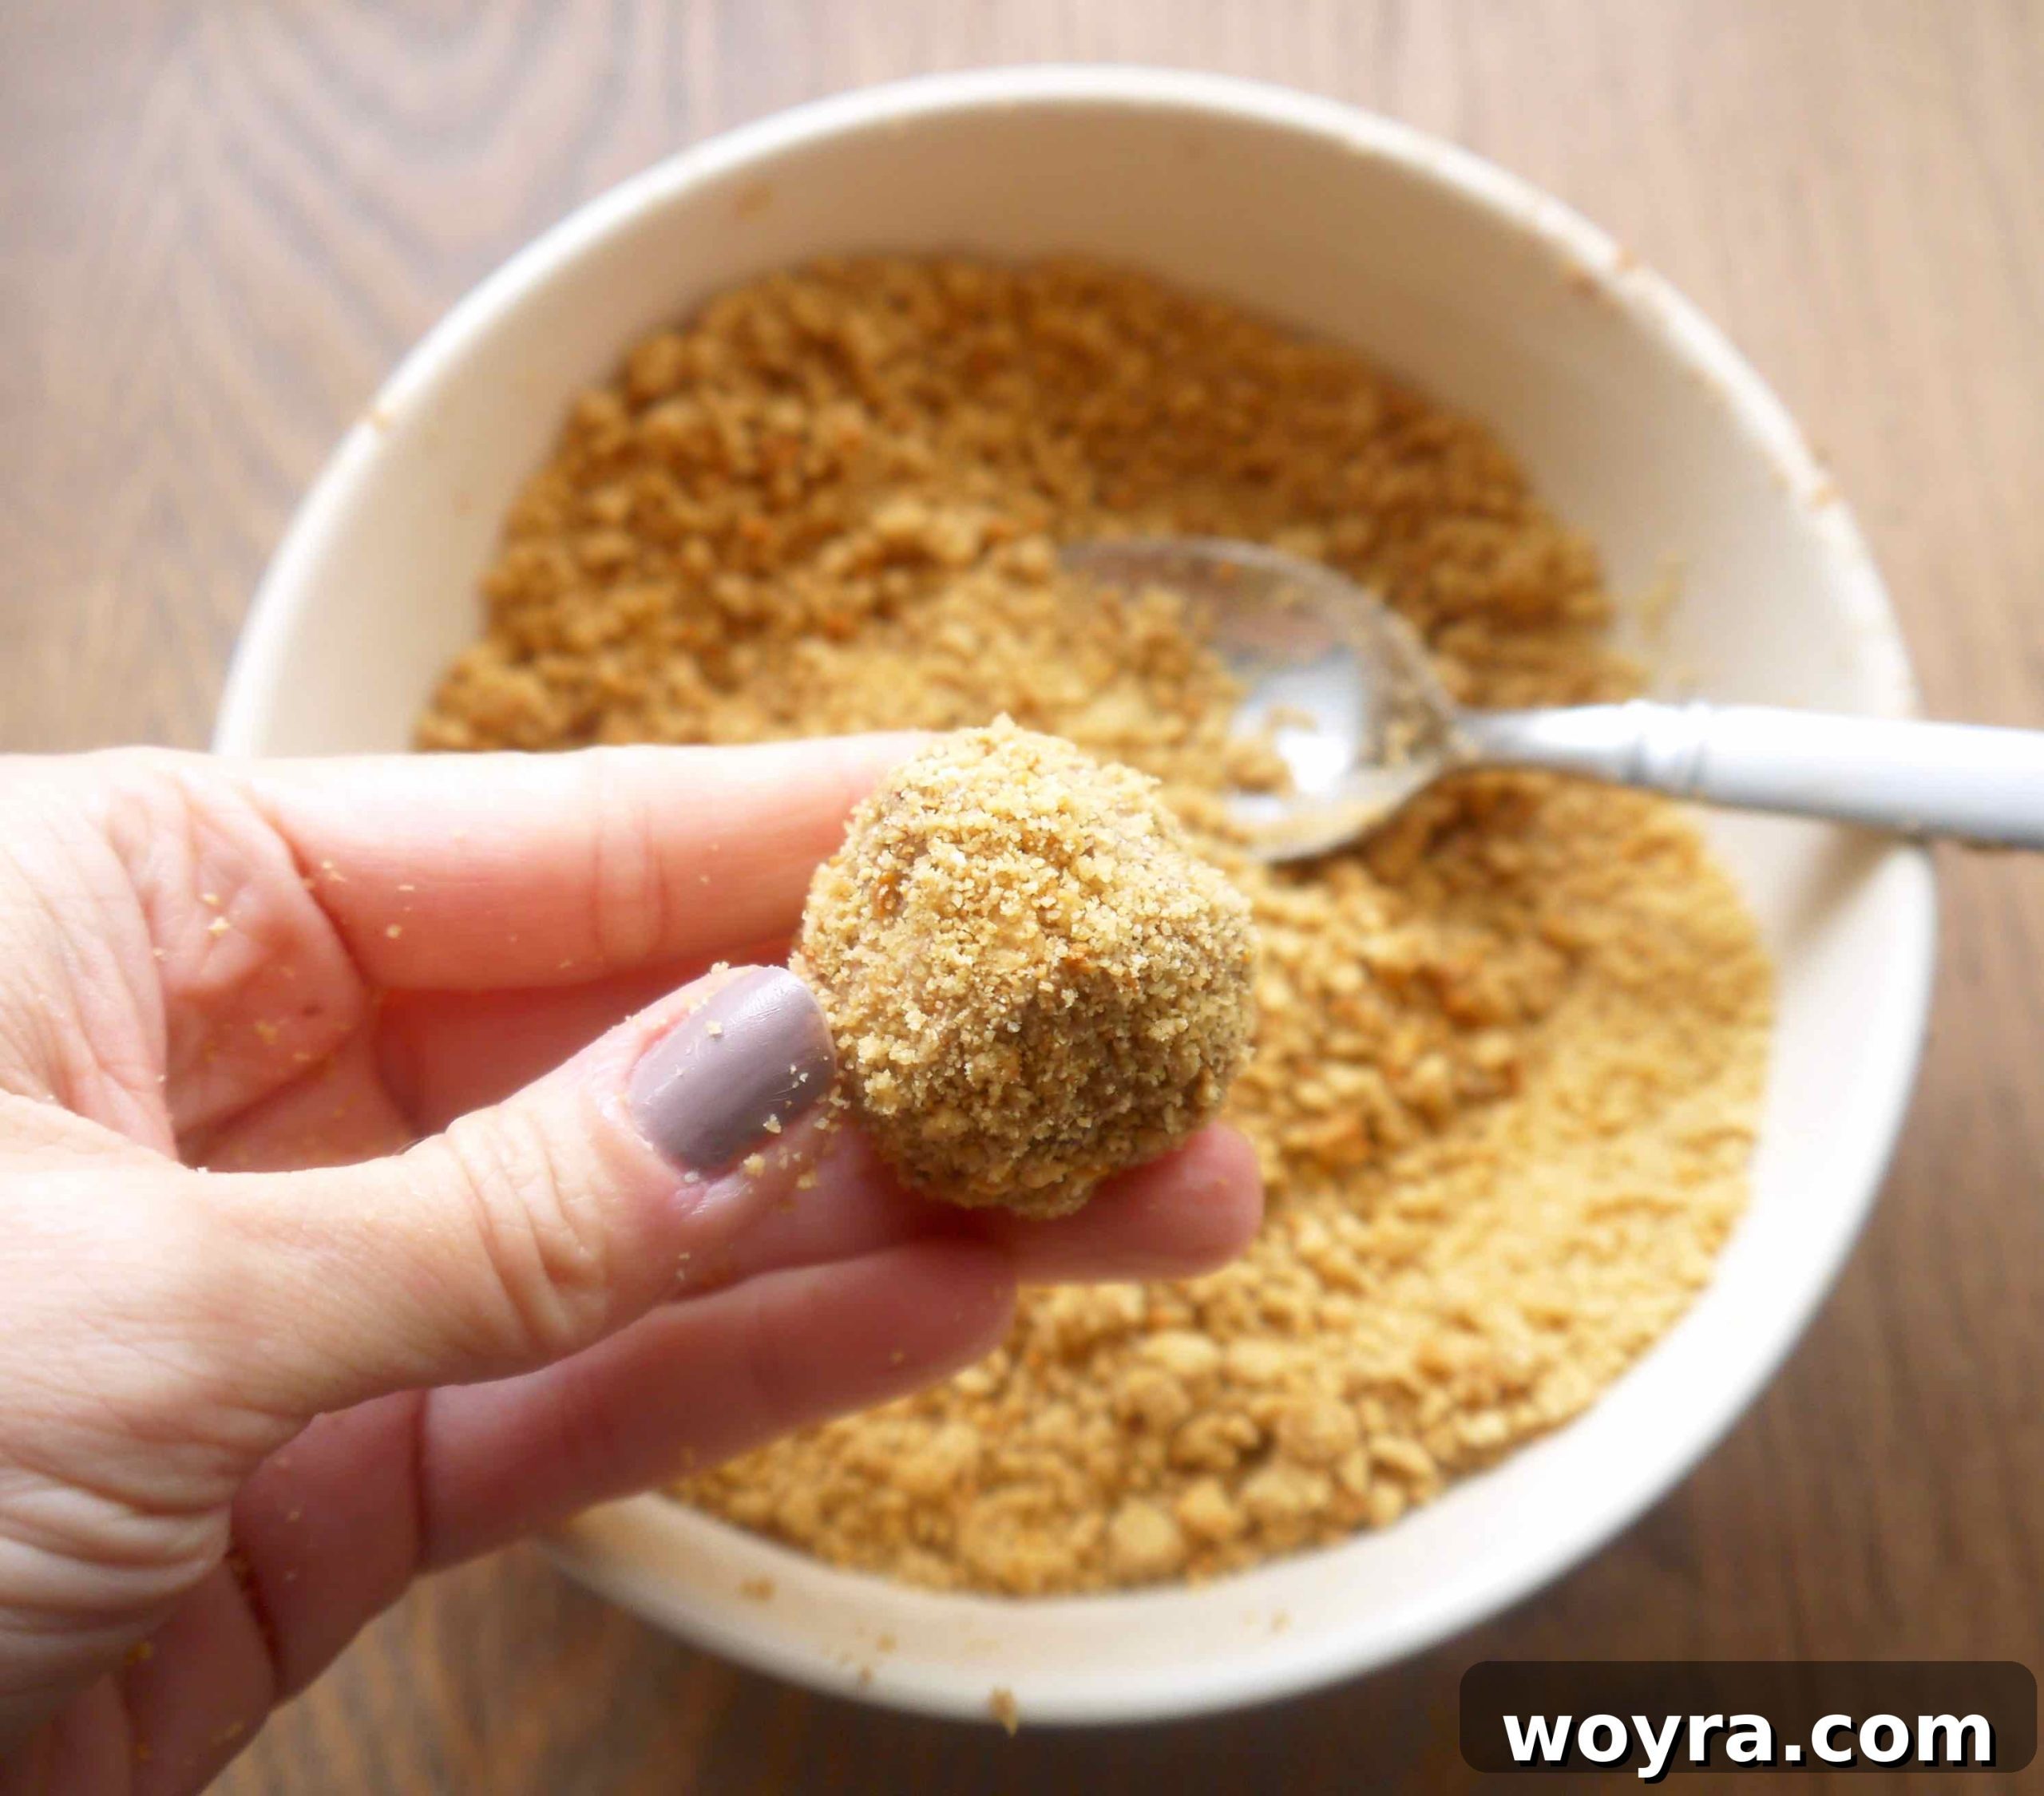
3. Repeat and Chill: Continue this process, taking a tablespoon of mousse, coating it, shaping it, and re-coating it until all of your delicious chocolate mousse has been transformed into perfectly adorned truffles. Once all the truffles are formed and coated, arrange them on a plate or baking sheet. Refrigerate the finished truffles for at least 30 minutes (or freeze them for a quicker set) before serving. This chilling time allows the mousse to fully firm up, enhancing their texture and ensuring they hold their shape beautifully.
Achieving Perfection: Essential Tips for Paleo Chocolate Truffles
To ensure your Paleo Chocolate Mousse Truffles turn out absolutely perfect every time, consider these invaluable tips and tricks:
- Pre-Chill Your Coconut Cream: This is a non-negotiable step for achieving truly whipped coconut cream. Place your cans of coconut cream in the refrigerator for at least 24 hours, or ideally a few days, before you plan to make the mousse. This extended chill time allows the solid cream to separate from the liquid, making it much easier to scoop out and whip into a fluffy texture.
- Prepare Cookies in Advance: To streamline your truffle-making process, consider baking the Paleo vanilla cookies a day or two ahead of time. This not only breaks down the active preparation time but also allows the cookies to dry out slightly, which is beneficial for creating perfectly crisp crumbs. Store them in an airtight container until ready to use.
- Select Premium Coconut Cream: The quality of your coconut cream significantly impacts the texture and flavor of your mousse. Opt for brands that pride themselves on purity, free from gums, stabilizers, and preservatives. These additives can hinder the cream from whipping properly and can introduce an undesirable taste. I personally highly recommend Savoy coconut cream; it’s consistently excellent, hardening beautifully into a rich cream without separating, which is ideal for mousse.
- Olive Oil for Smooth Melting: When melting dairy-free chocolate, a tiny touch of olive oil can work wonders. Adding a small amount helps the chocolate melt more smoothly and prevents it from seizing, resulting in a perfectly silky texture for your mousse. This trick ensures a glossy, professional finish.
- Cool Chocolate is Key: Patience is a virtue, especially when combining the melted chocolate with your whipped coconut cream. Ensure the melted chocolate has cooled completely to room temperature before folding it into the whipped cream. If the chocolate is too warm, it will melt the delicate whipped cream, resulting in a runny mousse. It needs to be cool enough not to affect the cream’s texture, but still fluid enough to incorporate smoothly.
- Embrace the Mess (and Wash Your Hands!): Rolling the mousse balls in cookie crumbs can be a bit messy, but it’s part of the fun! To maintain the best results and prevent the mousse from sticking too much to your hands, make sure to wash your hands a few times throughout the rolling process. A quick rinse and dry will keep your hands cool and clean, making it easier to shape the truffles perfectly. The little bit of effort is absolutely worth the heavenly outcome!
Beyond Truffles: More Paleo-Friendly Chocolate Delights
If you’ve fallen in love with these Paleo Chocolate Mousse Truffles and are eager to explore more dairy-free and Paleo-friendly chocolate creations, we have some fantastic suggestions for you. Expand your repertoire of wholesome indulgences with these delicious recipes:
For a slightly simpler, yet equally delightful, chocolate treat, you might want to try our dairy-free mousse ball recipe. This version uses convenient ingredients like cocowhip, Enjoy Life chocolate, and Simple Mills Cookies, making it a fantastic option when you’re short on time but still craving that rich chocolate mousse experience.
And when the seasons change, or you’re looking for a beautiful and effortless dessert to share, our Fall Chocolate Bark is an absolute must-try. It’s an incredibly easy and delicious way to encapsulate all the comforting flavors of autumn in a stunning chocolate confection. Perfect for gifting or a festive treat!
Did you try this recipe? Please leave me a ⭐ review below!
Paleo Chocolate Mousse Truffles
Ingredients
Paleo Vanilla Cookie ingredients:
- 4 Tbs coconut oil
- 1/4 cup coconut sugar
- 1/2 tsp apple cider vinegar
- 1 egg
- 1 Tbs vanilla
- 1 cup almond flour
- 1/4 cup + 2 Tbs coconut flour
- 1/4 tsp baking soda
Paleo Chocolate Mousse ingredients:
- 2 cups Enjoy Life mini chocolate chips, (dairy free chocolate)
- 4 tsp olive oil
- 2 cans coconut cream, (I love Savoy because it has no preservatives), refrigerated for a few days
- 2 Tbs honey
Instructions
Step One, make the Paleo Vanilla Cookies—Cookie instructions:
-
Preheat your oven to 350 degrees Fahrenheit (175°C). Prepare a cookie sheet by lining it with parchment paper or a silicone baking mat to prevent sticking.
-
In a food processor, combine the melted coconut oil and coconut sugar. Pulse and beat until these ingredients are thoroughly mixed and create a creamy consistency. Alternatively, you can achieve this with a handheld electric mixer. Next, add the apple cider vinegar, egg, and vanilla extract, beating until well incorporated. Finally, introduce the almond flour, coconut flour, and baking soda, and beat again until a thick, cohesive dough forms. The dough should be firm enough to handle.
-
Roll the dough into a uniform ball and place it onto a piece of wax paper. Cover the dough with another sheet of wax paper. Using a rolling pin, gently roll the dough out to an approximate thickness of 1/4 inch. Take a small round cutter, such as the rim of a shot glass, and press it firmly into the dough to cut out small circular cookie shapes. Carefully transfer each cut-out cookie onto your prepared cookie sheet. Gather any leftover dough scraps, re-roll them into a ball, and repeat the cutting process until all the dough has been used.
-
Bake the cookies for 16-18 minutes. The exact baking time may vary based on your oven, but aim for a light golden color and a firm texture. For my oven, 18 minutes yielded perfect results. It’s crucial to allow the cookies to cool completely on the cookie sheet after baking. They need to harden properly so they can be easily crushed into fine crumbs.
-
Once fully cooled and hardened, place the cookies into a food processor. Pulse until they are transformed into fine cookie crumbs. Transfer these crumbs into a bowl and set aside; they will be used for coating the mousse truffles.
-
Note: To ease your preparation and allow the cookies to dry out further, you can bake them the day before you plan to assemble the truffles. This helps them achieve the ideal crispness for crushing.
Step Two: make the Chocolate Mousse—Mousse Instructions:
-
In a microwave-safe bowl, combine the 2 cups of dairy-free chocolate chips with 1 teaspoon of olive oil. Mix them gently. Microwave in short bursts of 20 seconds, stirring thoroughly after each interval, until the chocolate is completely melted and smooth. Be extremely careful not to burn the chocolate. Don’t be alarmed if the chocolate appears soft initially and then hardens slightly; this is common with some dairy-free varieties. Once fully melted, stir in an additional 3 teaspoons of olive oil to achieve your desired silky consistency. Allow the melted chocolate to cool completely to room temperature, ensuring it remains fluid and silky smooth. For helpful tips on melting dairy-free chocolate, refer to resources like the Enjoy Life website.
-
Next, take your pre-refrigerated coconut cream out of the fridge. Scoop the thick, solid cream into a bowl or a food processor. Add 2 tablespoons of honey and whip the mixture using an electric mixer until it forms a light and fluffy whipped cream. Transfer this whipped coconut cream into a large mixing bowl. Now, very quickly and gently, fold the cooled (room temperature) melted chocolate into the whipped cream using a spatula. It’s almost a folding motion to combine them without deflating the mousse. Continue until a smooth, rich chocolate mousse forms. Immediately place the chocolate mousse into the freezer for approximately 20 minutes to firm up (it should be firm but not frozen). After 20 minutes, you can transfer the mousse to the refrigerator until you are ready to begin forming the mousse balls, or proceed directly to the next step.
Step Three– Make the Paleo Chocolate Mousse Balls—Mousse Ball Instructions:
-
Take one tablespoon of the firm chocolate mousse and gently drop it into the bowl of cookie crumbs. Using a spoon, carefully cover the mousse with crumbs. Then, gently pick up the crumb-coated mousse and roll it between your hands to form a smooth, round ball. Immediately return the ball to the bowl of crumbs and roll it again until it is fully and evenly covered. This double-coating ensures a beautiful finish and helps maintain the truffle’s shape. Place the finished truffle on a plate. Repeat this process for the remaining mousse. You may find it helpful to wash your hands a few times during this step, as the mousse can become sticky.
-
Note: If at any point the mousse becomes too soft or liquidy to work with, simply place it back into the freezer for about 15 minutes to firm up again. Resume forming the mousse balls once it has reached the desired consistency.
-
Once all the mousse balls are formed and coated, refrigerate them for at least 30 minutes. This allows them to set completely, resulting in the perfect truffle texture. Alternatively, you can freeze them for a firmer treat. Serve chilled and enjoy your homemade Paleo Chocolate Mousse Truffles!
-
This recipe typically yields approximately 50 delightful mousse balls, making it perfect for sharing or enjoying over several days.
Notes
- * For optimal results with your mousse, place the coconut cream cans in the refrigerator for a few days prior to preparation. This encourages proper separation of the solid cream.
- * To save time on the day of assembly, you can bake the Paleo vanilla cookies ahead of time. This also allows them to dry out slightly, which is beneficial for creating perfect crumbs.
- * The quality of your coconut cream is paramount for a velvety mousse. Seek out brands free from preservatives or gums. My personal recommendation is Savoy coconut cream, as it consistently delivers a superb taste and hardens perfectly without separation.
- * When melting dairy-free chocolate, incorporating a small amount of olive oil can greatly assist in achieving a smooth, pliable consistency, preventing it from seizing.
- * It’s critical that the melted chocolate cools completely to room temperature before you fold it into the whipped coconut cream. If the chocolate is warm, it will melt the delicate cream and compromise the mousse’s texture.
- * Rolling the mousse balls can be a messy but rewarding part of the process! To ensure smooth, even coatings and prevent excessive stickiness, washing your hands a few times during assembly is highly recommended.
Nutrition
Nutrition information is automatically calculated, so should only be used as an approximation.