
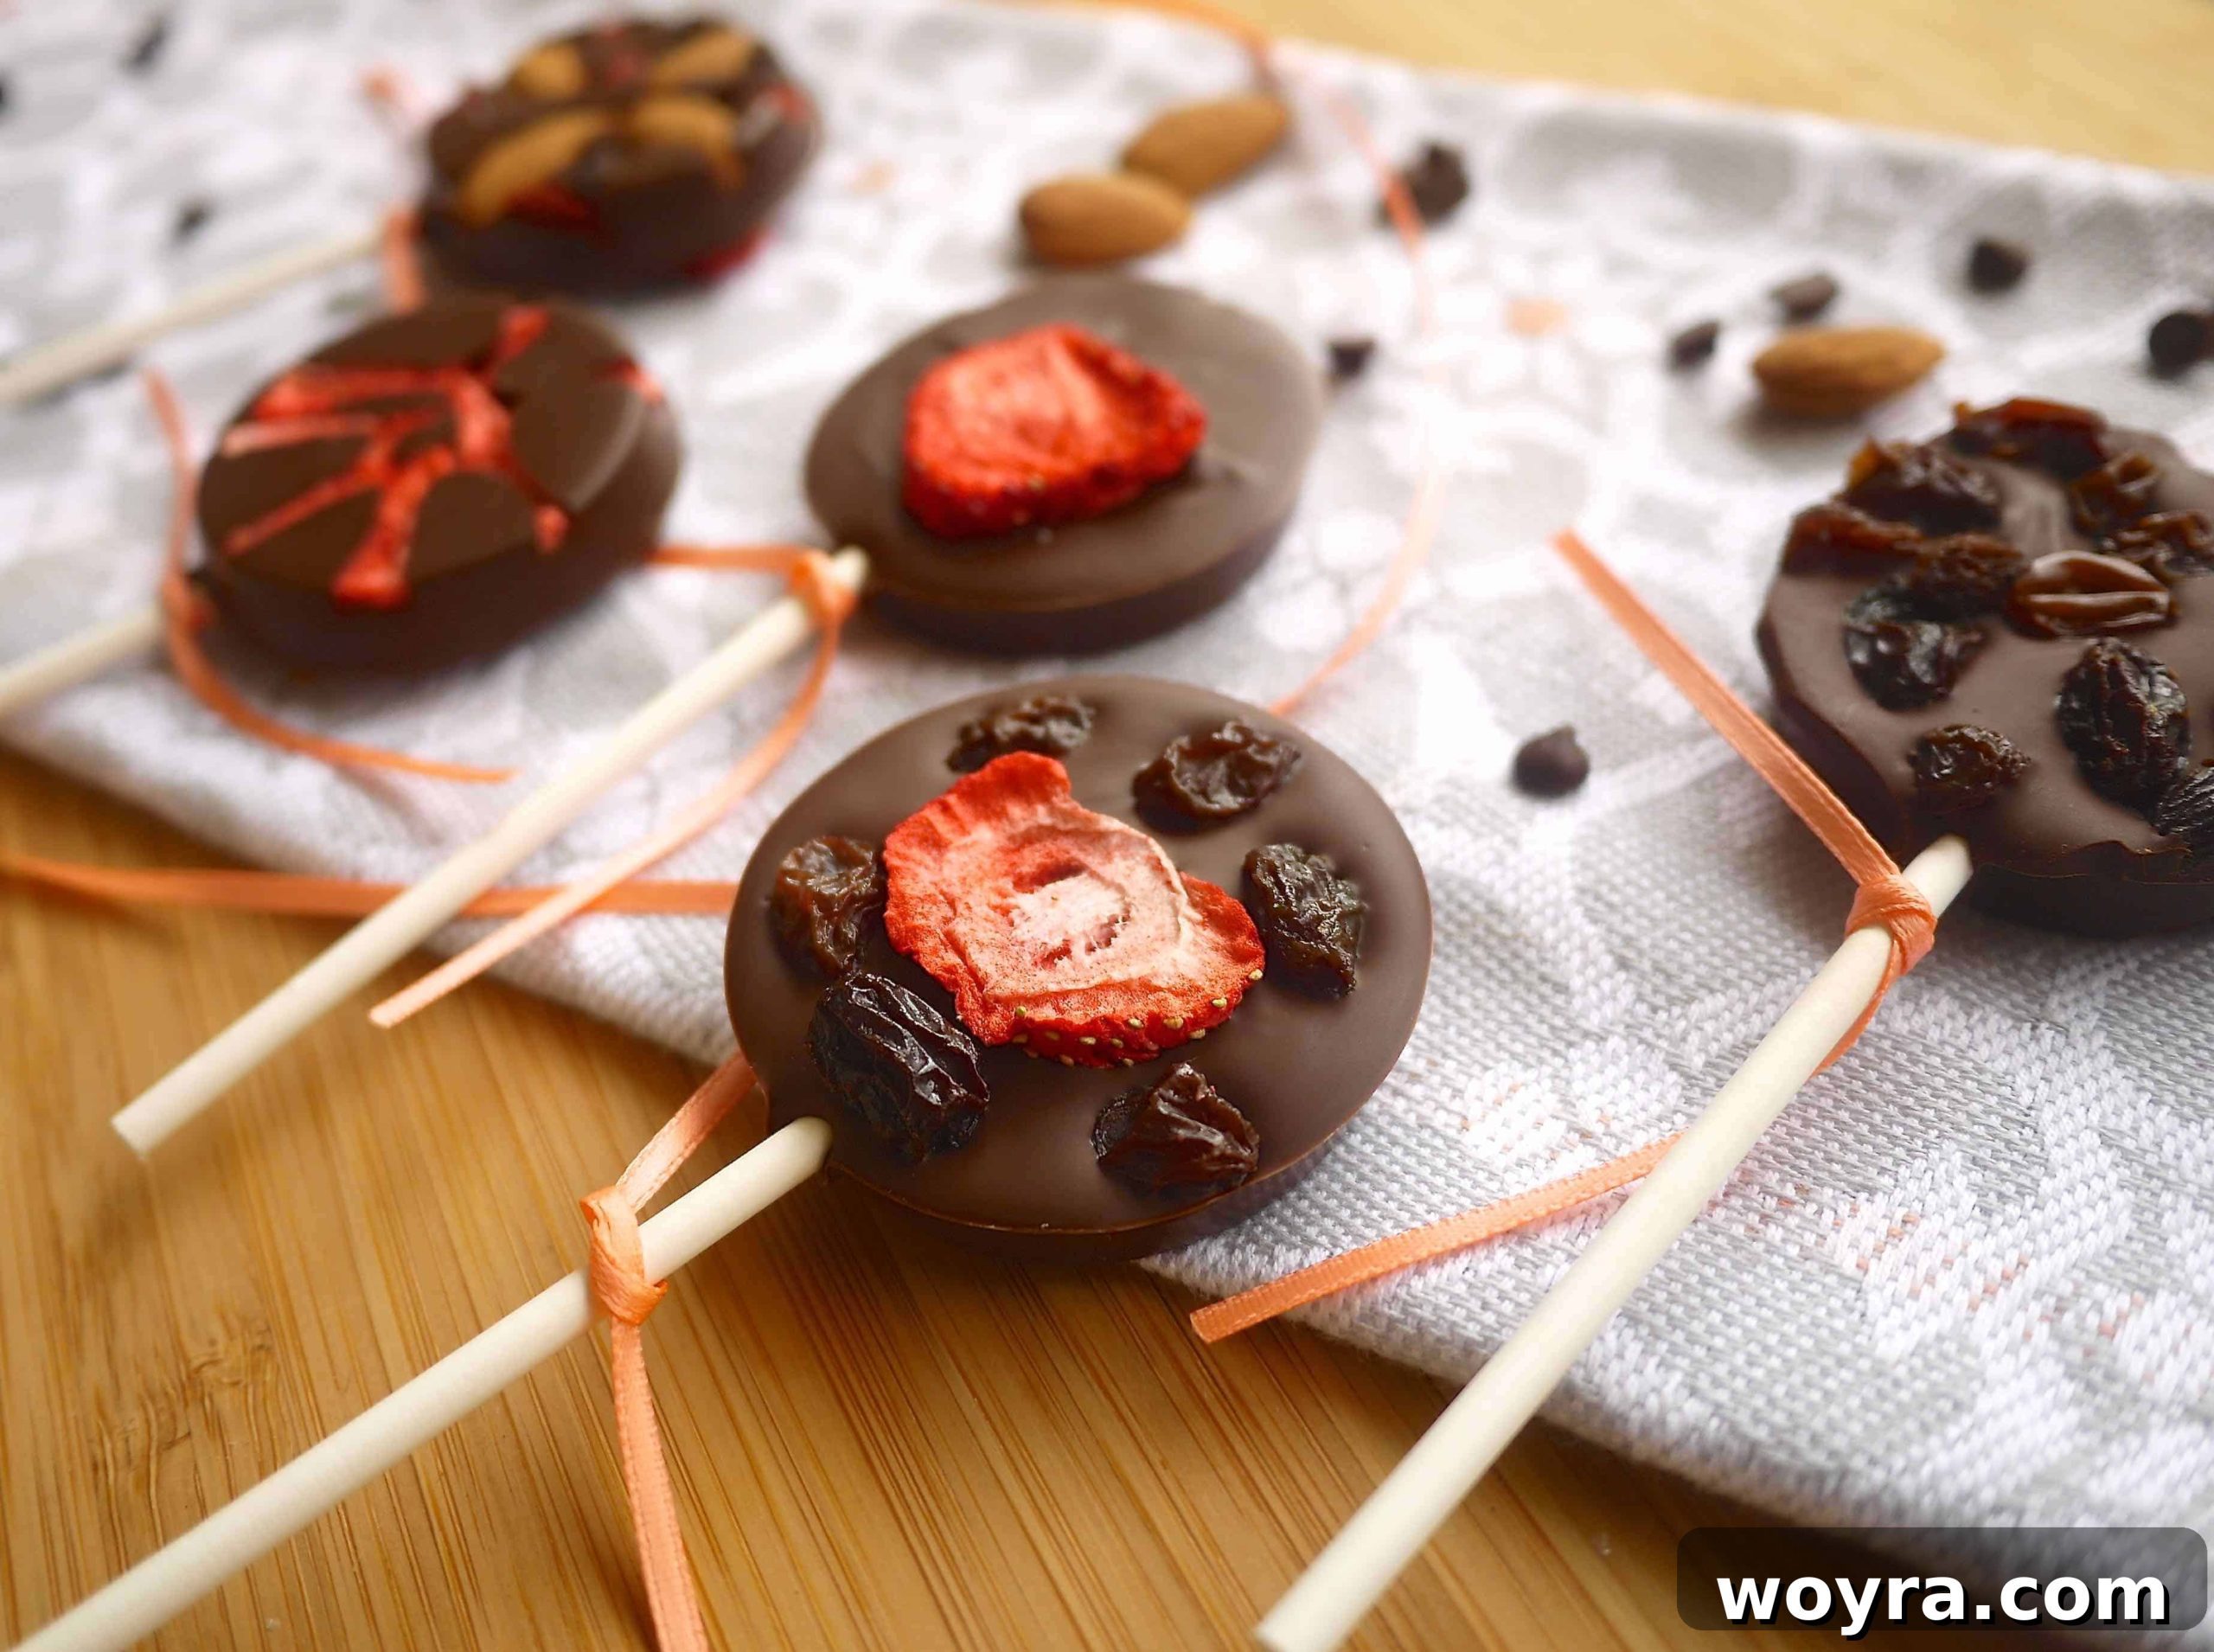
Indulge in the delightful world of homemade confections with these exquisite chocolate lollipops. Each one is a beautifully crafted, irresistible chocolate treat, generously adorned with your choice of vibrant dried fruits, tangy freeze-dried fruits, and crunchy nuts. Perfect for gifting, parties, or simply satisfying your sweet tooth, these lollipops offer a gourmet experience that’s surprisingly simple to create in your own kitchen.
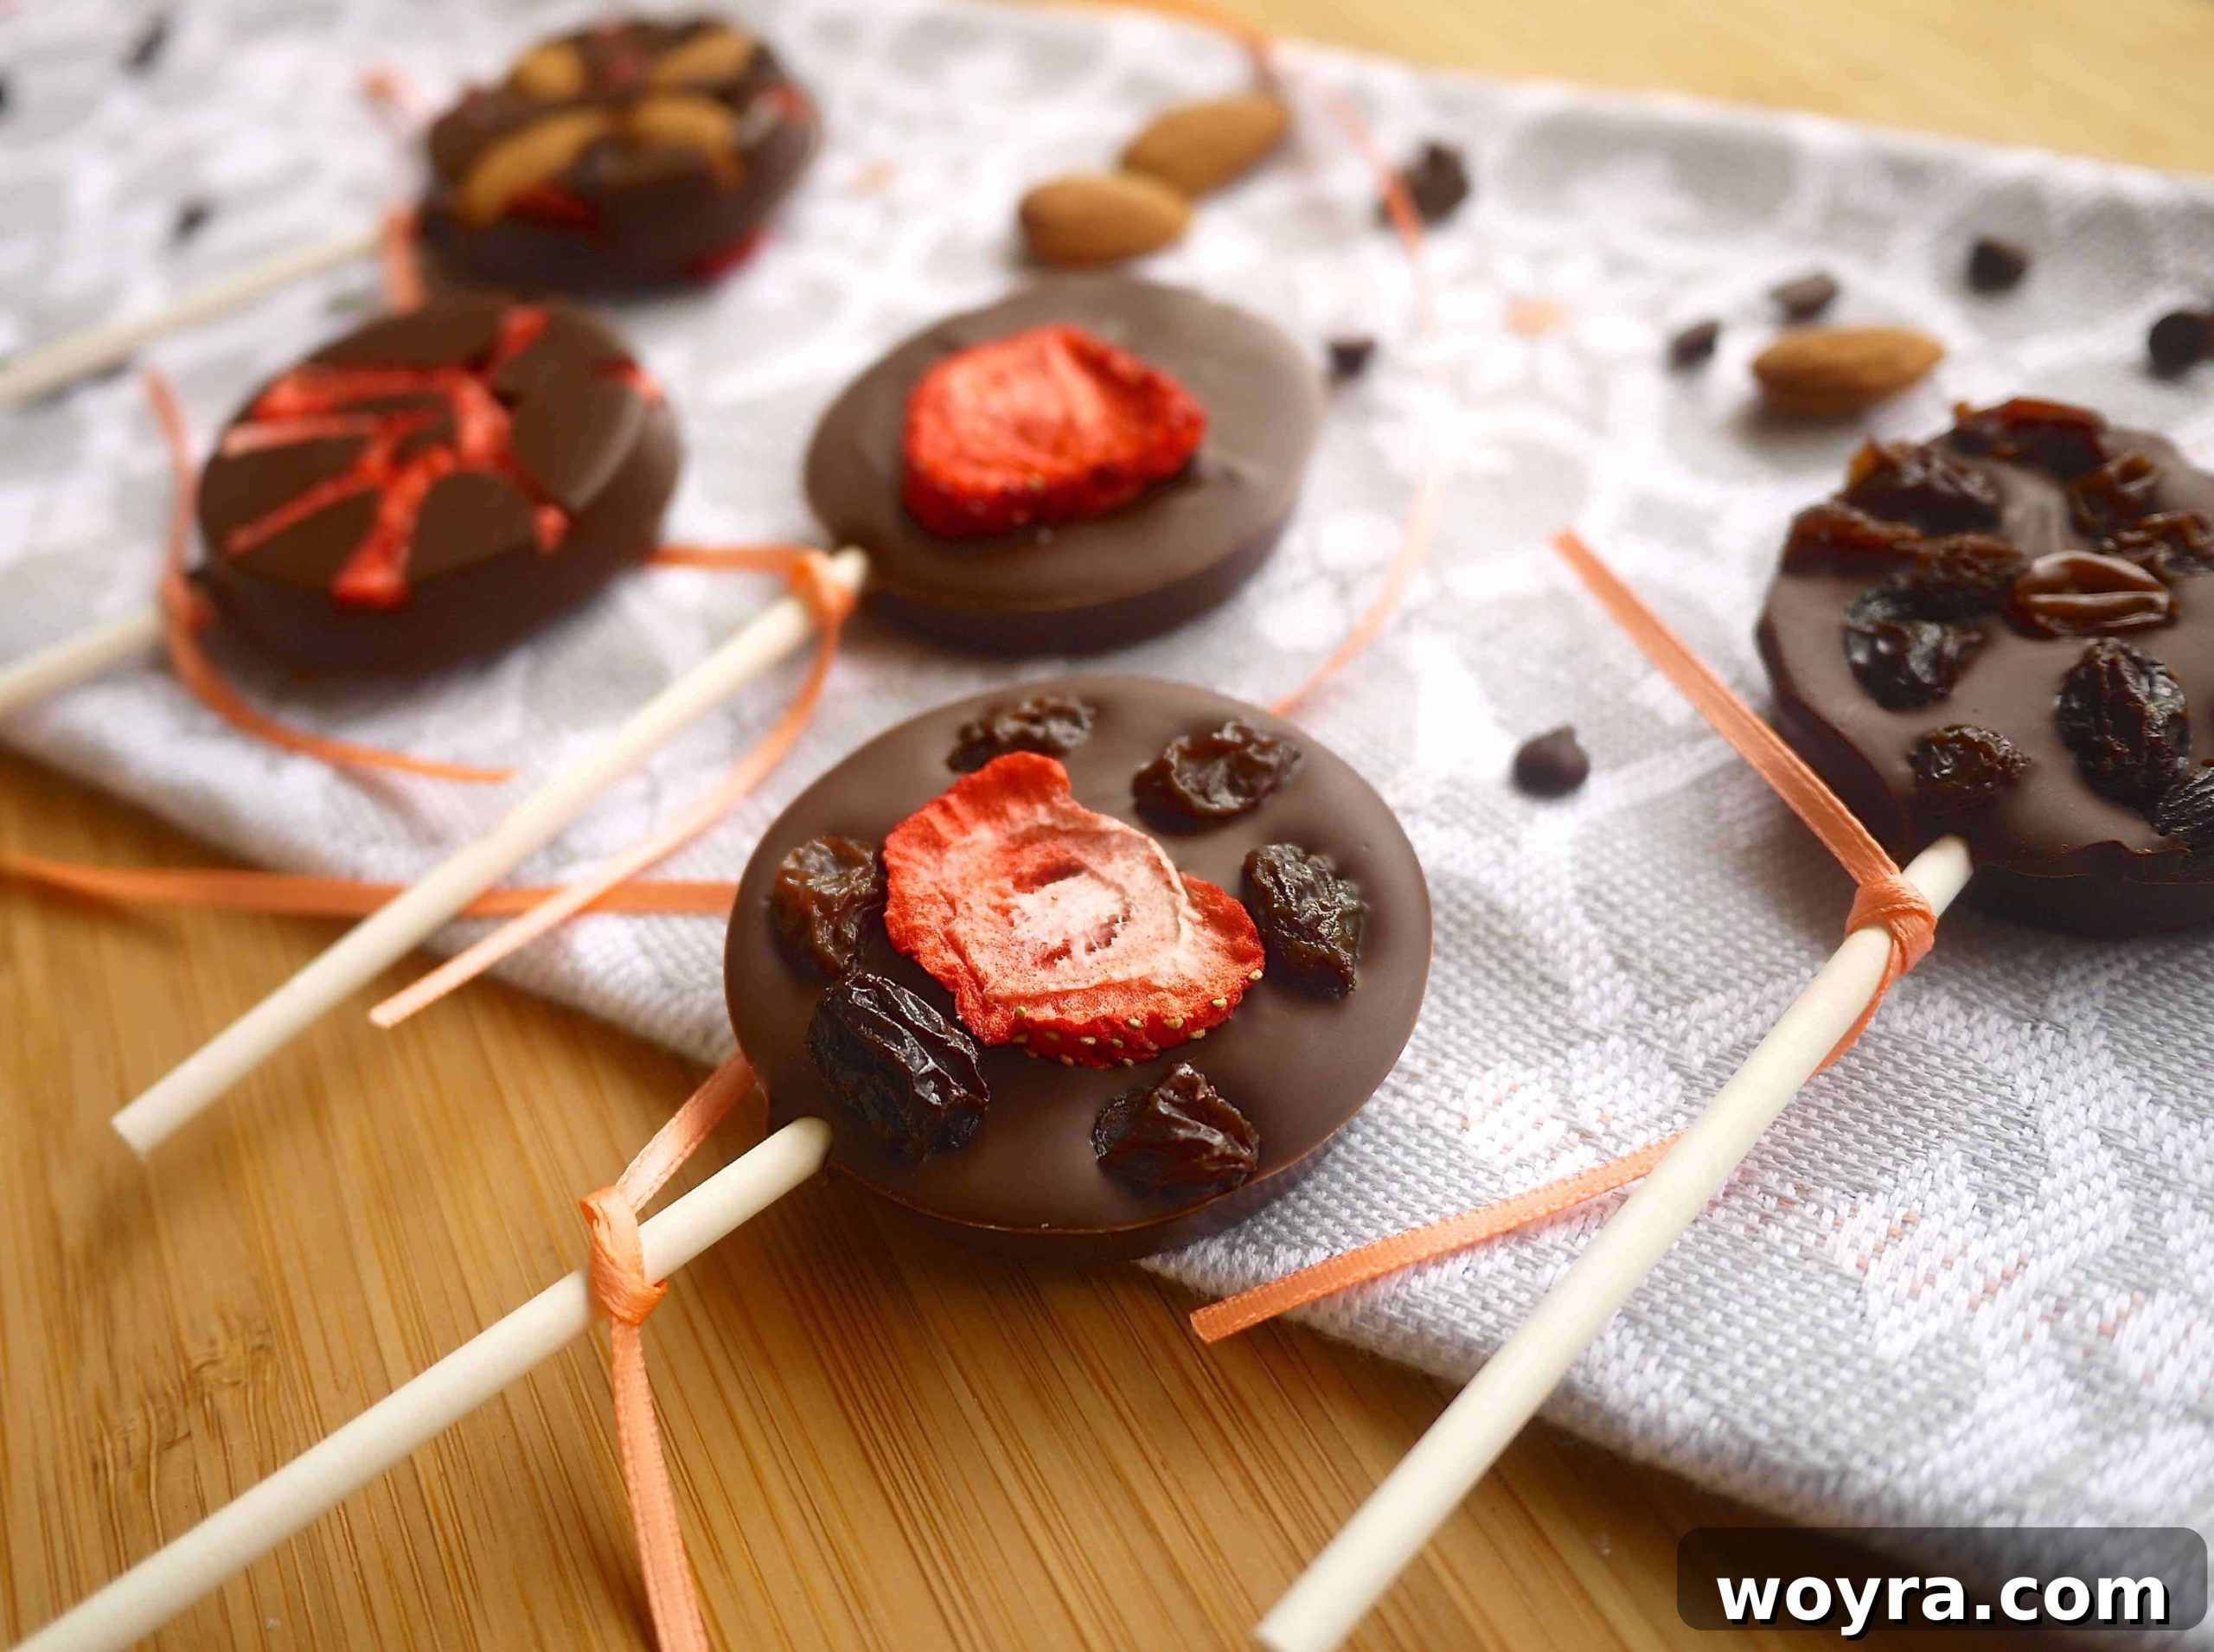
Crafting these stunning chocolate lollipops from the comfort of your home is far easier than you might imagine. Not only do they boast an elegant appearance and rich flavor, but they also come together incredibly quickly, allowing for effortless customization to perfectly suit your personal preferences or dietary needs. Forget store-bought sweets; these homemade delights are a game-changer for any chocolate lover!
This enticing recipe draws its inspiration from the exquisite chocolate lollipops I savored during my time living in Bordeaux, France. Those particular treats featured a delightful combination of dried kiwi and succulent dried strawberries, leaving a lasting impression on my palate. Determined to replicate that unique taste sensation, I set out to recreate them at home, and thus, this versatile recipe was born. If your heart, like mine, yearns for the magical pairing of chocolate and fruit, you absolutely must try my Chocolate Covered Pumpkin Stuffed Dates or the wonderfully seasonal Fall Chocolate Bark for more delightful chocolate adventures.
Table of Contents
- Why You’ll Love This Recipe
- Essential Ingredients for Chocolate Lollipops
- Creative Additions & Substitutions
- Step-by-Step Guide to Making Chocolate Lollipops
- Expert Tips for Perfect Lollipops
- Other Chocolate Desserts You’ll Love
- Recipe Card: Chocolate Lollipops with Dried Fruit
Why You’ll Love This Easy Chocolate Lollipop Recipe
There are countless reasons why these homemade chocolate lollipops will become your new go-to treat. They blend simplicity with gourmet flair, making them suitable for both novice and experienced confectioners alike. Here’s why this recipe stands out:
- Effortlessly Simple to Create: You don’t need to be a pastry chef to master these. The process involves just a few straightforward steps and minimal equipment, making it an ideal project for a fun afternoon in the kitchen. All you truly need are quality ingredients, a chocolate mold, and some lollipop sticks to get started.
- Infinitely Customizable to Your Taste: This recipe is a blank canvas for your culinary imagination! Whether you prefer dark chocolate, milk chocolate, or even white chocolate, the choice is yours. Mix and match your favorite nuts – think crunchy almonds, vibrant pistachios, or classic hazelnuts – with a vast array of dried fruits. From exotic dried mango to tart cranberries or chewy dates, the possibilities are limitless, ensuring every batch can be a unique creation tailored to your cravings.
- Stunning Visual Appeal: These lollipops aren’t just delicious; they’re genuinely beautiful! Their vibrant toppings against a backdrop of rich chocolate make them perfect for impressive homemade gifts, elegant party favors, or charming decorations for any festive occasion. They add a touch of handcrafted elegance to any spread.
- A Healthier Indulgence: By choosing your own high-quality chocolate and natural dried fruits and nuts, you can control the ingredients, opting for options like dairy-free or Paleo-friendly chocolates. This allows for a more mindful indulgence without sacrificing flavor.
- Perfect for All Ages: The straightforward nature of this recipe makes it a fantastic activity for families, allowing kids to participate in decorating their own lollipops, fostering creativity and a love for homemade treats.
Prepare to be amazed by how easily you can transform simple ingredients into such spectacular and personalized chocolate delights!
Essential Ingredients for Your Chocolate Lollipops
Creating these delightful chocolate lollipops requires just a handful of core ingredients. The beauty of this recipe lies in its flexibility, allowing you to choose components that best suit your taste and dietary preferences. Here’s a breakdown of what you’ll need to gather:
- Chocolate Chips (or chopped chocolate bars): This is the foundation of your lollipops, so choose a quality chocolate that you genuinely love.
- Dark Chocolate: For a rich, intense flavor with less sweetness.
- Semi-Sweet Chocolate: A classic choice, offering a balanced sweetness that pairs well with fruits.
- White Chocolate: A creamy and sweet option that provides a beautiful contrast, especially with tart freeze-dried fruits.
- Dairy-Free Chocolate: Excellent for those with lactose intolerance or vegan diets. Brands like Enjoy Life chocolate chips are great dairy-free and gluten-free options.
- Paleo Chocolate: For a more specific dietary approach, HU chocolate chips are a popular Paleo-friendly choice.
- Dried Fruit & Freeze-Dried Fruit: These add incredible texture, natural sweetness, and vibrant bursts of flavor. They are the stars of the topping!
- Dried Fruits: I’ve personally found that chewy raisins, sweet apricots, and rich figs create a truly harmonious flavor profile when combined with chocolate. Other fantastic choices include dried cranberries, cherries, mango, or even sliced dates.
- Freeze-Dried Fruits: These offer a delightful crisp texture and an intense, concentrated fruit flavor. Freeze-dried strawberries are particularly amazing, offering a tart counterpoint to the chocolate’s sweetness. Raspberries, blueberries, or even bananas are also excellent.
- Nuts: Adding nuts introduces a satisfying crunch and a lovely nutty aroma that complements the chocolate beautifully.
- Almonds: A versatile and widely loved nut, offering a subtle crunch.
- Pistachios: Their vibrant green color and distinct flavor make them a gourmet addition.
- Hazelnuts: Known for their rich, buttery flavor, especially delicious with milk or dark chocolate.
- Peanuts: A classic pairing with chocolate, adding a savory crunch.
- Other options: Walnuts, pecans, or even seeds like pumpkin seeds (pepitas) or sunflower seeds can also be fantastic.
- Coconut Oil (or Olive Oil): A small amount of oil helps to thin the melted chocolate slightly, making it smoother and easier to pour into the molds, and gives it a lovely sheen once set. It also aids in preventing the chocolate from seizing.
For a precise list of ingredients and their measurements, please refer to the comprehensive recipe card located further down on this page.
Creative Additions & Substitutions for Unique Flavors
Part of the joy of making these chocolate lollipops is the endless possibility for customization. Don’t be afraid to experiment with different flavor combinations to create a truly unique treat every time. Here are some ideas to spark your creativity:
- Flavor Infusions: Elevate your melted chocolate with a few drops of food-grade essential oils or extracts. Consider an invigorating orange oil for a citrusy zest, or a refreshing mint extract for a classic mint-chocolate pairing. Vanilla extract is also always a welcome addition, enhancing the overall chocolate flavor.
- Spice It Up: A tiny pinch of cayenne pepper can add an unexpected and delightful kick to dark chocolate lollipops. Cinnamon or cardamom can introduce warm, aromatic notes, especially good with dried apples or pears.
- Beyond Fruit and Nuts:
- Shredded Coconut: Toasted or untoasted, shredded coconut adds a tropical flavor and unique texture.
- Mini Marshmallows: For a fun, chewy element, especially appealing to younger tasters.
- Sprinkles: A festive and colorful topping that’s perfect for celebrations or themed lollipops.
- Crushed Pretzels: For a delightful sweet and salty crunch that’s incredibly addictive.
- Espresso Powder: A small amount can deepen the chocolate flavor without making it taste like coffee.
- Alternative Dried Fruits: As mentioned, the sky’s truly the limit here. Explore options from exotic dried kiwi slices to sweet dried cherries or tart cranberries. Consider dried blueberries, papaya, pineapple, or even candied ginger for a sophisticated twist. Each fruit brings its own unique flavor and texture profile to the party.
- Different Nut Varieties: Don’t limit yourself to the usual suspects. Try macadamia nuts for a buttery richness, pecans for their earthy notes, or even candied nuts for an extra layer of sweetness and crunch.
- Chocolate Blends: Don’t feel you have to stick to one type of chocolate per lollipop. You could drizzle white chocolate over dark chocolate, or even create marbled effects for an artistic touch.
Let your imagination guide you! These lollipops are a fantastic opportunity to play with flavors and textures.
Step-by-Step Guide to Making Perfect Chocolate Lollipops
Creating these gourmet-style chocolate lollipops is a fun and straightforward process. Follow these simple steps to craft beautiful and delicious treats every time.
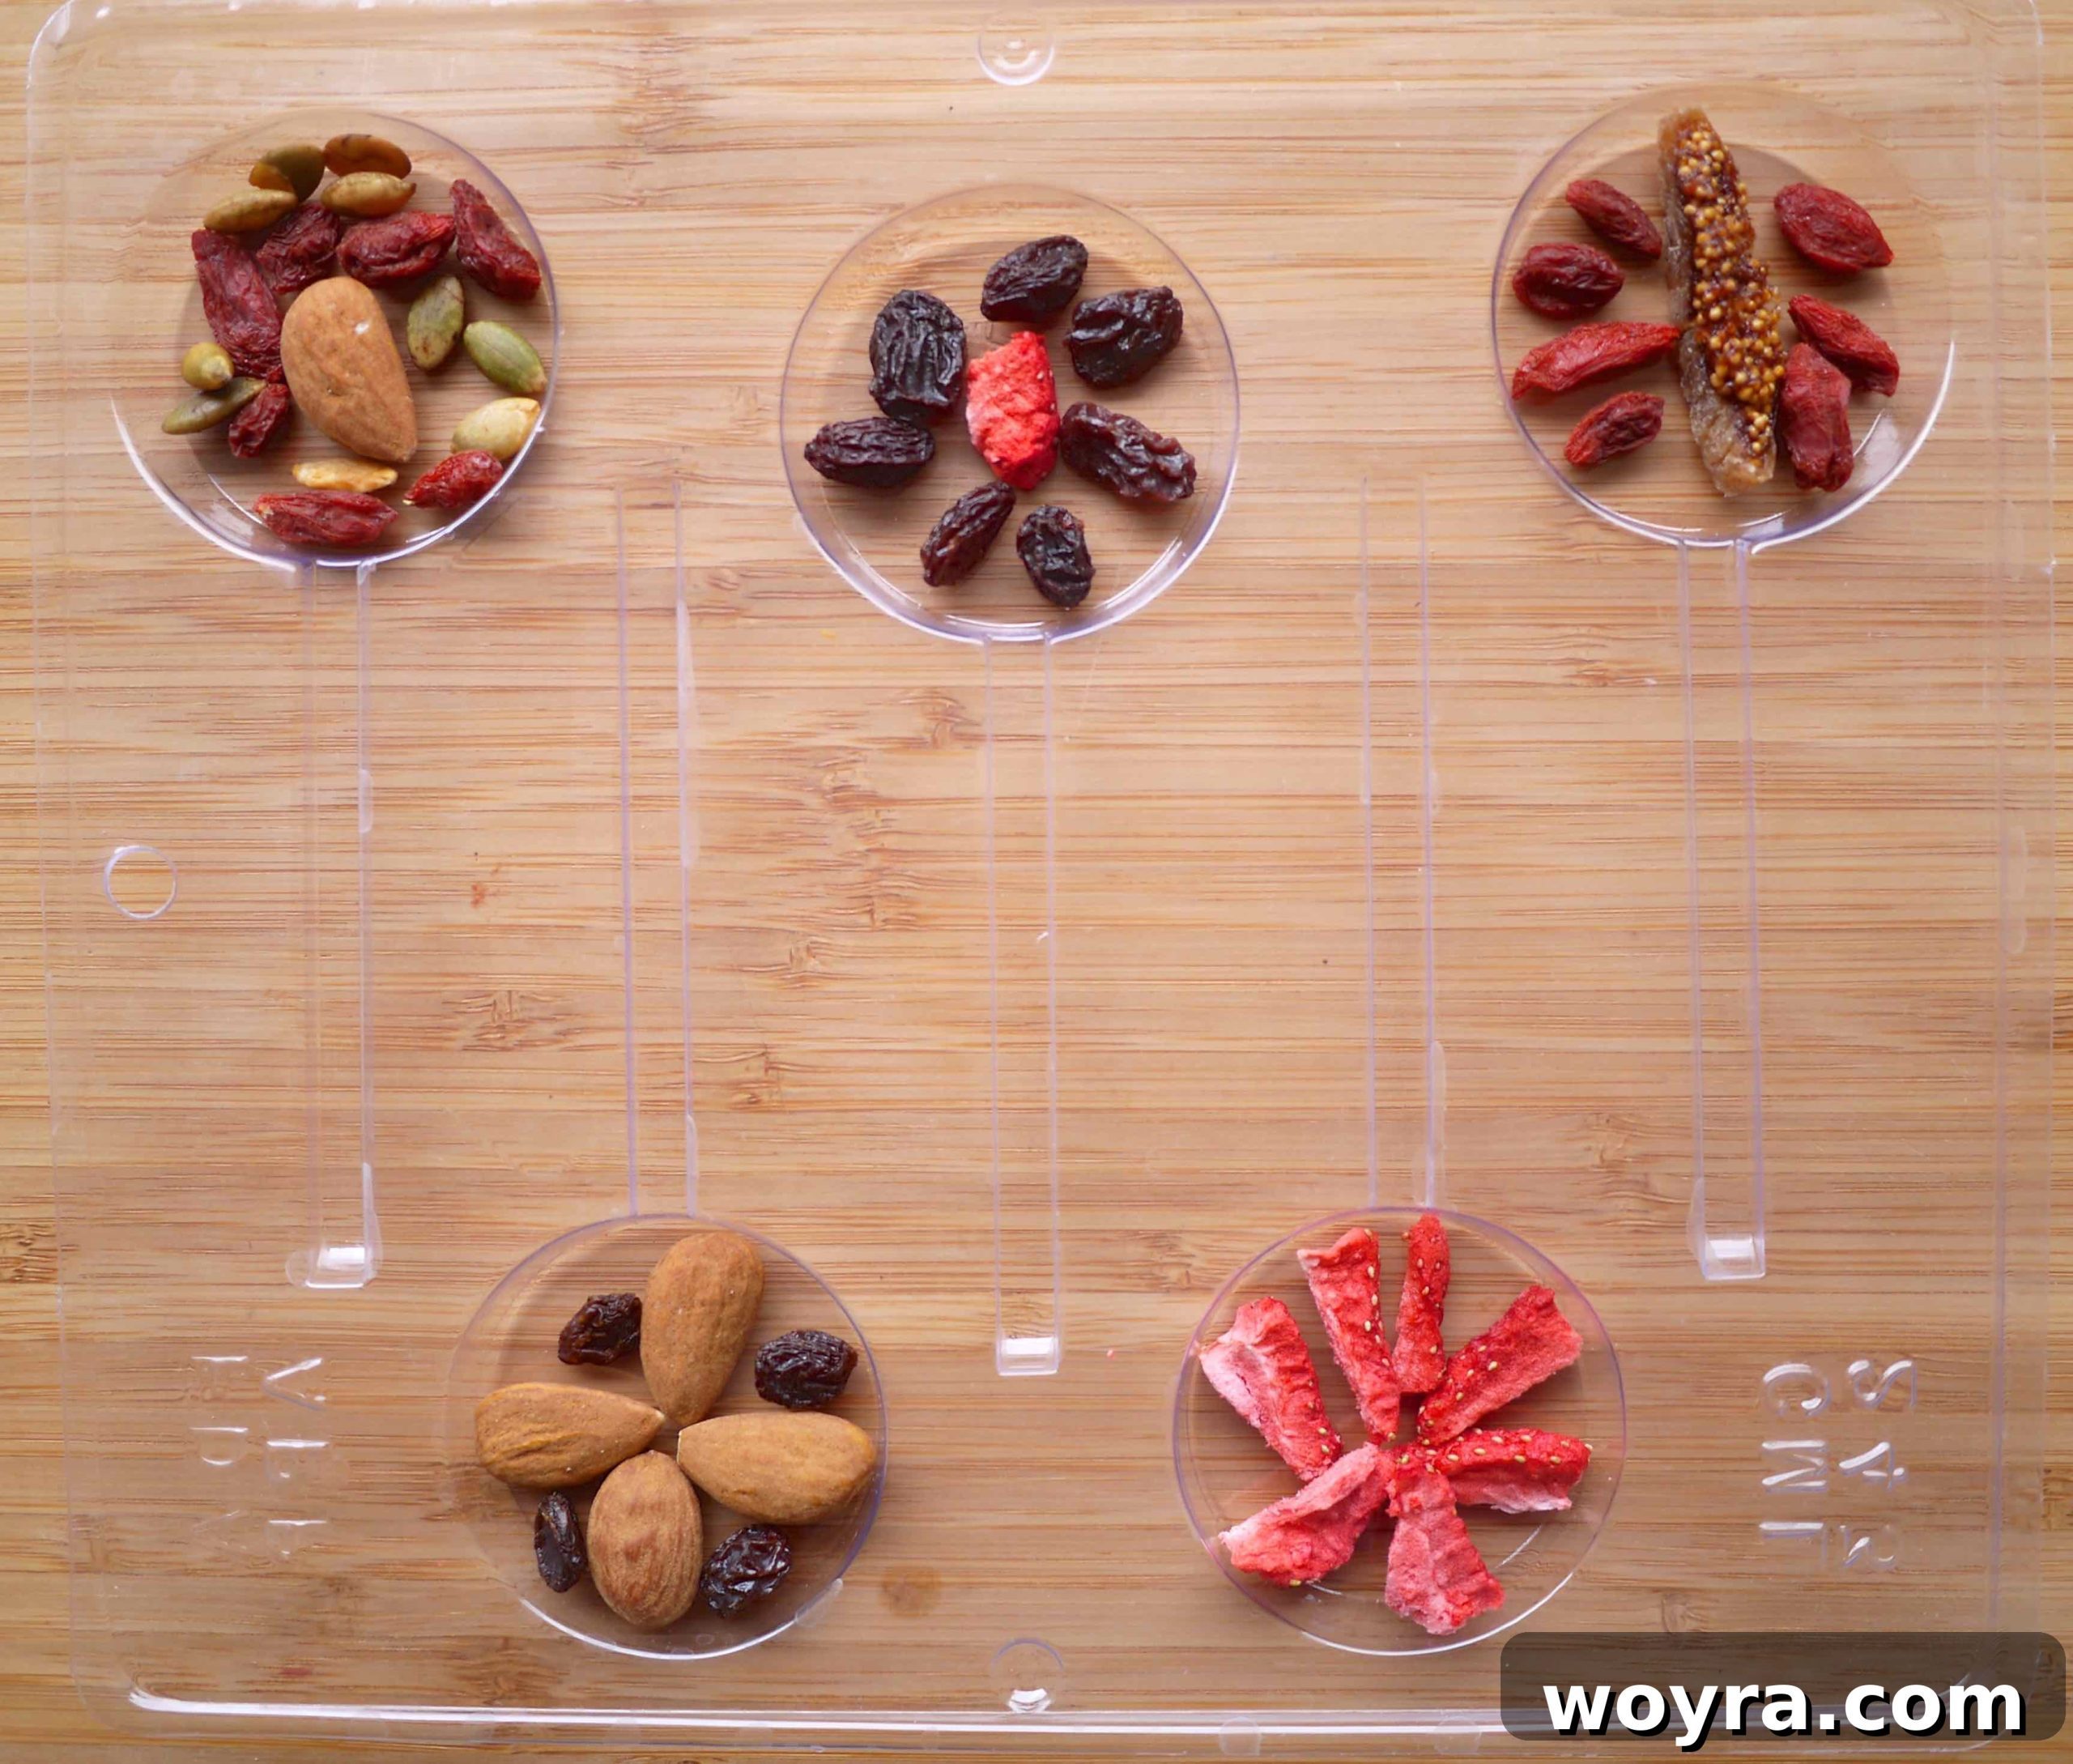
Step 1: Arrange Your Toppings in Molds. Begin by thoughtfully arranging your chosen dried fruits and nuts into the bottom of each cavity of your chocolate lollipop mold. This first layer will be visible on the front of your lollipops, so take care to create an appealing pattern. Don’t overcrowd them, but ensure a good distribution of colors and textures.
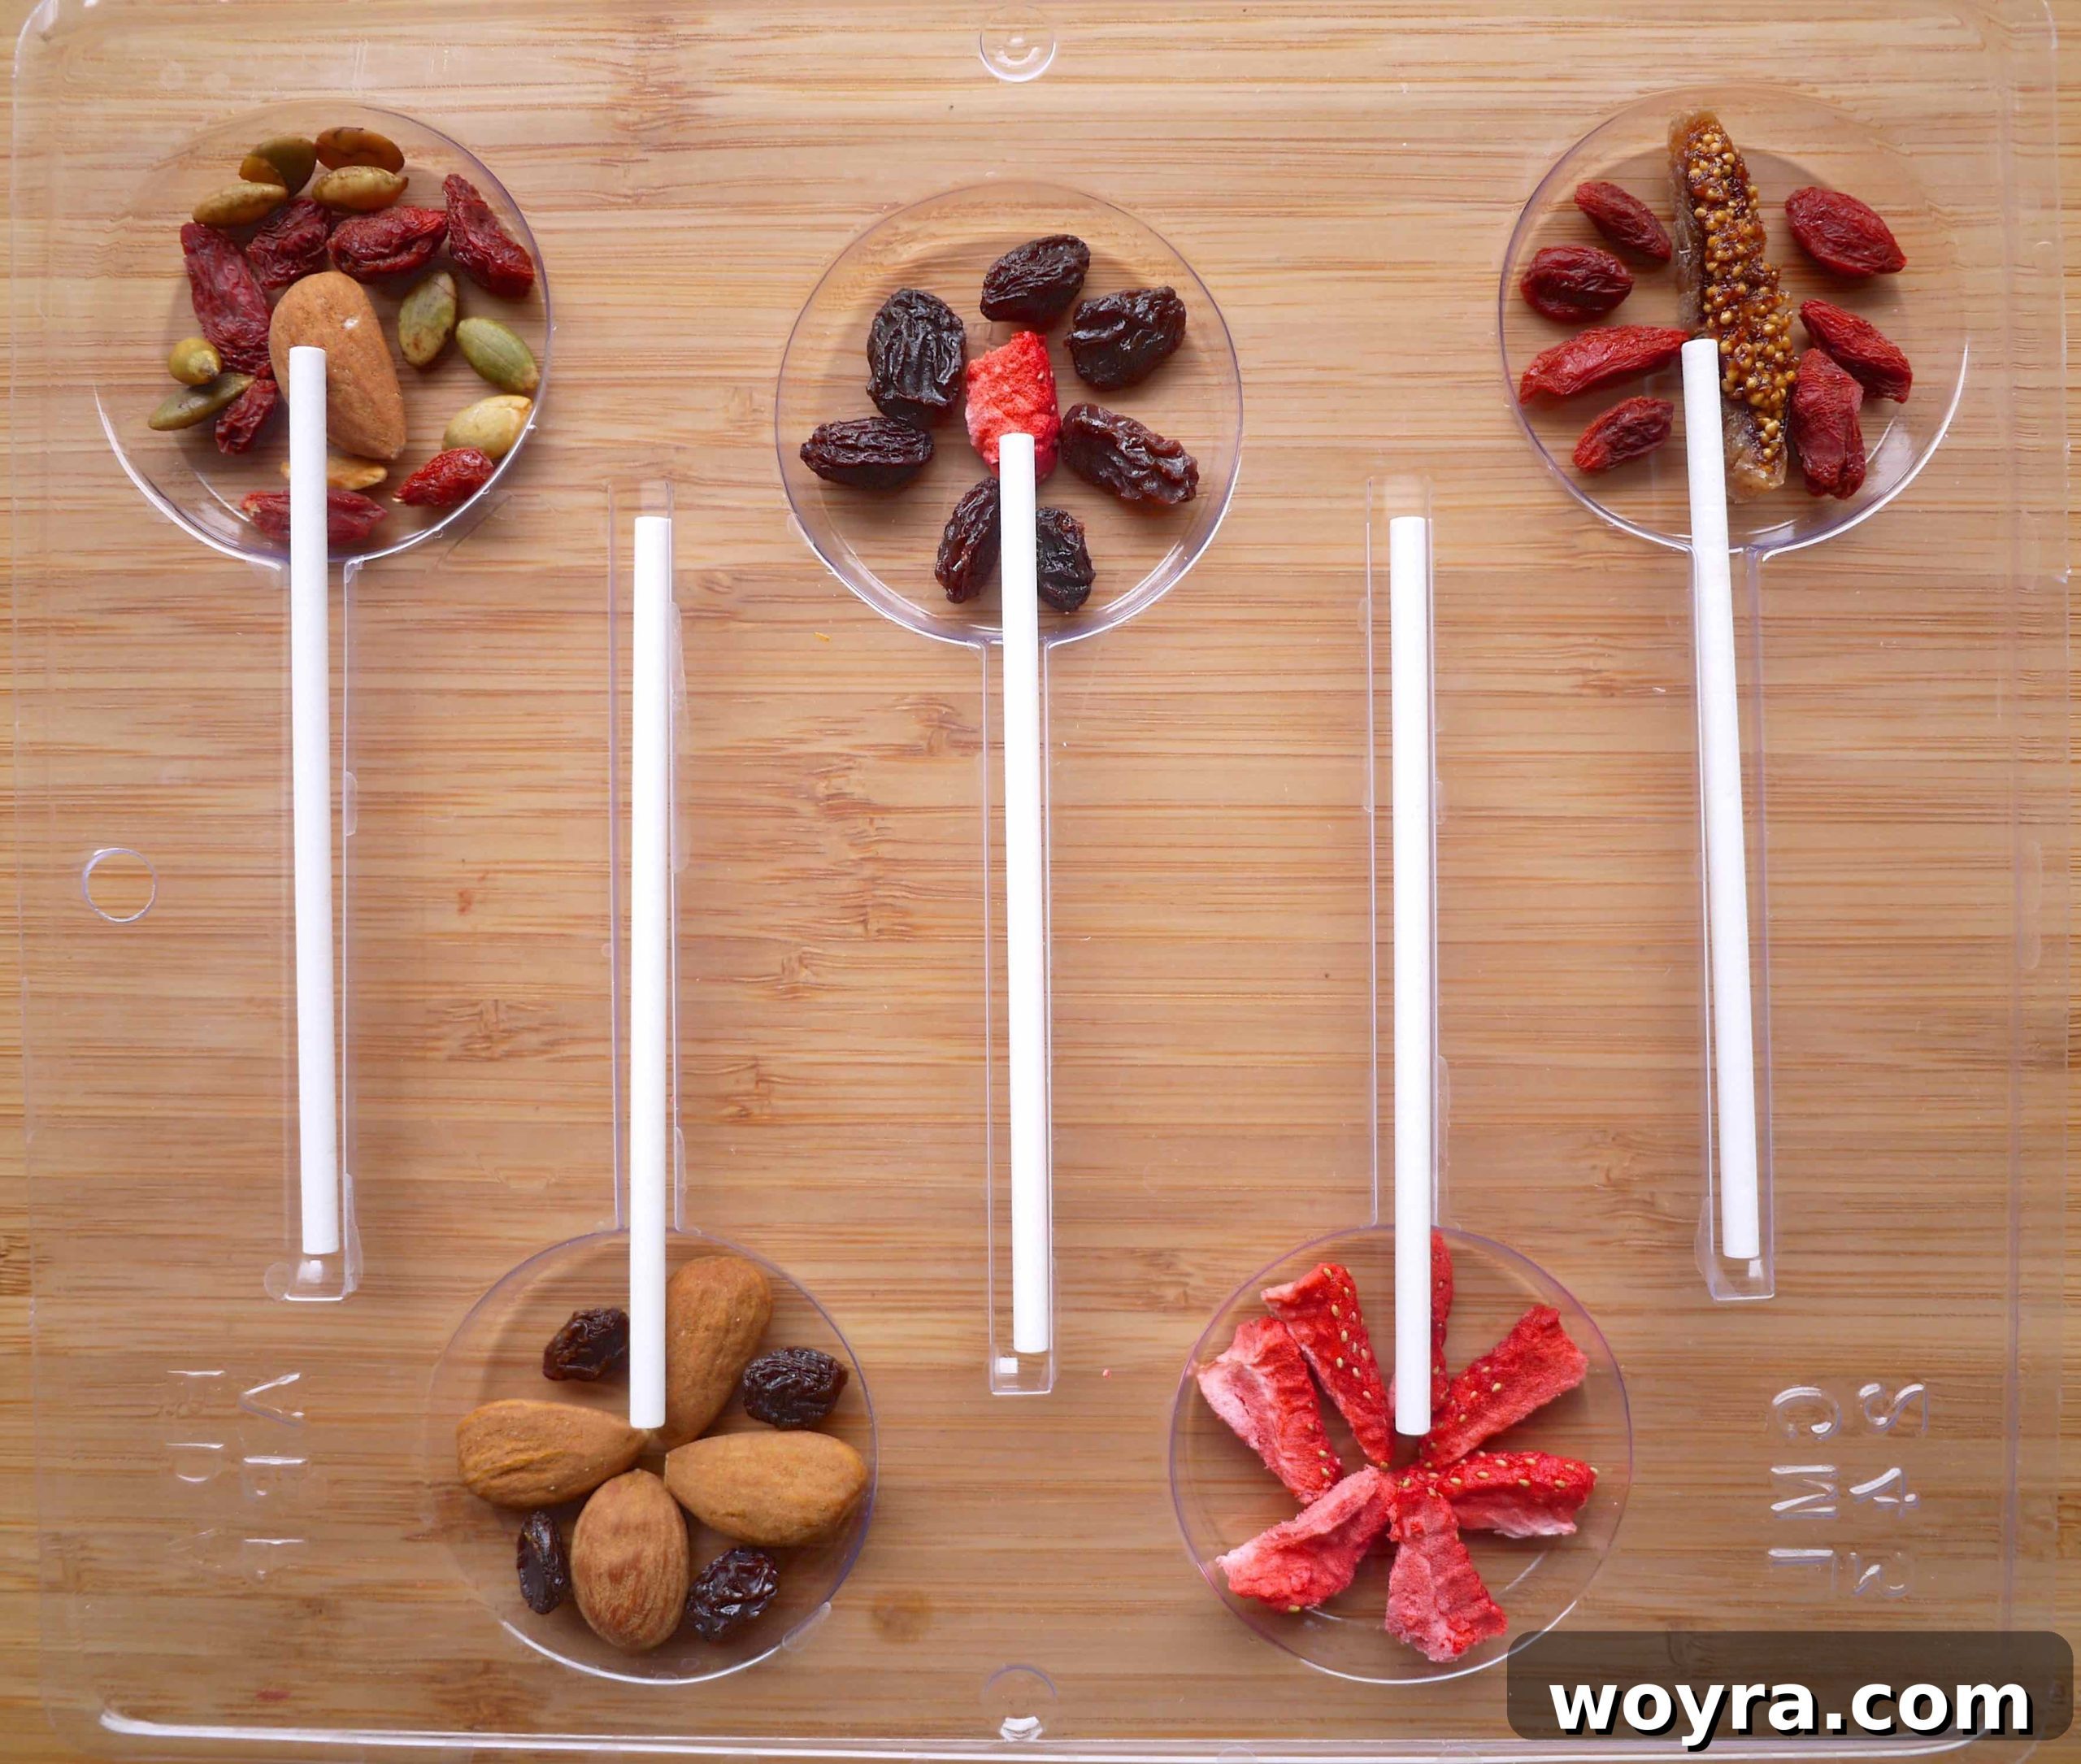
Step 2: Insert the Lollipop Sticks. Gently place a lollipop stick into each mold cavity, ensuring it rests securely in the groove designed for it. The stick should extend about halfway into the mold to provide a sturdy handle for your finished lollipops.
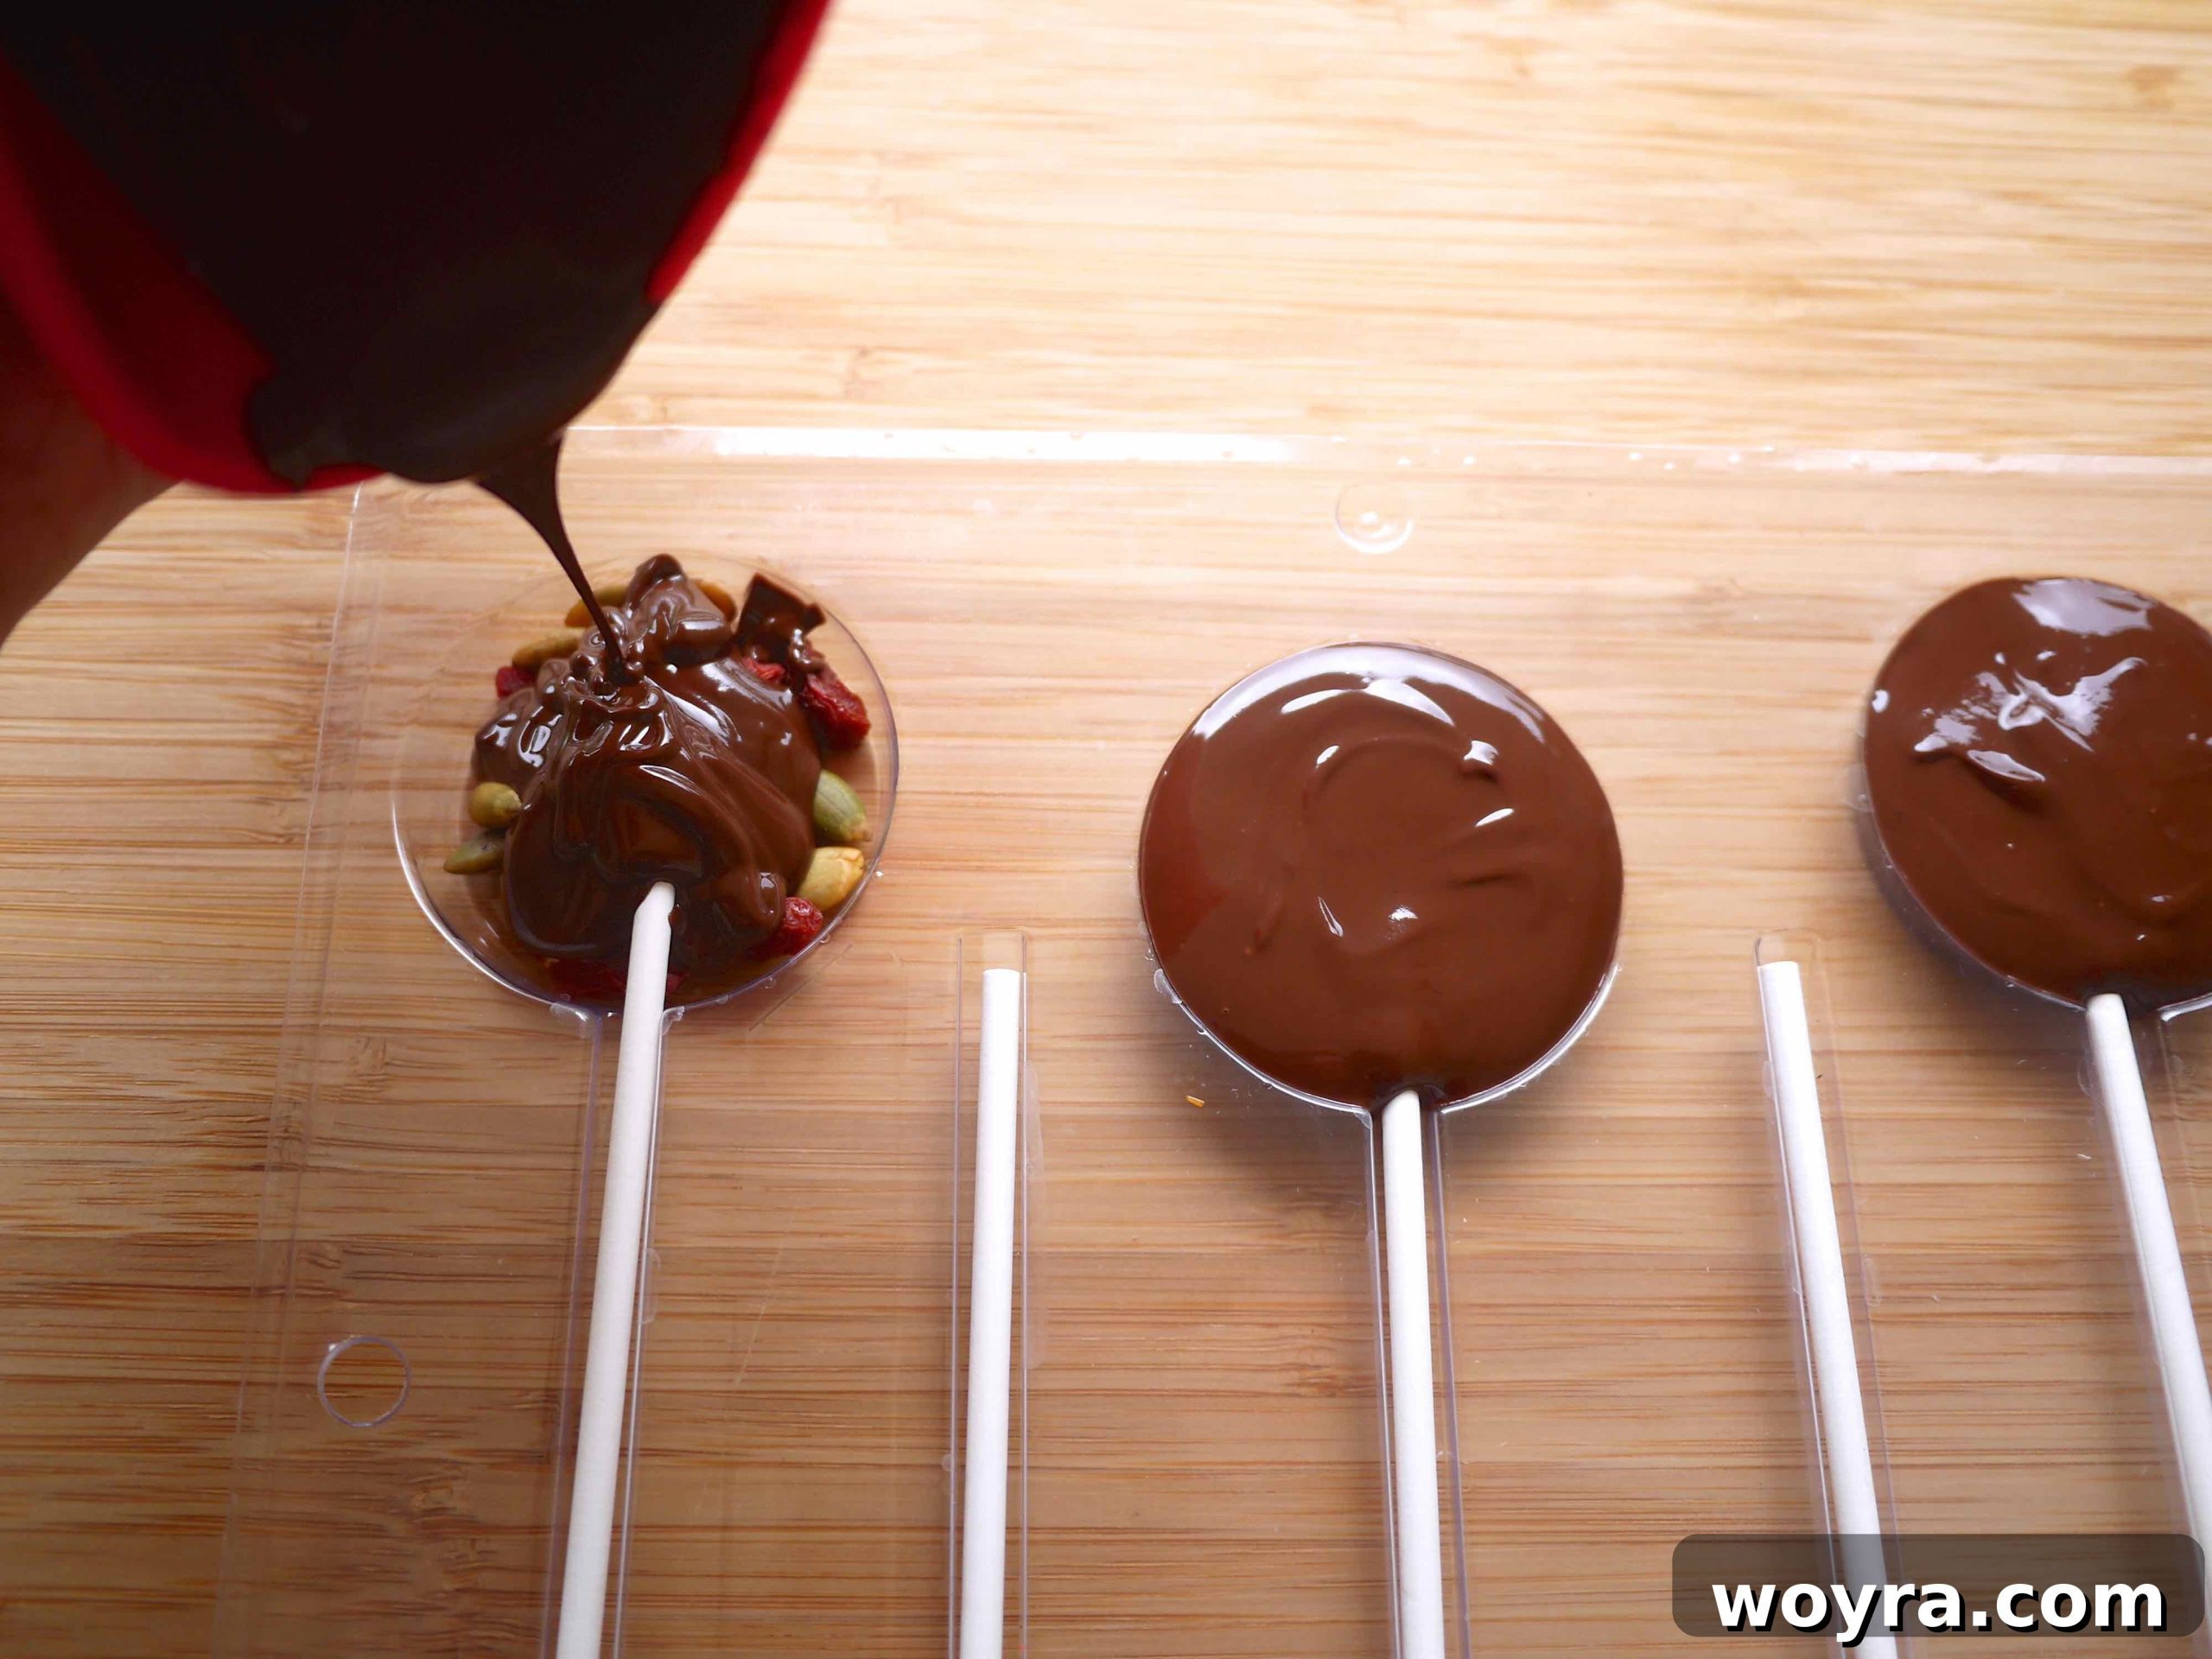
Step 3: Melt and Pour the Chocolate. Carefully melt your chosen chocolate chips using a microwave or a double boiler method (see expert tips below for best practices). Once smooth and fully melted, slowly and steadily pour the chocolate into each mold, covering the dried fruit, nuts, and the base of the lollipop stick. Fill the molds just to the brim, but avoid overfilling.
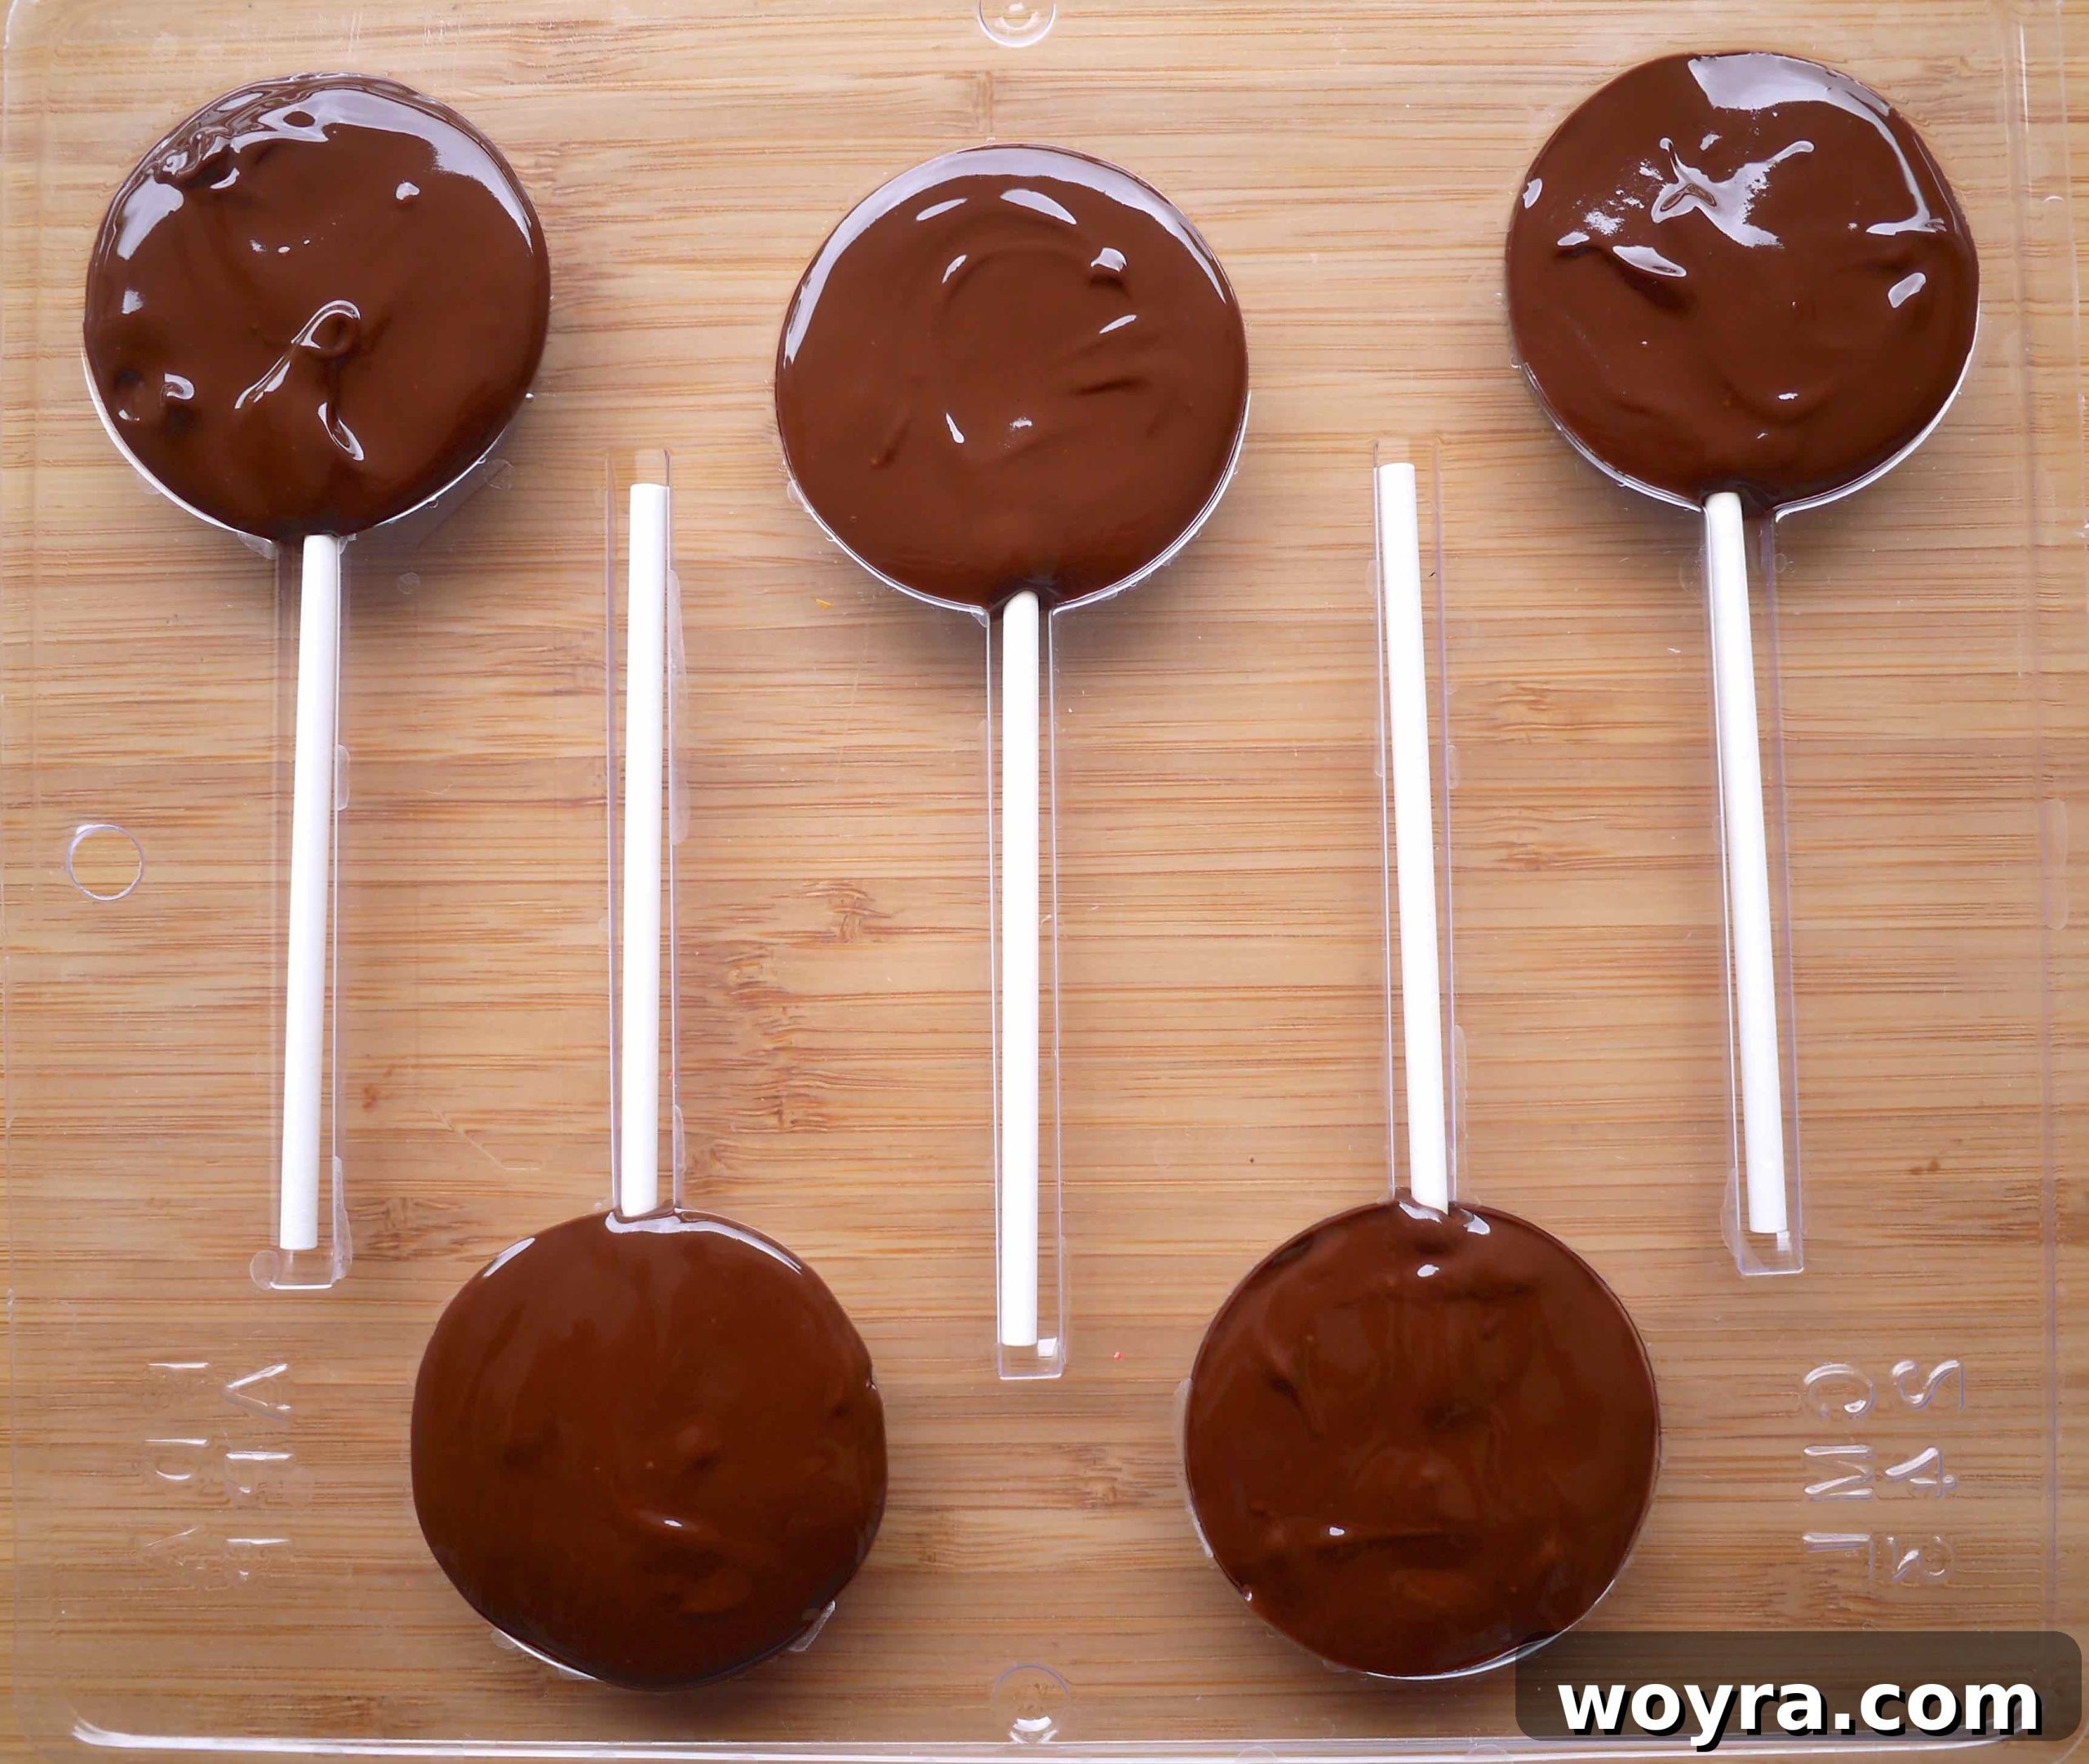
Step 4: Ensure Even Chocolate Coverage. After pouring, gently tap the mold a few times on your countertop. This helps to release any trapped air bubbles and ensures the melted chocolate settles evenly into every crevice, creating a smooth and uniform surface for your lollipops. Use a small offset spatula or the back of a spoon to gently smooth the top if needed, ensuring a flat back.
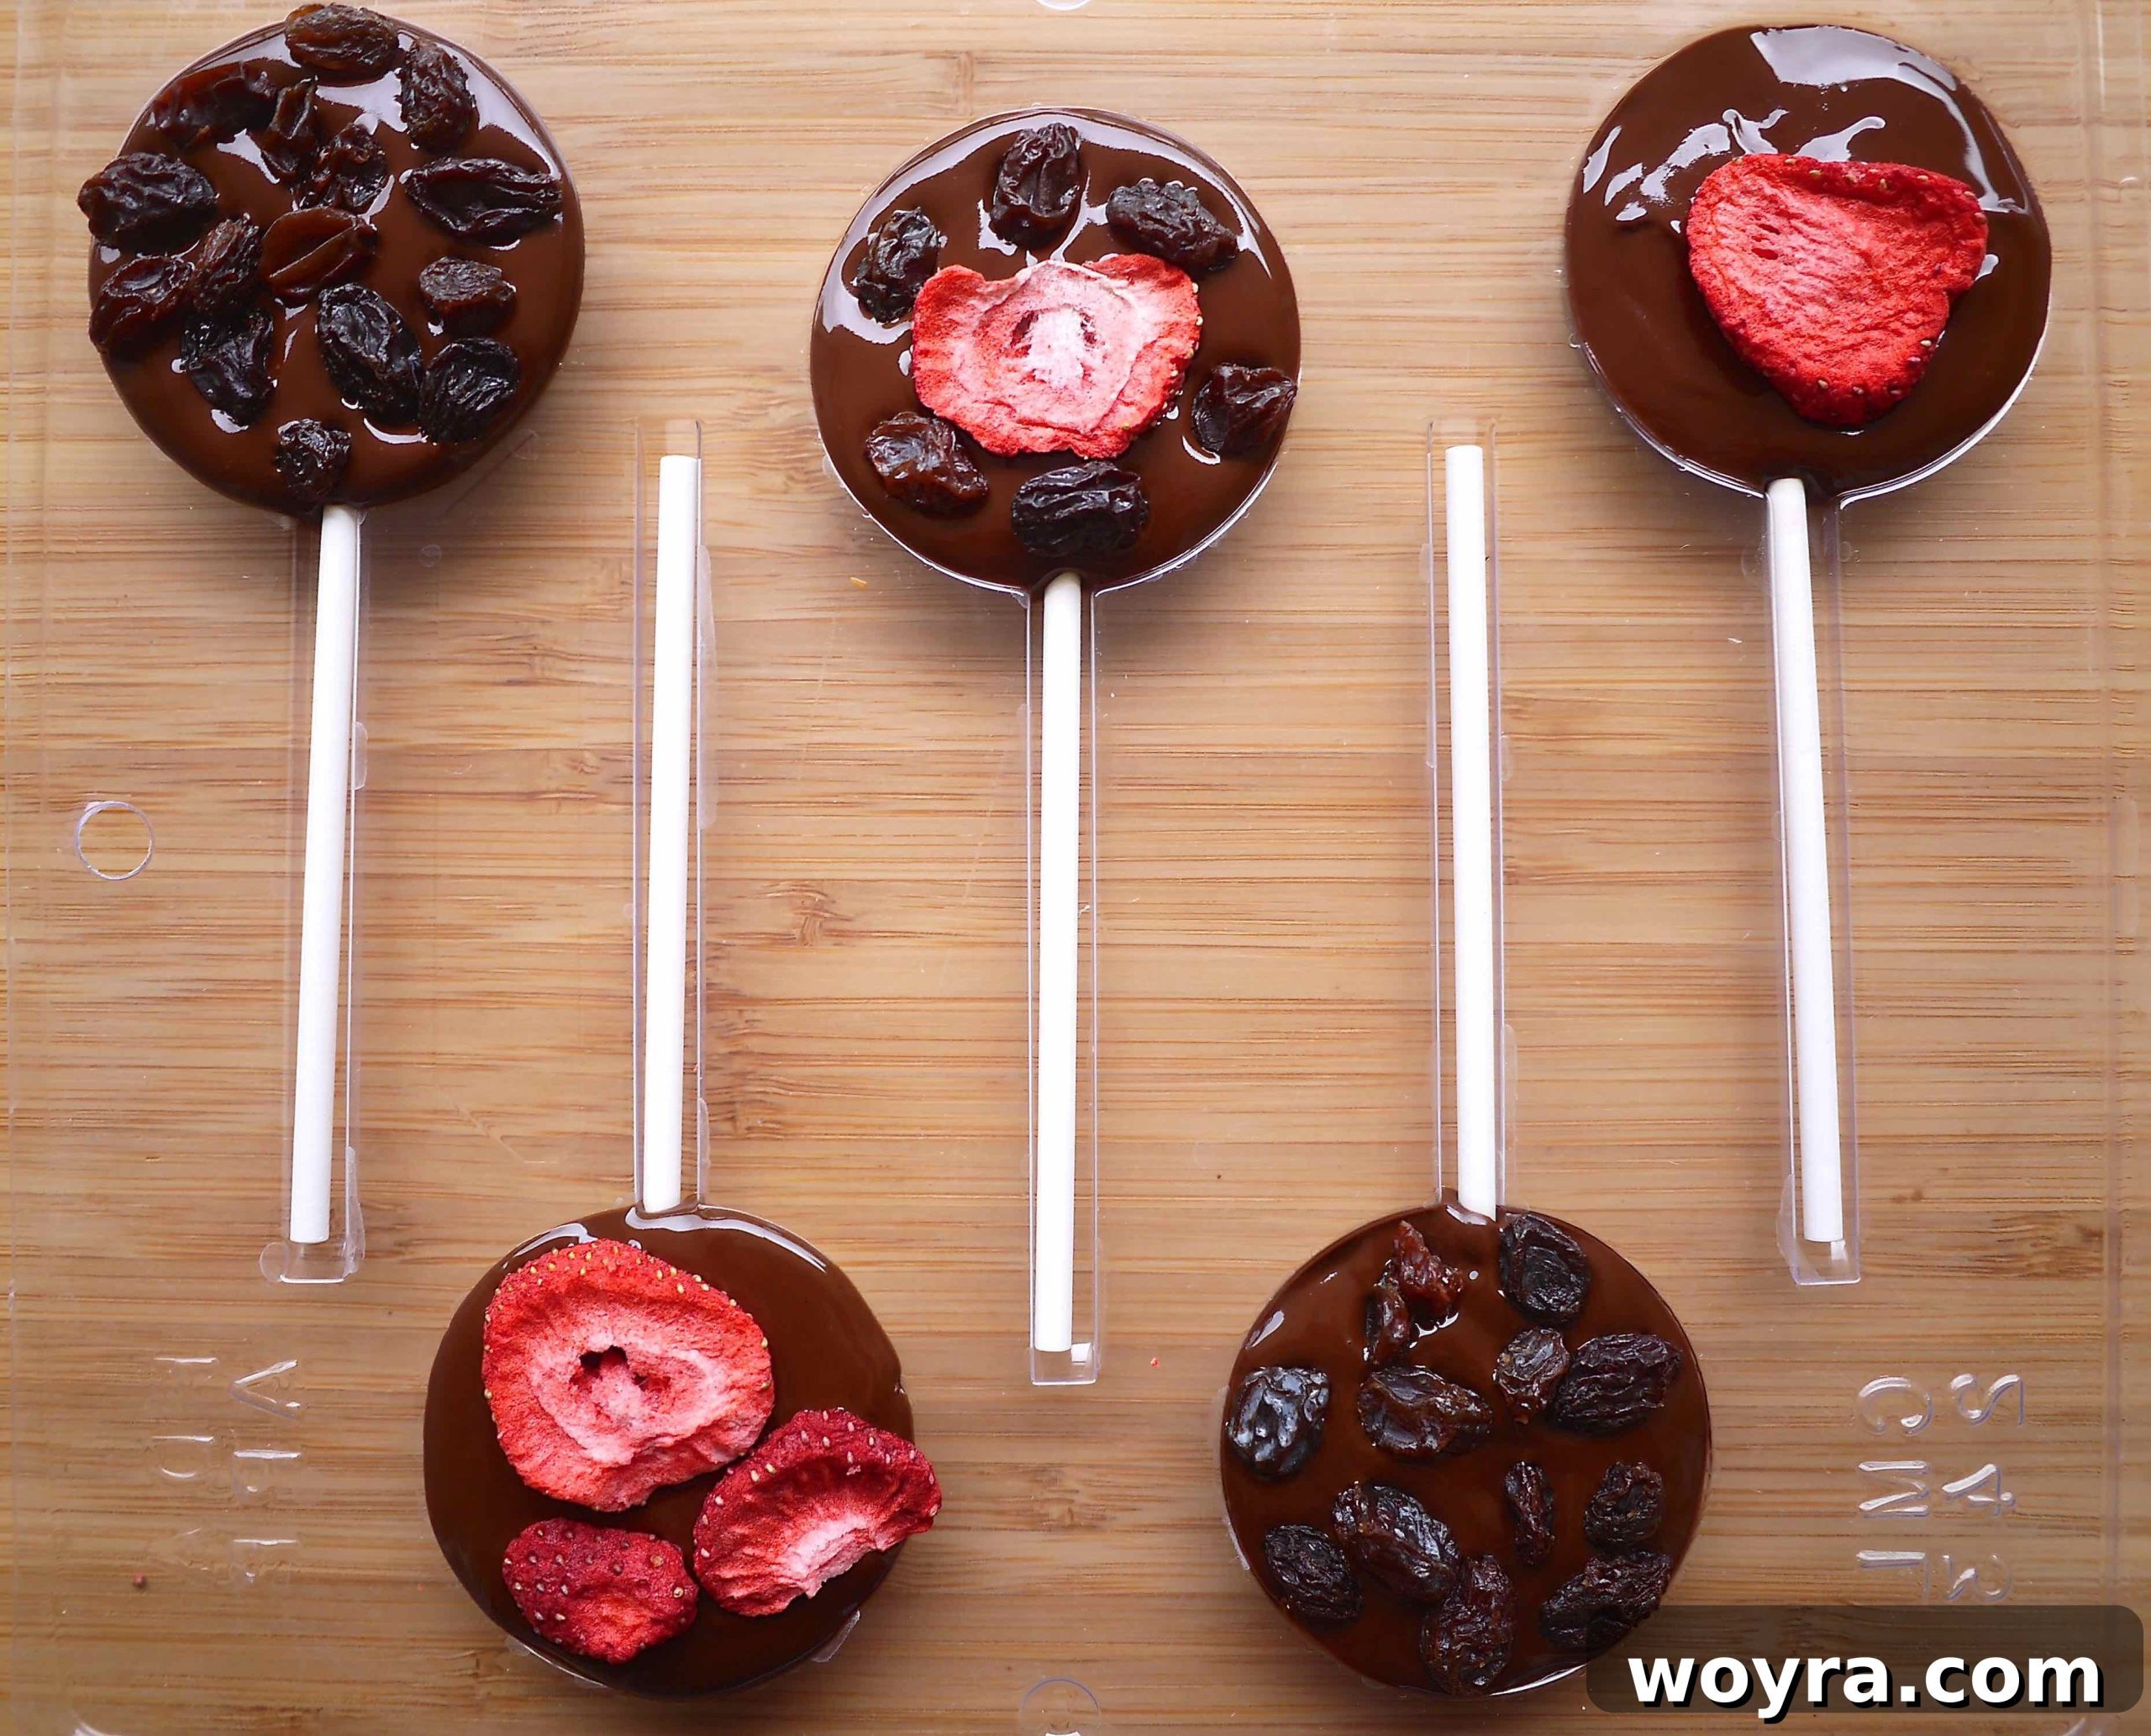
Step 5: Top with More Dried Fruit (Optional, for Double-Sided). For an extra decorative touch and more texture, you can immediately sprinkle additional dried fruit and nuts on top of the freshly poured melted chocolate. Gently press them down slightly so they adhere. This creates a beautiful double-sided lollipop and adds another layer of visual and textural interest.
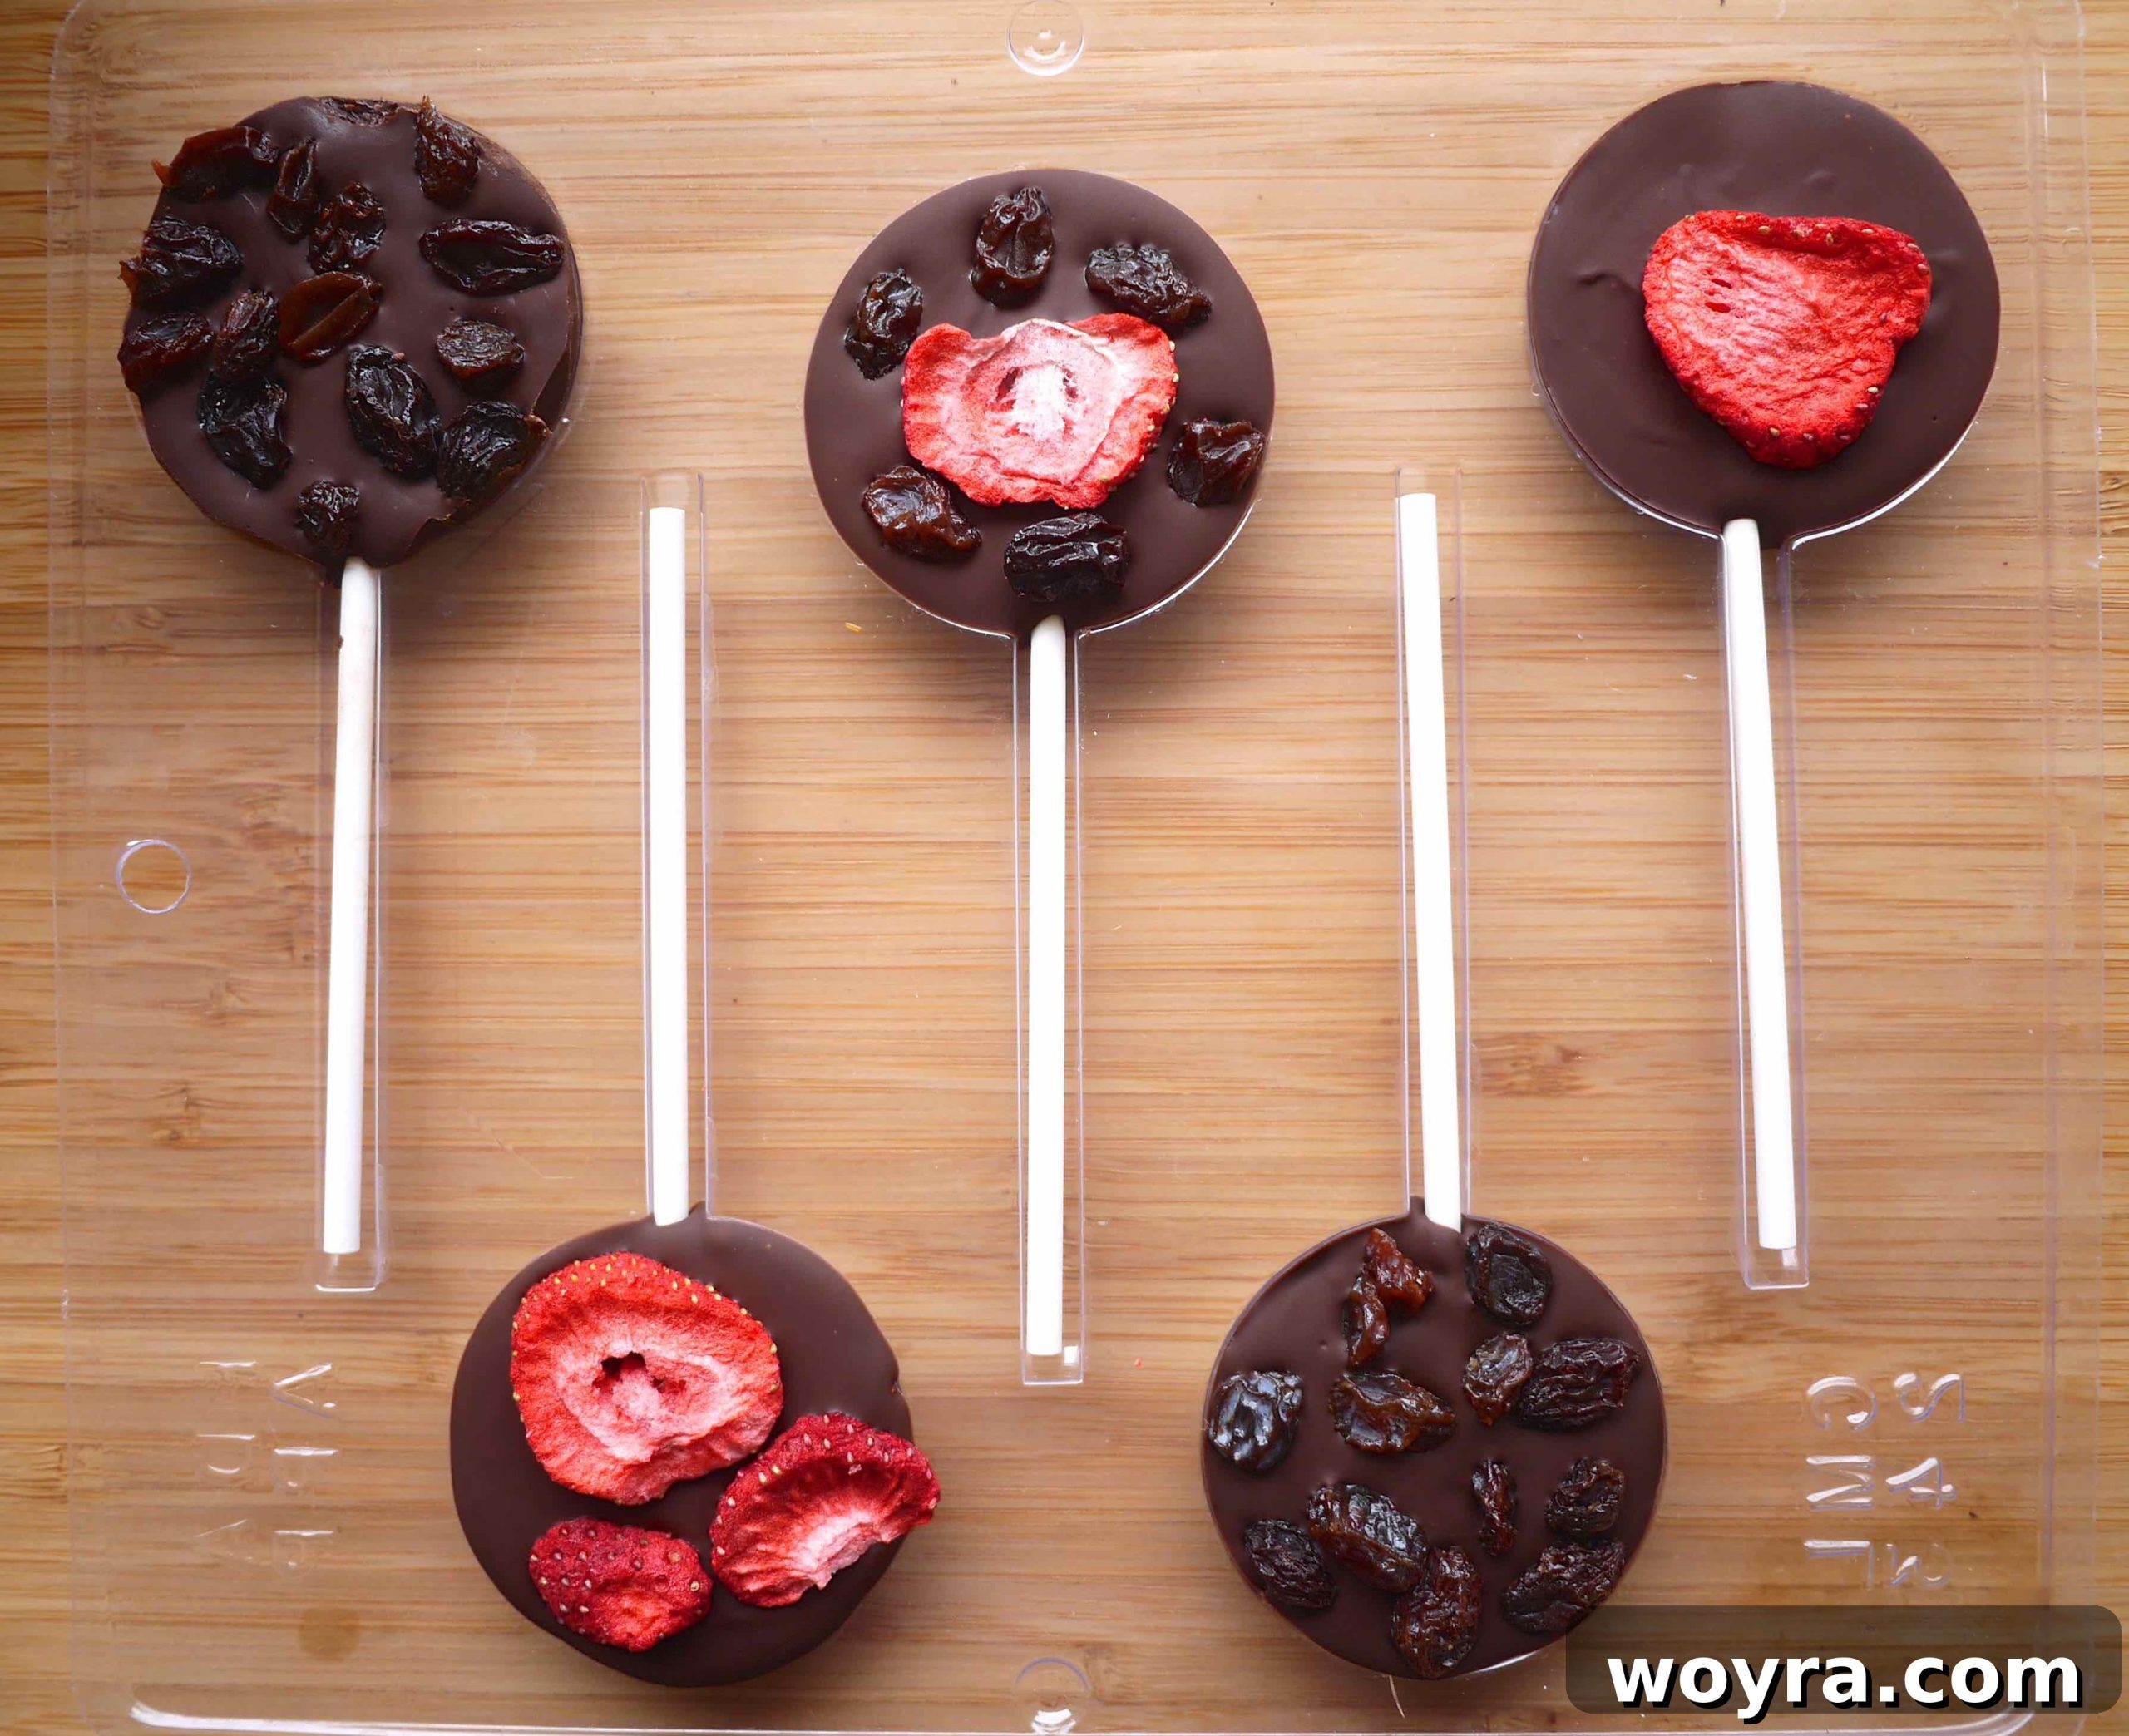
Step 6: Chill to Set. Once all your molds are filled and decorated, carefully transfer the entire lollipop mold into the refrigerator. Allow them to chill for at least one hour, or until the chocolate is completely firm and easily releases from the mold. Chilling ensures a clean snap and a perfectly set lollipop.
Expert Tips for Crafting Perfect Chocolate Lollipops
Achieving beautifully set and delicious chocolate lollipops is simple with a few insider tricks. These tips will help you avoid common pitfalls and ensure a professional finish every time:
- Choosing the Right Melting Bowl: For a seamless and mess-free experience, I highly recommend melting your chocolate in flexible silicone mixing bowls. Their pliable nature allows you to easily bend and pour the melted chocolate directly into the molds without spills, saving you cleanup time and minimizing waste.
- Mastering the Art of Melting Chocolate: This is arguably the most crucial step. Chocolate is delicate and can easily seize or burn if overheated, becoming hard, clumpy, and impossible to work with. The key is to heat it slowly and gently:
- Microwave Method: Place your chocolate chips in a microwave-safe bowl. Heat in short bursts – 30 seconds at a time – stirring thoroughly after each interval. Continue this process until the chocolate is mostly melted, then stir vigorously to melt any remaining chunks using the residual heat. This slow approach prevents burning.
- Double Boiler Method: Place your chocolate in a heatproof bowl set over a saucepan of simmering water (ensure the bowl doesn’t touch the water). Stir continuously until the chocolate is smooth and melted. This method offers more controlled, even heating.
Always aim for just melted and smooth; overcooking even slightly can ruin the texture and flavor. If the chocolate seems too thick, a tiny amount of coconut oil can help thin it out.
- Ensuring a Smooth Finish: After pouring the chocolate into the molds, gently tap the mold on your counter several times. This action helps to release any trapped air bubbles, preventing unsightly pockmarks and ensuring a perfectly smooth surface on your finished lollipops.
- Optimal Chilling Time: While the recipe suggests an hour, the exact chilling time can vary depending on your refrigerator’s temperature and the thickness of your lollipops. They are ready when the chocolate is completely firm and opaque, and they pop out of the molds with ease. Avoid removing them too early, as they may break or have a dull finish.
- Storage Suggestions: Once unmolded, store your chocolate lollipops in an airtight container at room temperature for up to a week, or in the refrigerator for extended freshness. If storing in layers, separate them with parchment paper to prevent sticking. For best flavor and texture, bring them to room temperature before serving.
- Presentation Matters: To elevate their gift-worthiness, once firm, wrap each lollipop in small cellophane bags and tie with a pretty ribbon. This not only protects them but also makes them look incredibly professional and inviting.
By following these expert tips, you’ll be well on your way to creating professional-looking and tasting chocolate lollipops that will impress everyone!
Other Delightful Chocolate Desserts You’ll Love
If these chocolate lollipops have ignited your passion for chocolate-infused treats, you’ll surely adore these other recipes that celebrate the rich, comforting flavors of cocoa:
Did you try this recipe? Please leave me a ⭐ review below! Your feedback helps other home cooks!
Recipe Card: Chocolate Lollipops with Dried Fruit
⭐⭐⭐⭐⭐

These chocolate lollipops are a delicious and beautiful chocolate treat full of the dried fruit, freeze dried fruit, and nuts of your choice. A perfect customizable dessert or gift.
By: Dominique
Servings: 5
Prep Time: 1 hour
Total Time: 1 hour
Print Recipe
Equipment
- 1 chocolate candy mold
- 5 lollipop sticks
Ingredients
- 3/4 cup semi-sweet chocolate chips (or your preferred type of chocolate)
- 1/2 tsp melted coconut oil, or olive oil
- Assorted dried fruit or freeze-dried fruit of your choice (e.g., raisins, goji berries, dried figs, freeze-dried strawberries, dried kiwi, apricots)
- Assorted nuts of your choice (e.g., almonds, pistachios, hazelnuts, pumpkin seeds)
Instructions
- In a microwave-safe bowl, combine the chocolate chips with your chosen oil. Heat in the microwave for 30 seconds, then stir everything thoroughly. Heat for another 30 seconds, and stir again. If the chocolate isn’t completely melted at this point, heat for an additional 20-30 seconds and continue stirring until perfectly smooth. Set the melted chocolate aside.
- Carefully arrange a portion of your desired dried fruit and nuts into the bottom of each cavity of the chocolate candy molds, creating a visually appealing base. Then, insert the lollipop sticks into the designated slots within the mold.
- Pour the melted chocolate into each individual mold cavity, ensuring that the fruit, nuts, and the base of the lollipop stick are fully covered. Fill the molds evenly to the top. (If the chocolate starts to thicken, you can reheat it in the microwave for 10-15 seconds to make it easier to pour). Gently smooth the surface with a knife or small spatula if necessary.
- For a beautiful double-sided effect, immediately sprinkle more dried fruit and nuts on top of the freshly poured chocolate in the molds. Gently press them down so they adhere to the melted chocolate. Arrange them in any pattern you desire.
- Transfer the filled mold to the refrigerator and chill for at least 1 hour, or until the chocolate is completely set and firm.
- Once fully set, gently lift the lollipop sticks upward. The chocolate lollipops should easily pop out of the molds. Serve immediately or store for later enjoyment.
Notes
- To avoid a messy pouring experience, consider melting your chocolate in flexible silicone mixing bowls. They allow for easy bending and precise pouring.
- Be extremely careful not to burn your chocolate while melting. Overheated chocolate will become hard, grainy, and difficult to work with. Always heat chocolate slowly in short bursts (like 30-second intervals in the microwave), stirring well between each heating session to distribute heat and prevent scorching.
- Store finished lollipops in an airtight container at room temperature for up to a week, or in the refrigerator for longer freshness.
Nutrition
Calories: 129 kcal
Carbohydrates: 16 g
Fat: 8 g
Saturated Fat: 6 g
Polyunsaturated Fat: 0.01 g
Monounsaturated Fat: 0.03 g
Fiber: 2 g
Calcium: 0.004 mg
Iron: 1 mg
Nutrition information is automatically calculated and should be used as an approximation only.
Additional Info
Course: Dessert
Cuisine: American
Tried this recipe?
Mention @perchancetocook or tag #perchancetocook on Instagram! We’d love to see your creations!